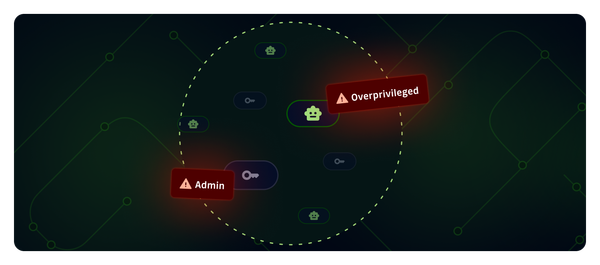
In the past, secrets management was difficult. There are many types of secrets in software engineering, including usernames/passwords, API keys, tokens, SSH Keys, certificates, and more. To further complicate things, secrets can be, and commonly are, stored in different locations: code repo (don't do this), configuration files (not a best practice), CI/CD systems, Kubernetes clusters, secret managers, key management systems (KMS), Cloud Identity and Access Management systems (IAM), etc. With these numerous types of secrets scattered across various systems, it has been challenging to gain visibility into them all, let alone to continuously monitor and audit.
Until now.
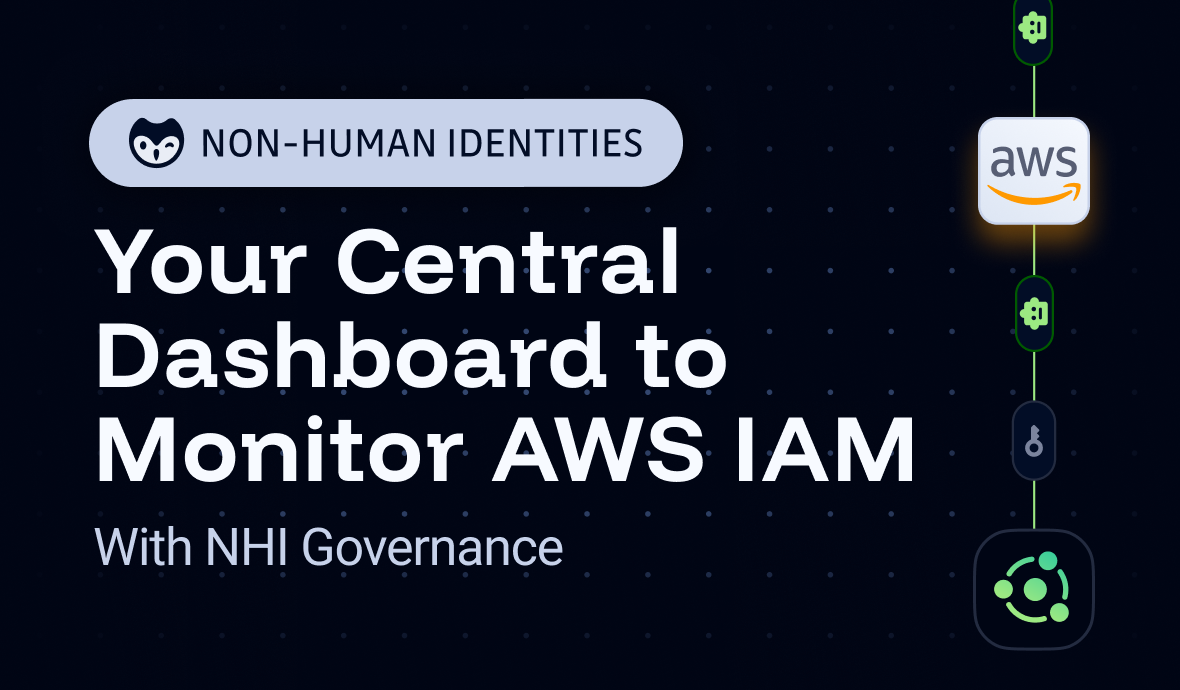
Because GitGuardian NHI Governance can serve as your central continuous monitoring dashboard for secrets.
Simply put, NHI Governance can be integrated with secrets managers, CI systems, infrastructure, and even Cloud IAMs to provide a central view of all your NHIs, providing detailed visibility of your Non-Human Identities, which are secrets and identities used for machine-to-machine interactions.
Now, let's have a look at how to integrate NHI Governance with AWS IAM to get some detailed security insights into our dashboard.
1. How NHI Governance-IAM Integration Works
Under the hood, the integration uses OIDC for authentication. It uses IAM Roles/OIDC with short-lived, temporary credentials that automatically expire, meaning no long-lived credentials, which is the most significant risk in cloud integrations.
The integration fetches AWS IAM data, comprehensive AWS IAM data, including policies, roles, users, and groups, analyzes permissions tied to AWS API keys to understand their potential impact, and displays the result with comprehensive metadata in the NHI inventory. This provides context about credential sensitivity and the potential impact of a leak in the centralized dashboard.
And the whole process is secure by default: It follows the principle of least privilege with a read-only IAM policy which grants only the specific permissions needed for this job, it uses a fine-grained trust policy on the IAM Role to explicitly locked down to GitGuardian's OIDC provider and your specific tenant's unique audience claim so that a random third party cannot assume this role, and its pull-based, TLS-encrypted data flow is initiated by GitGuardian's servers to access AWS APIs without the need to open inbound ports in security rules or expose endpoints to the public internet on your side.
2. Add an OIDC Provider in AWS
Add GitGuardian as an OIDC provider in your AWS account so that it can securely access AWS.
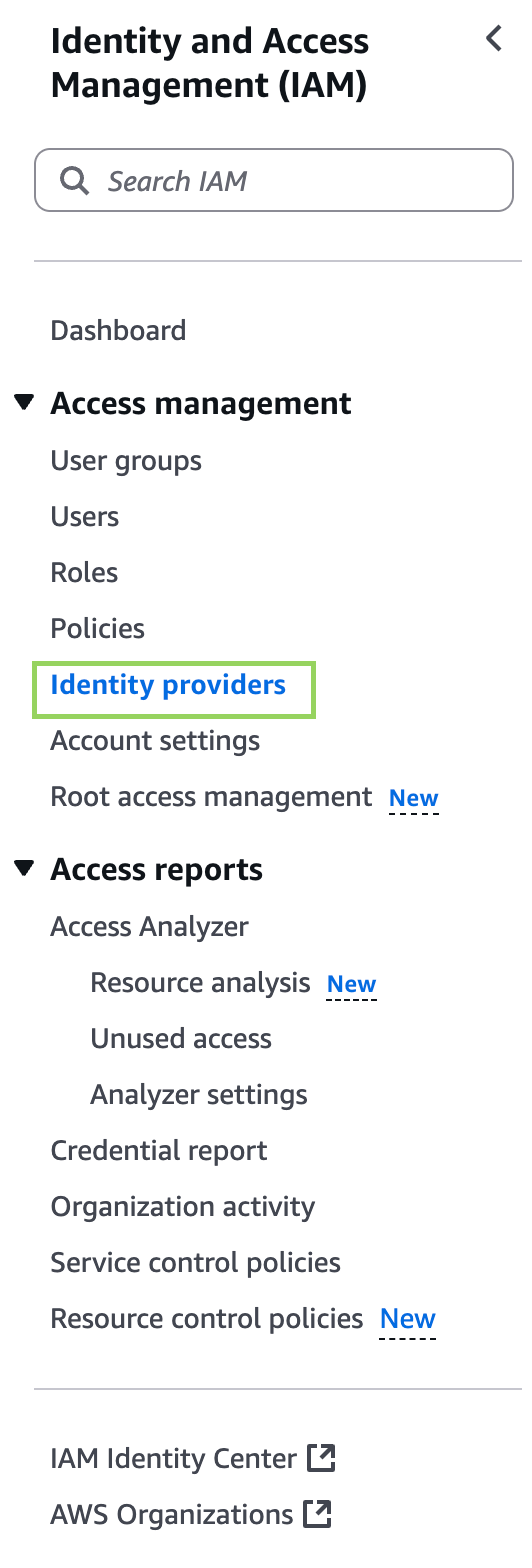
To do so, go to your AWS console, in Identity and Access Management (IAM), click "Identity providers" under "Access management":
Then click the "Add provider" button, and fill in the following information:
- Provider type: select "Provider type"
- Provider URL: If you are using the GitGuardian SaaS platform, it should be
https://api.gitguardian.com. - Audience: sts.amazonaws.com
After creation, copy the resource ARN, which will be used in the next step.
3. Create an IAM Role with Minimum Required Permissions and a Strictly-Defined Trust Policy
First, create the policy. Prepare a file named policy.json with the following content:
{
    "Version": "2012-10-17",
    "Statement": [
        {
            "Effect": "Allow",
            "Action": [
                "iam:GetAccessKeyLastUsed",
                "iam:GetGroup",
                "iam:GetGroupPolicy",
                "iam:GetPolicy",
                "iam:GetPolicyVersion",
                "iam:GetRolePolicy",
                "iam:GetUserPolicy",
                "iam:ListAccessKeys",
                "iam:ListAttachedGroupPolicies",
                "iam:ListAttachedRolePolicies",
                "iam:ListAttachedUserPolicies",
                "iam:ListGroups",
                "iam:ListPolicies",
                "iam:ListRolePolicies",
                "iam:ListRoles",
                "iam:ListUserPolicies",
                "iam:ListUsers"
            ],
            "Resource": "*"
        }
    ]
}
As we can see, GitGuardian will only have permission to read users, roles, groups, access keys, etc., without any permission to modify anything or read other resources.
Create the policy with the CLI by running:
aws iam create-policy \
    --policy-name gg-nhi-governance-policy \
    --policy-document file://policy.json
Copy the policy ARN from the output, which will be used later when attaching the policy to a role.
Create another file named trust-policy.json with the following content:
{
    "Version": "2012-10-17",
    "Statement": [
        {
            "Effect": "Allow",
            "Principal": {
                "Federated": "arn:aws:iam::{your-aws-account-id}:oidc-provider/{your-gitguardian-oidc-provider}"
            },
            "Action": "sts:AssumeRoleWithWebIdentity",
            "Condition": {
                "StringEquals": {
                    "{your-gitguardian-oidc-provider}:sub": "gitguardian-account-id:{your-gitguardian-account-id}"
                }
            }
        }
    ]
}
Replace the placeholders from the above:
{your-aws-account-id}: Your AWS account ID{your-gitguardian-oidc-provider}: The OIDC provider URL configured in the previous section (without thehttps). For GitGuardian SaaS platform, it should beapi.gitguardian.com.{your-gitguardian-account-id}: Your GitGuardian account ID. You can get this ID by accessing GitGuardian dashboard, the number in the URL afterworkspaceis the ID. For example, if the URL is:https://dashboard.gitguardian.com/workspace/12345/, then the GitGuardian account ID is12345.
As we can see in the trust policy, it guarantees that only your GitGuardian account can assume this role; a random third party cannot.
Here's an example of the JSON file with the placeholders' content updated, assuming I'm using GitGuardian SaaS, my AWS account ID is 123456789, and my GitGuardian account ID is 12345:
{
    "Version": "2012-10-17",
    "Statement": [
        {
            "Effect": "Allow",
            "Principal": {
                "Federated": "arn:aws:iam::123456789:oidc-provider/api.gitguardian.com"
            },
            "Action": "sts:AssumeRoleWithWebIdentity",
            "Condition": {
                "StringEquals": {
                    "api.gitguardian.com:sub": "gitguardian-account-id:12345"
                }
            }
        }
    ]
}
Then, create the role by running:
aws iam create-role \
    --role-name gg-nhi-governance-role \
    --assume-role-policy-document file://trust-policy.json
Finally, attach the previously created policy to the new role:
aws iam attach-role-policy \
    --policy-arn arn:aws:iam::202449767955:policy/gg-nhi-governance-policy \
    --role-name gg-nhi-governance-role
Copy the role ARN, which will be filled into NHI Governance - IAM integration.
Note: If you prefer, you can create the role with the above settings via the web console, or using Infrastructure as Code tools like Terraform. For the web console, you can choose "Custom trust policy" so that you can paste the policy above for the new role.
3. Integrate NHI Governance with AWS IAM
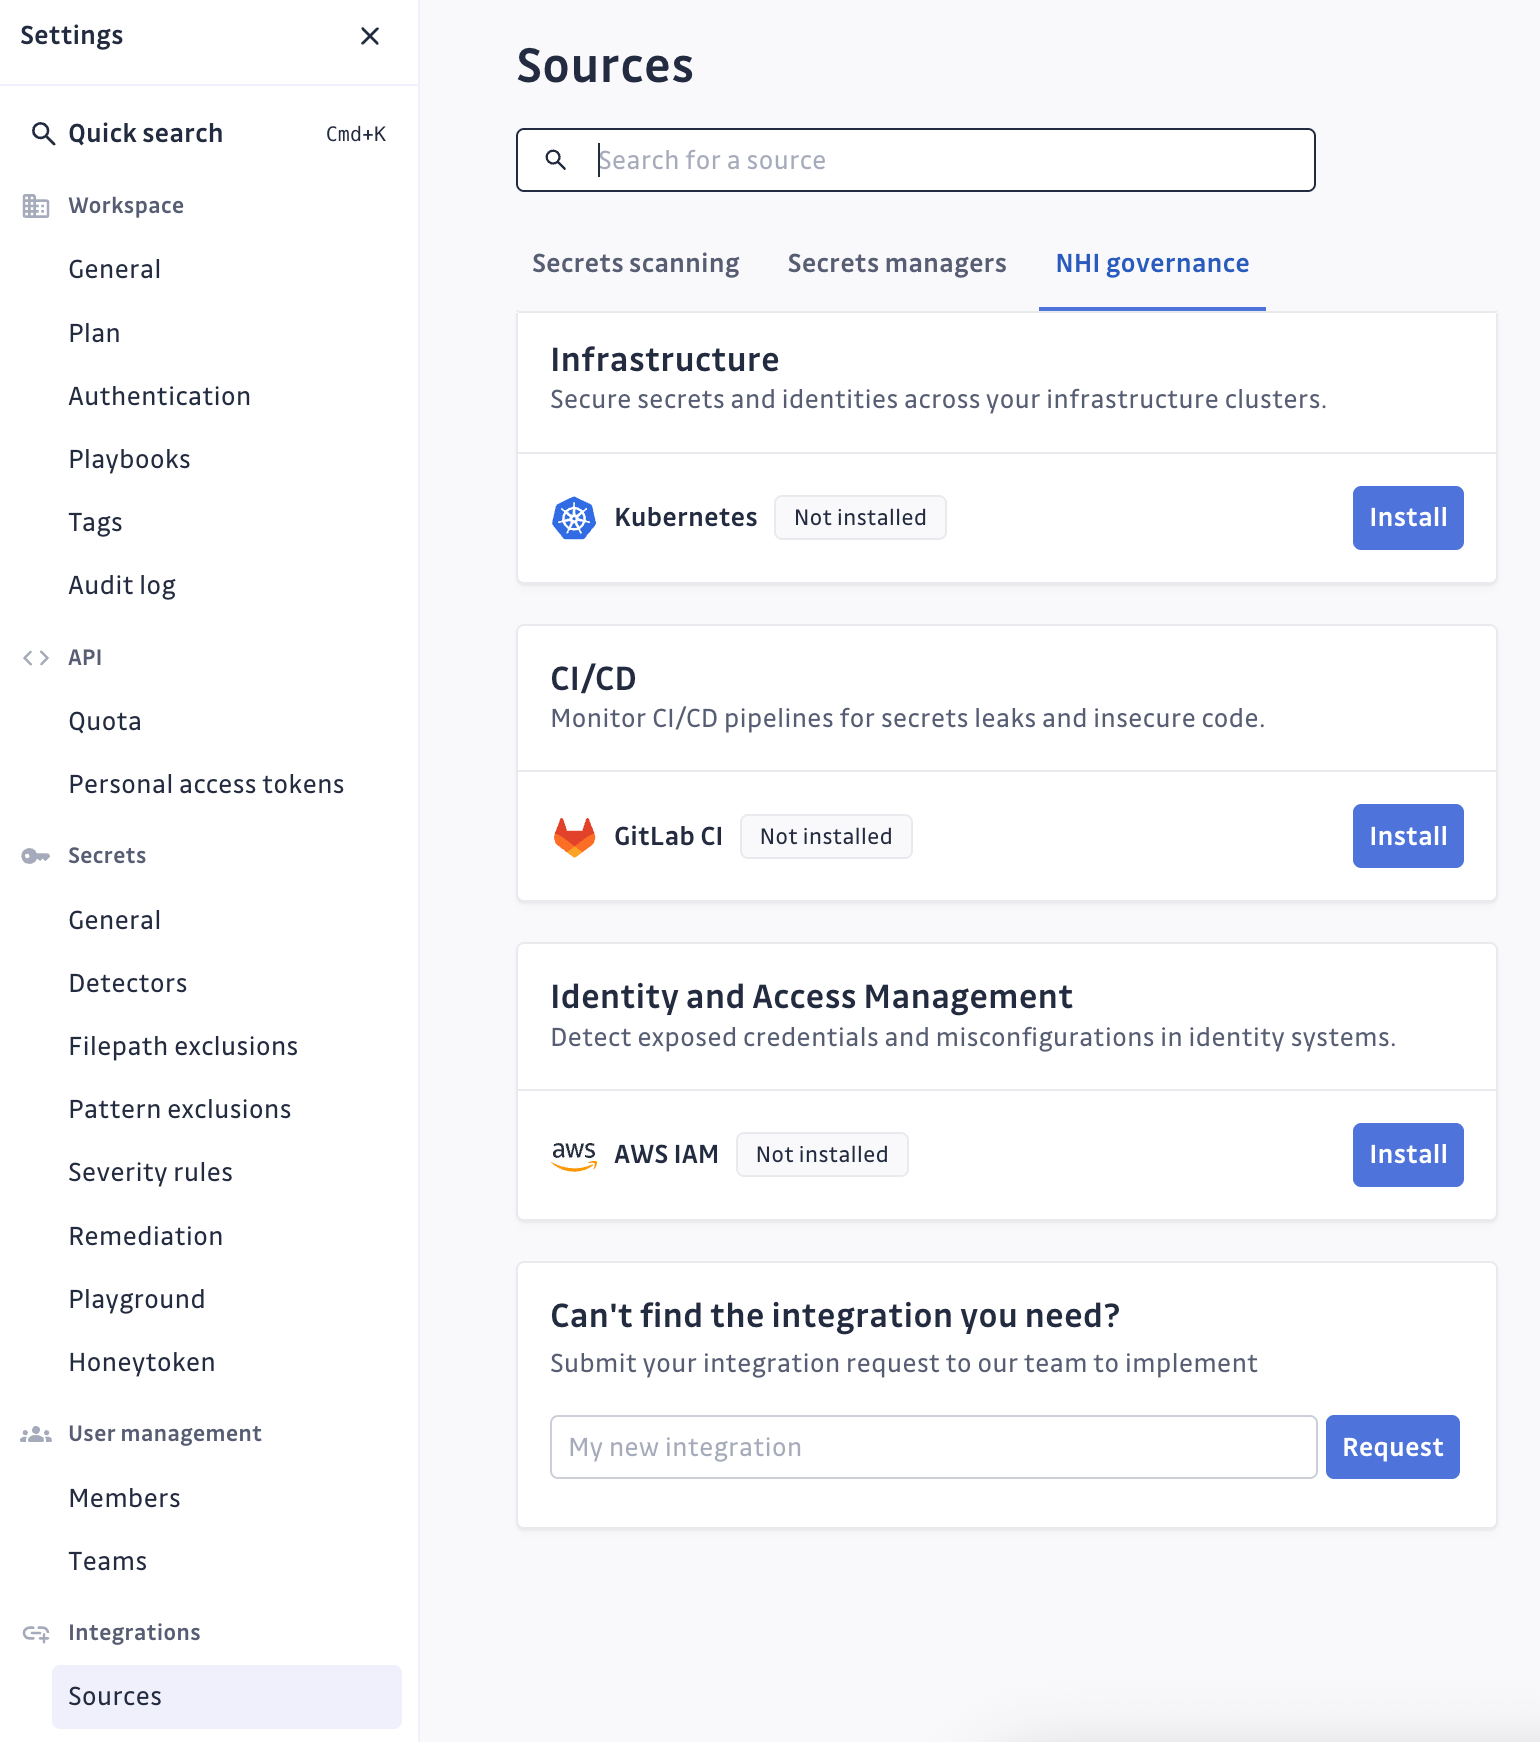
Go to your GitGuardian settings, select "Sources" under "Integrations", then select the "NHI governance" tab. Click the "Install" button for AWS IAM under the "Identity and Access Management" section:
On the new page, put in your AWS account ID and the role ARN from the previous step:
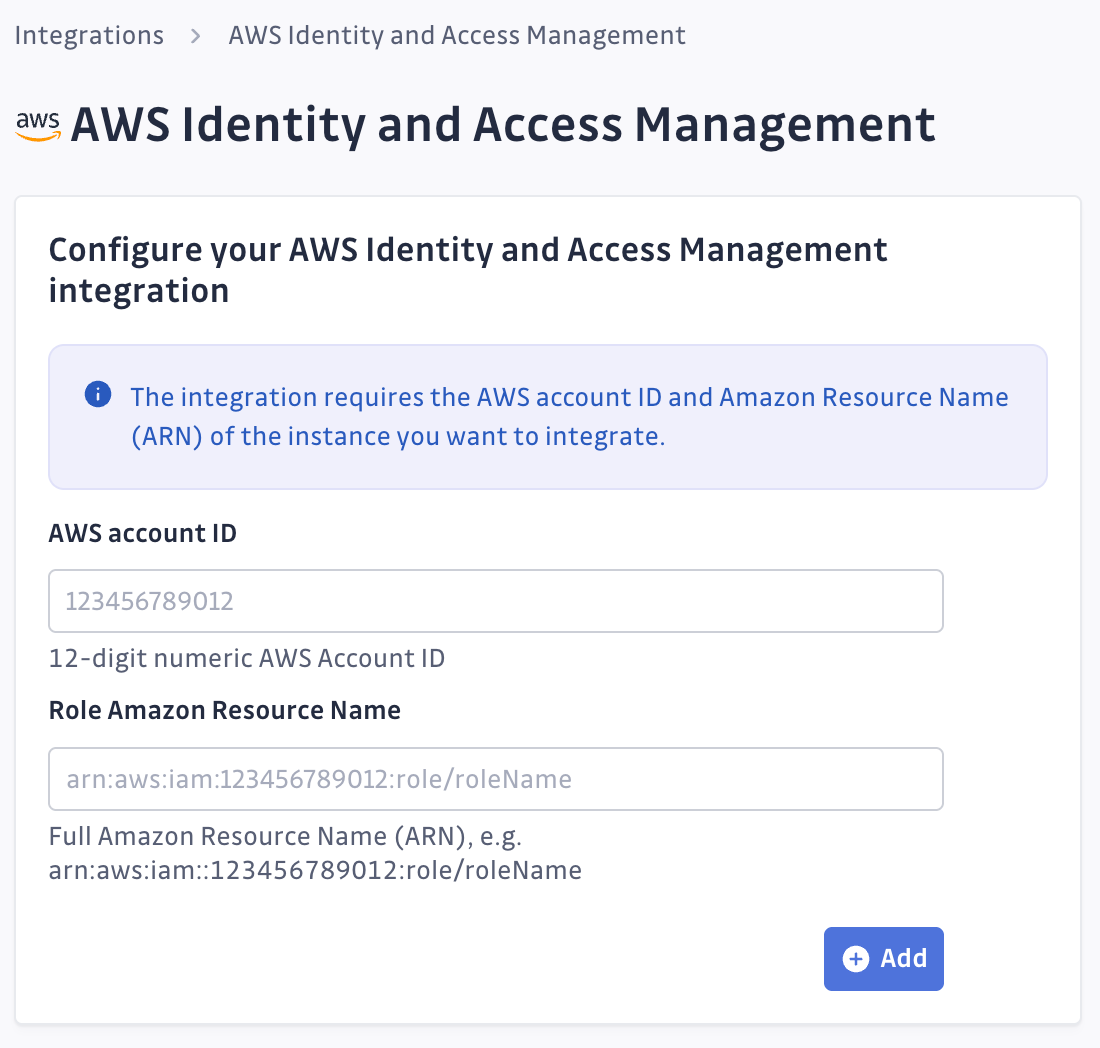
You're all set! GitGuardian will start fetching AWS IAM data from your account, enriching your security graph with comprehensive permission context for discovered AWS credentials.
After this, the integration steps are done.
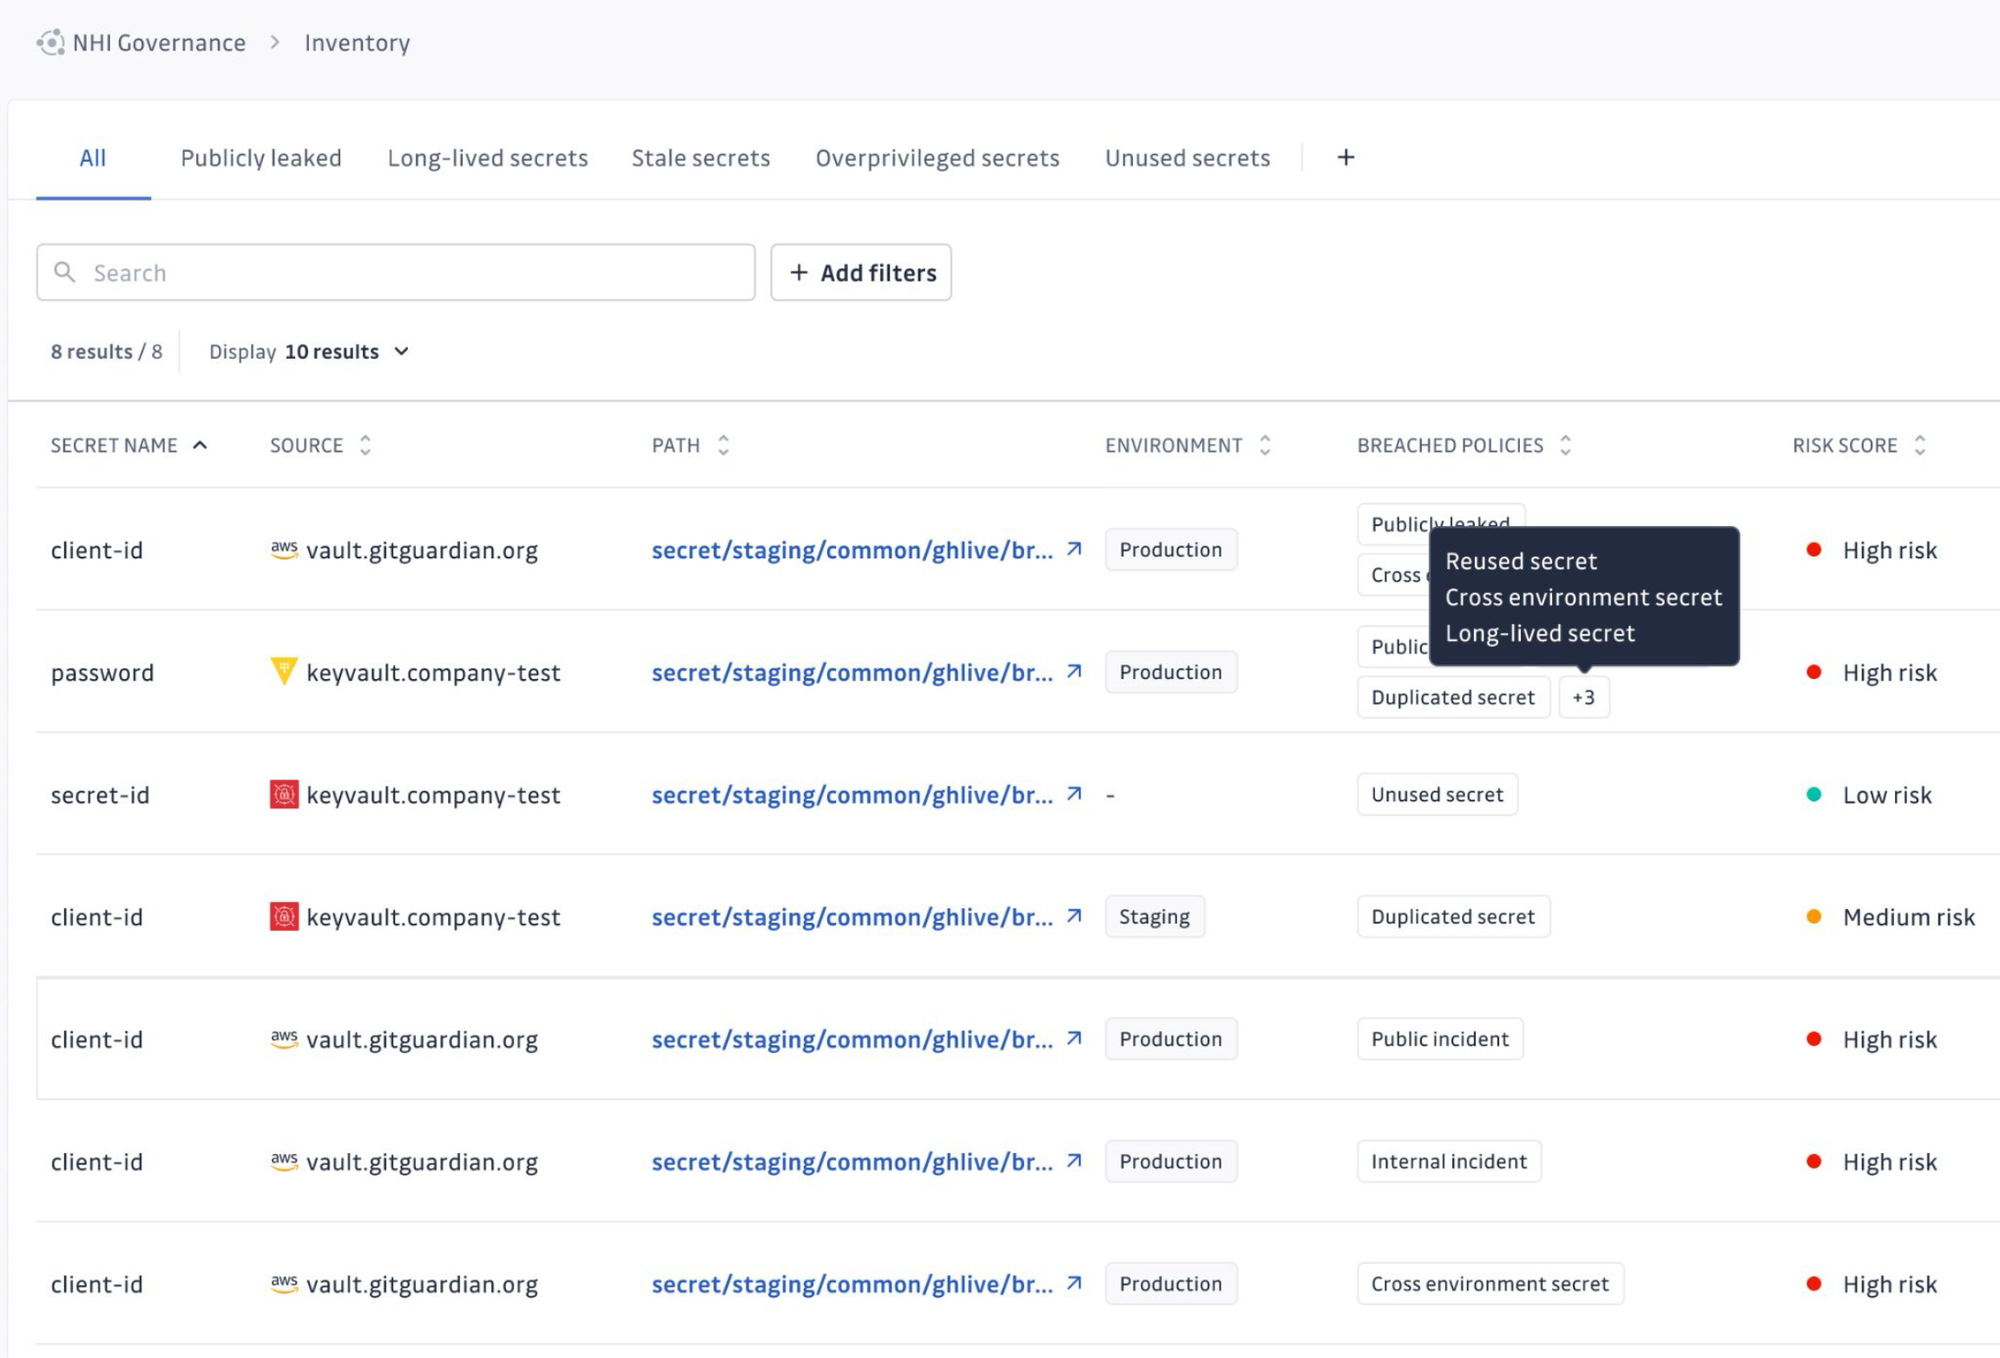
4. Results
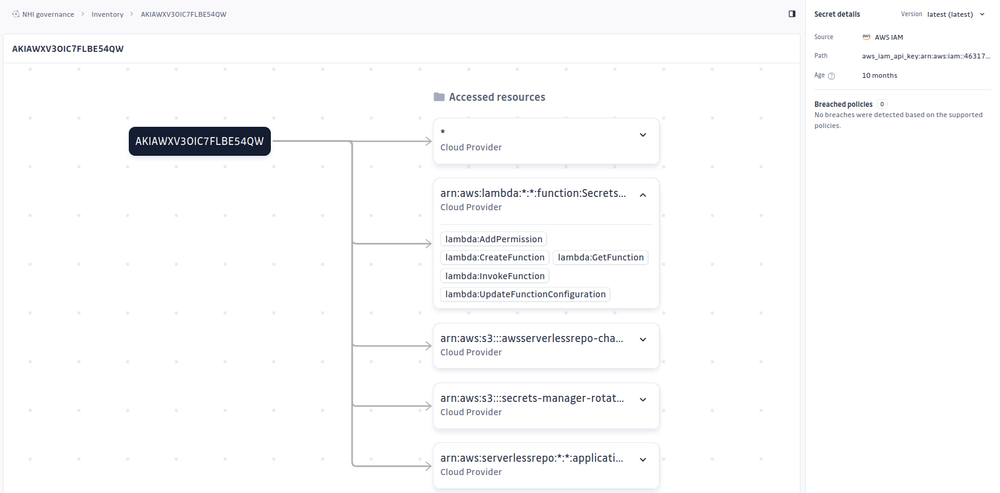
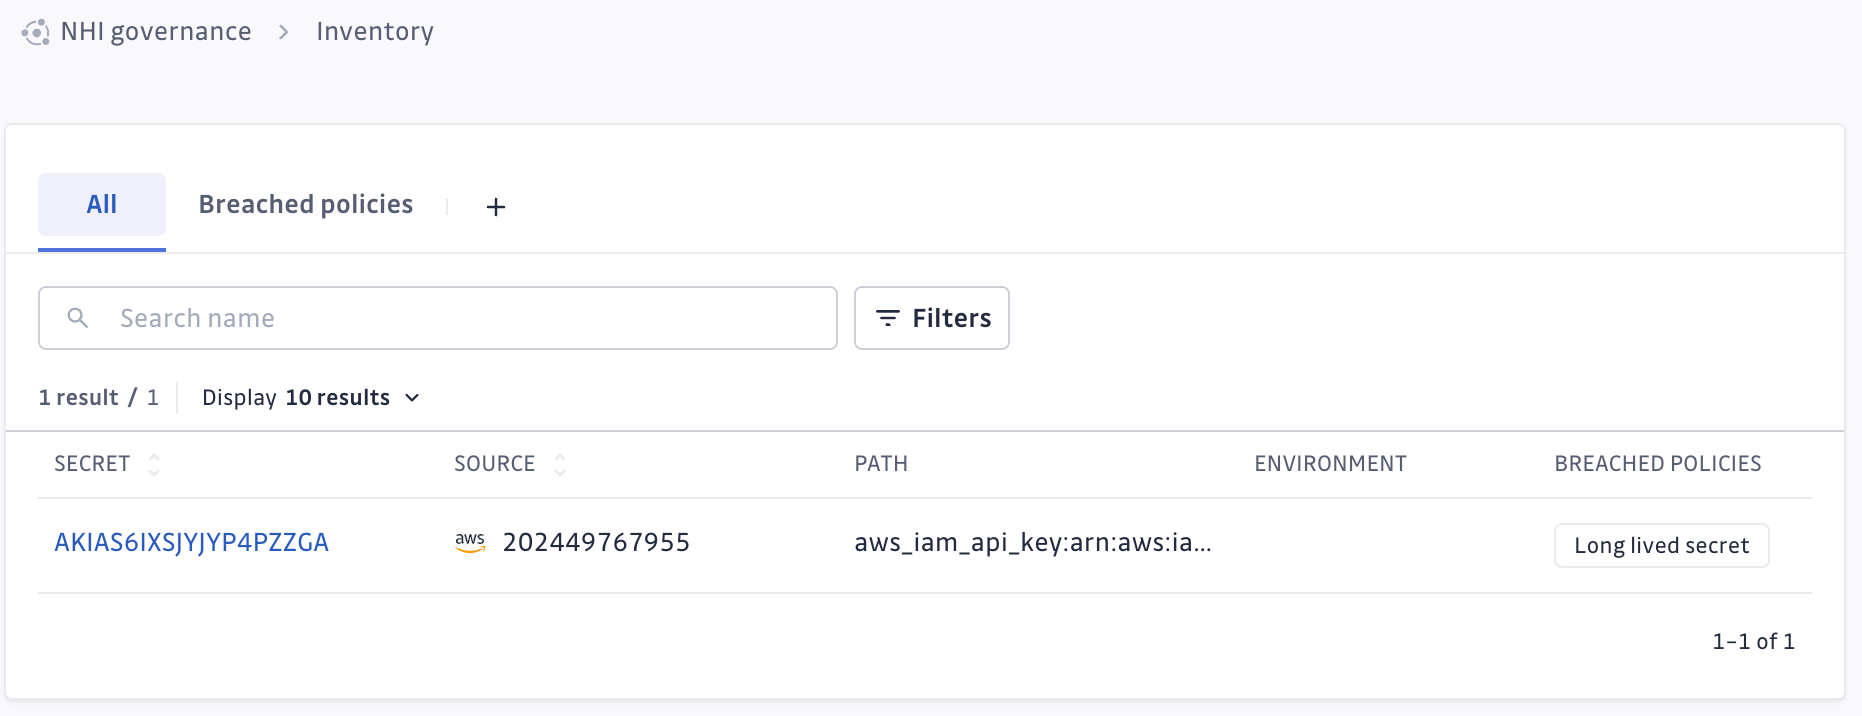
Wait for a little while, and once it's active, our NHI inventory will be populated with data from AWS IAM. We'll be able to see things like access keys (and whether they're long-lived – a big No), what resources they can access, and whether they're violating any policies.
In my case, I have an access key, which is not ideal, because it's a long-lived secret, as reported by NHI:
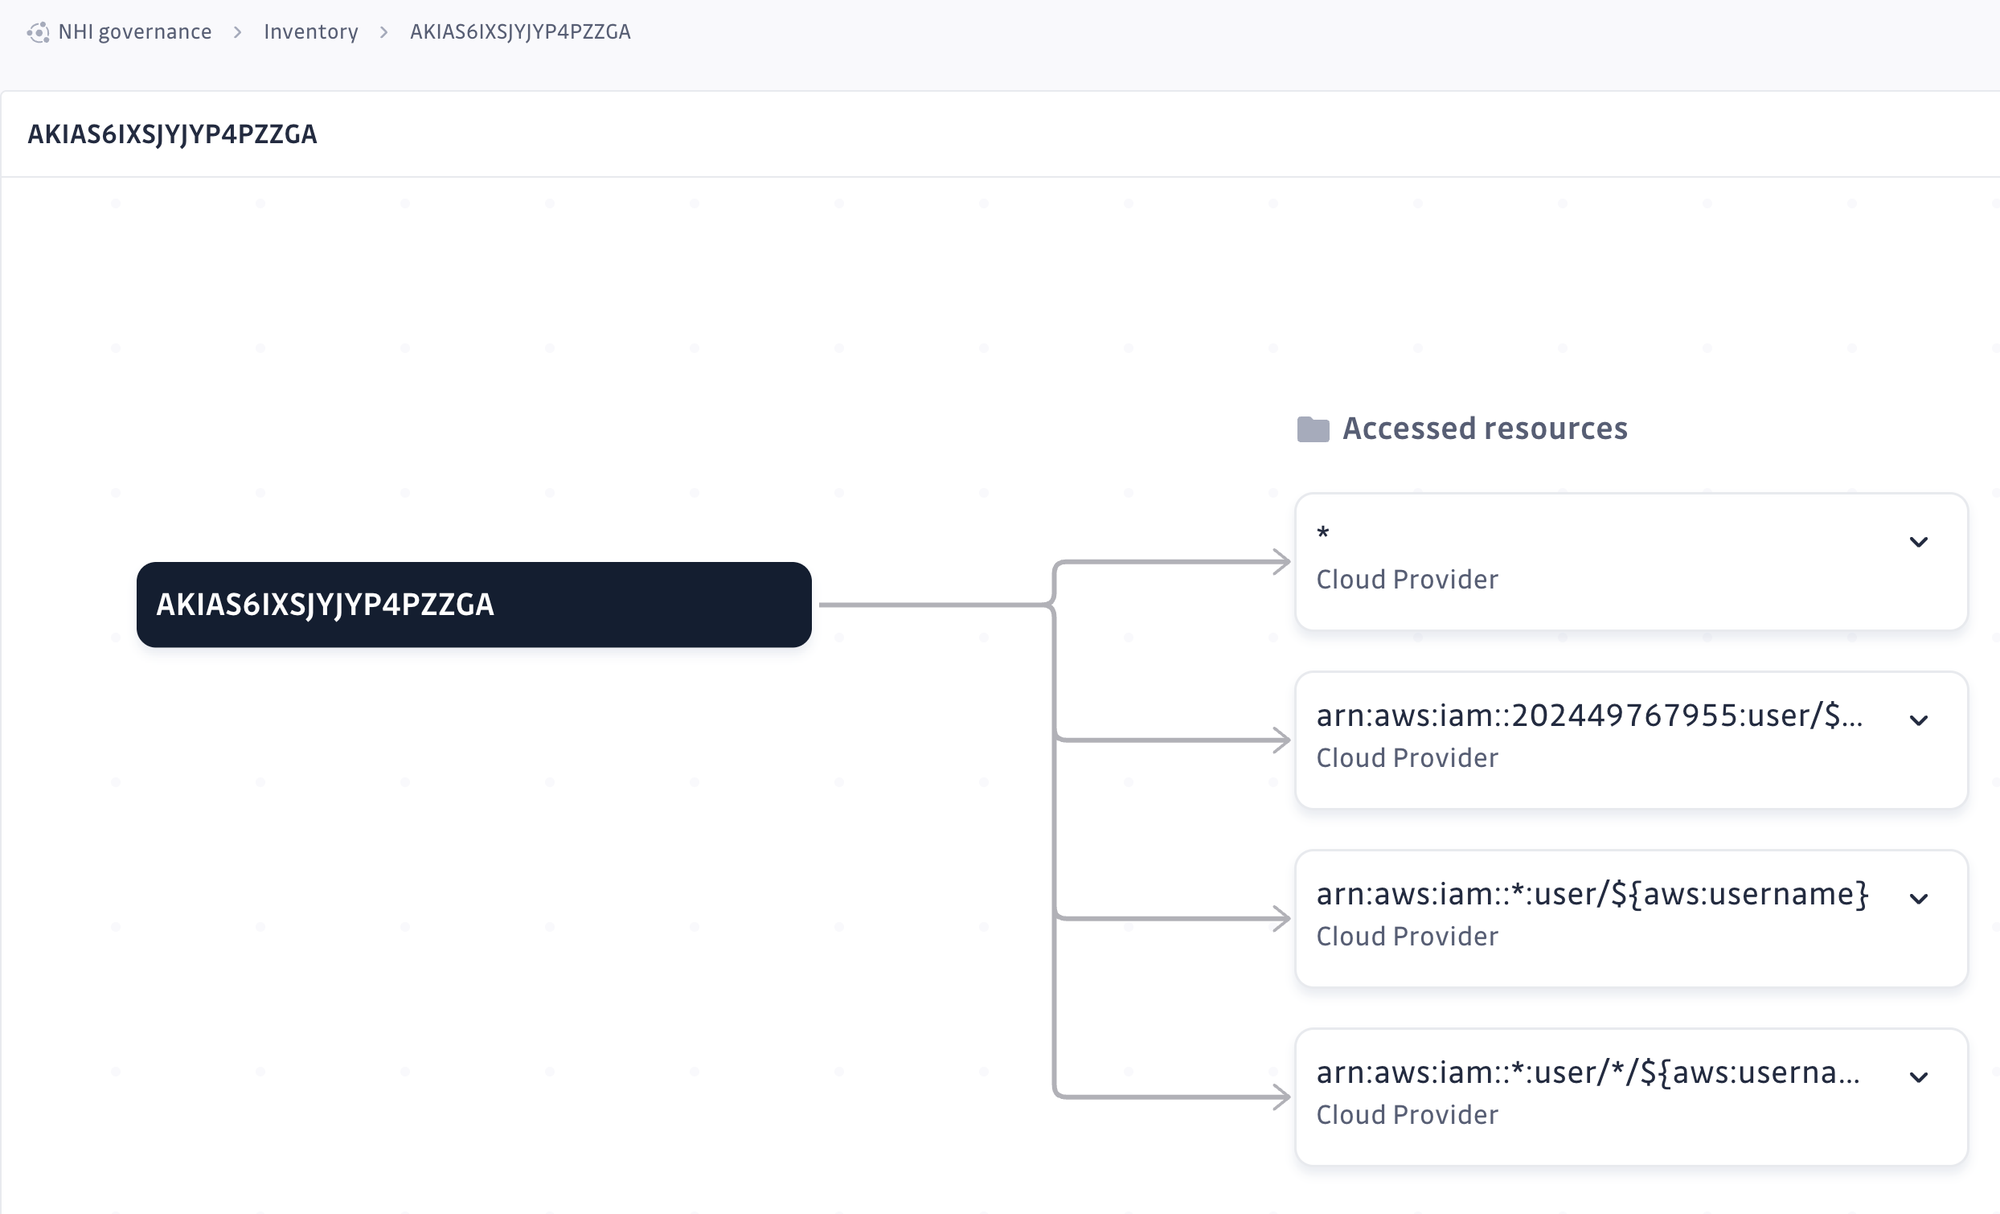
If I click it, I can see some more details, like what resources it has accessed:
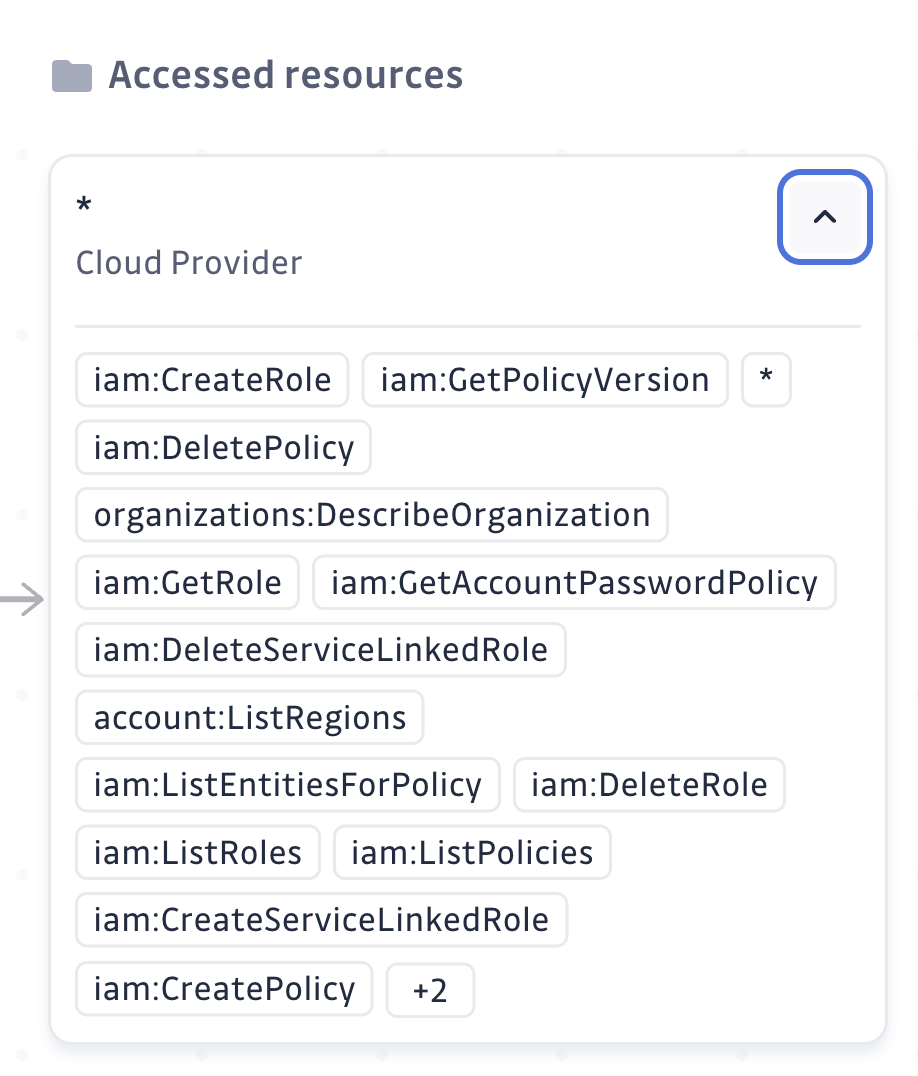
I can even view more information, like what permissions it has, by expanding those boxes:
Voila! Now we have a centralized view to provide insights into our AWS IAM settings, and we can easily have an overview of all the NHIs there and which breaches what policies.
Summary
Stop letting your AWS IAM secrets keep you up at night. GitGuardian NHI Governance is here to help you gain control, improve your security posture, and sleep soundly knowing your secrets are safe.
What's more, besides the AWS IAM stuff, imagine being able to see all your NHIs from any sources, all in one place, knowing exactly what they can do and whether they're putting you at risk. That's the power of GitGuardian NHI Governance!
GitGuardian NHI Governance could be the go-to solution for monitoring secrets and NHIs from various sources, including those hiding in AWS IAM. It gives us the visibility and control we longed for to stay secure and avoid those dreaded secret leaks. Ditch the scavenger hunt and start using NHI Governance today!
Further Reading:
- GitGuardian NHI Governance Documentation: Integrate with other sources.
- AWS IAM Security Best Practices
- Why Machine Identity Security is Your Next Critical Battlefront