Skip the intro and jump to the guide.
After reading about leaked secrets and exposed credentials everywhere, your security lead became too tempted to peek at the private repositories in your organization. You start running a couple of regex searches like /AKIA[0-9A-Z]{16}/ thinking you won’t find much, when lo and behold, a handful of what looks like valid AWS API keys are highlighted.
You are now confident more secrets are lurking in this git repo. One branch, one regex doesn't do, so you and your security lead decide to take things further and run automated secrets scanning with GitGuardian (or Gitleaks, or TruffleHog) on every single repository. It only takes a few minutes before you find out how big the problem is, thousands of occurrences are detected. You now realize that you now have to deal with a giant pile of security debt.
We hear this very often at GitGuardian. Many Proof of Concept exercises we run at large companies with hundreds of developers and repositories share this similar story where thousands of results surfaced, revealing years of accumulated poor credentials hygiene. And if you find it hard to believe, read our latest reports in which we analyze the Twitch, Nvidia, and Microsoft leaked repositories.
Why is the threat of secrets-in-code different?
With this in mind, we should consider every occurrence as a dormant threat that cannot be left untreated. But how can you pull this off when there are more incidents than your security engineers can ever handle?
Understanding Secret Context for Faster Remediation
When automating secrets risk remediation, context is the difference between surgical precision and operational chaos.
Without proper context, teams face a critical bottleneck: they know a secret is exposed but struggle to understand what it does, where it's used, or what breaking it might cause. This uncertainty leads to delayed remediation as teams hesitate to rotate secrets that might break production systems.
Effective automated remediation requires answering key questions immediately: What team or application does this secret belong to? What resources does it access? What permissions does it grant? Who created it and where is it actively used? When teams have this contextual information readily available, remediation transforms from a high-risk guessing game into a precise, strategic operation.
This contextual understanding reduces mean time to remediation from weeks to hours while minimizing the risk of service disruptions during the rotation process.
Prioritizing your incidents
Start with a discovery phase
Code security practices, and secrets management, in particular, differ from one engineering team to the next. This usually translates to uneven repository hygiene and will show when examining the sources impacted the most by incidents.
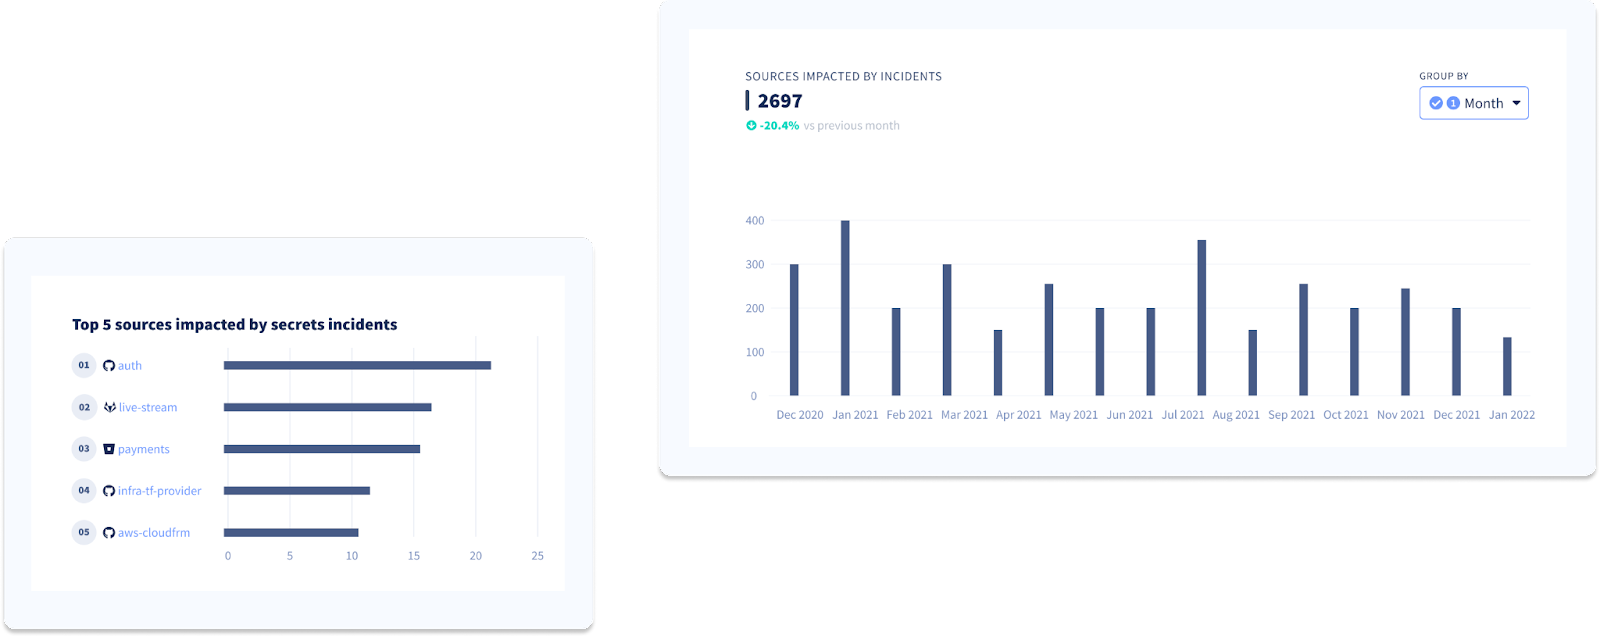
We recommend you start by determining the repositories that contain the most secrets and try linking them to the applications or services your development teams are maintaining before you decide what to tackle first.
Continue your discovery phase, but this time, focus on the secrets. Explore secrets exposure trends and evolution over time and try identifying the types of secrets that leak the most and the services they give access to.

Deploy honeytokens when dealing with a large secrets debt
Deploying GitGuardian honeytokens can serve as a crucial element in your secrets remediation strategy, especially when dealing with a substantial secrets debt.
As you embark on the journey to clean up these historical secrets, a process that might take months or even years, these honeytokens will act as an alarm system, offering protection during this vulnerable period. By deploying honeytokens strategically across your critical repositories, you create an effective alert mechanism.
 Thomas Segura
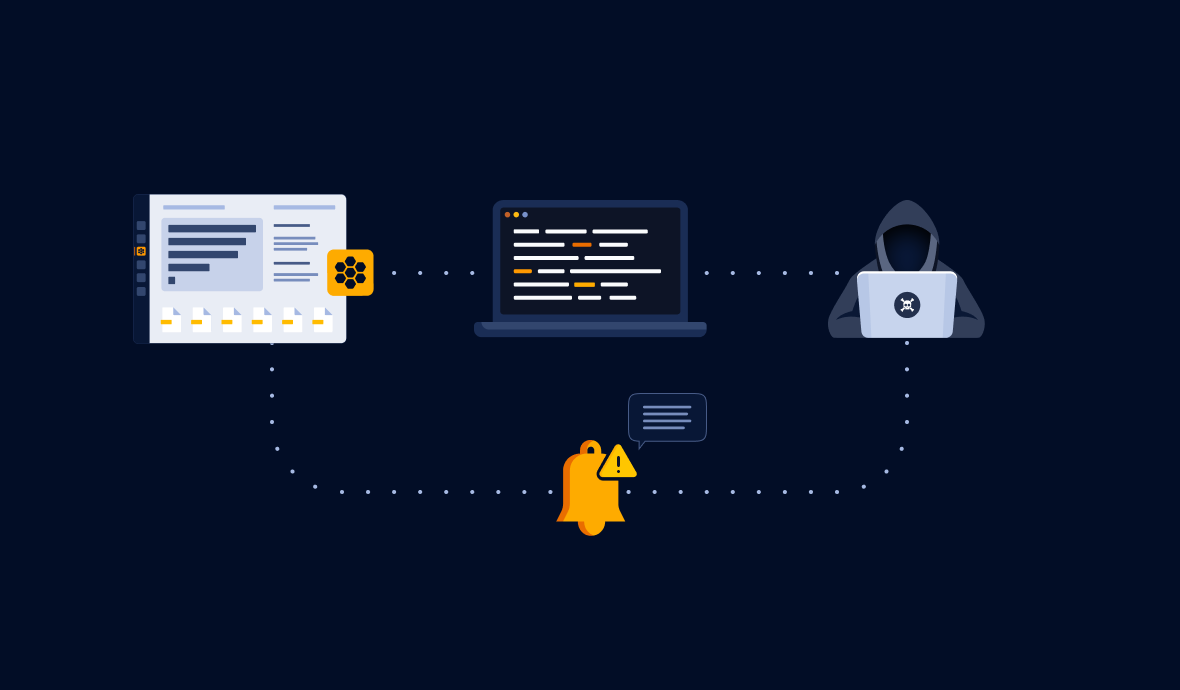
In the event of a breach, the honeytoken triggers an immediate alert, providing essential information for your security team to investigate and address the breach swiftly. This not only brings peace of mind but also helps in prioritizing secrets incidents.
Breached honeytokens signal compromised assets, guiding your team to prioritize and rotate critical secrets in those assets promptly, ensuring a proactive and efficient remediation process. This approach allows you to maintain a vigilant defense against potential security threats while steadily addressing secrets sprawl.
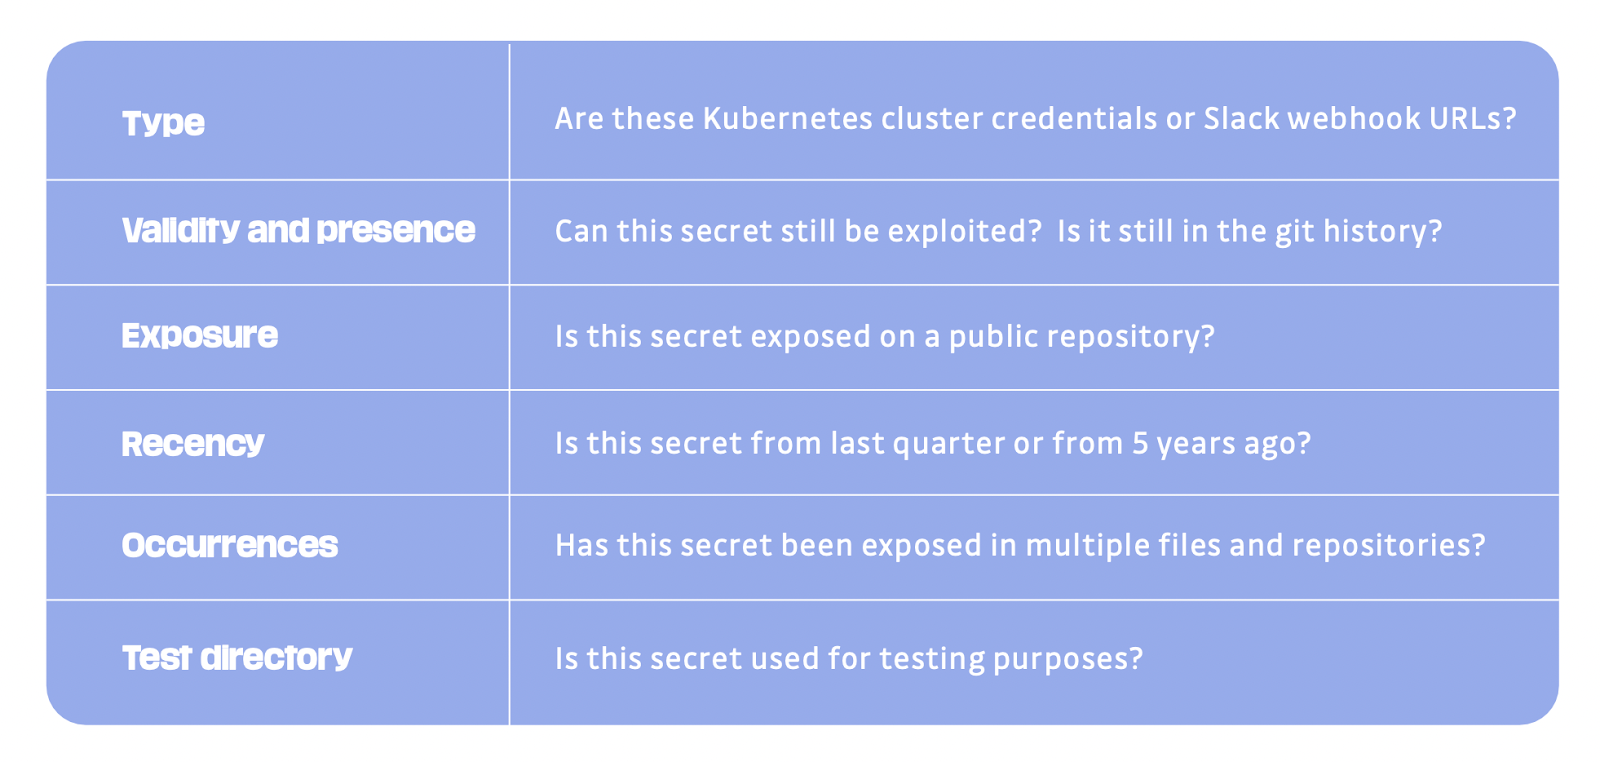
Define your severity levels
Now, before diving headfirst into remediating your historical incidents, we suggest you set a few rules for prioritizing them first. Here are some elements to consider before deciding on the severity of an incident and the priority it should get:
Implementing Proactive vs. Reactive Remediation Workflows
Proactive remediation workflows focus on preventing secrets exposure before it occurs. This includes implementing automated scanning at critical points in the development lifecycle, during pull requests, pre-commit hooks, and CI/CD pipeline stages. These workflows can automatically block commits containing secrets or trigger immediate alerts to developers before code reaches production environments.
Reactive remediation workflows activate after secrets have already been exposed in repositories, logs, or other insecure locations. These workflows require immediate assessment of impact, rapid revocation of exposed credentials, and coordinated rotation across all dependent systems. The key difference lies in urgency and scope—reactive workflows must assume potential compromise and act accordingly.
Successful automation combines both approaches: proactive measures reduce the volume of incidents requiring reactive response, while reactive workflows ensure rapid containment when prevention fails. Organizations should implement guardrails that prevent secret introduction while maintaining robust incident response capabilities for historical exposures and detection bypasses.
Remediating your incidents
Before starting this phase, you must establish precise remediation processes for your historical incidents. Ask yourself the following questions:
- Which team/role will be responsible for remediating the incidents?
- Which team/role will be accountable for tracking remediation progress and reviewing open incidents?
- Which team/role will be consulted during the remediation process (e.g., DevOps engineers might have to intervene to avoid service outages while rotating secrets).
- How much autonomy are we willing to give to developers to resolve incidents?
Scale remediation with the help of developers
It’s no secret that security engineers are heavily outnumbered by developers (with an average ratio of 100:1) and cannot possibly handle all the vulnerabilities generated by the latter's activity. To scale remediation, you must pull your developers closer to the process and ensure they contribute their fair share. Here’s how you can go about this:
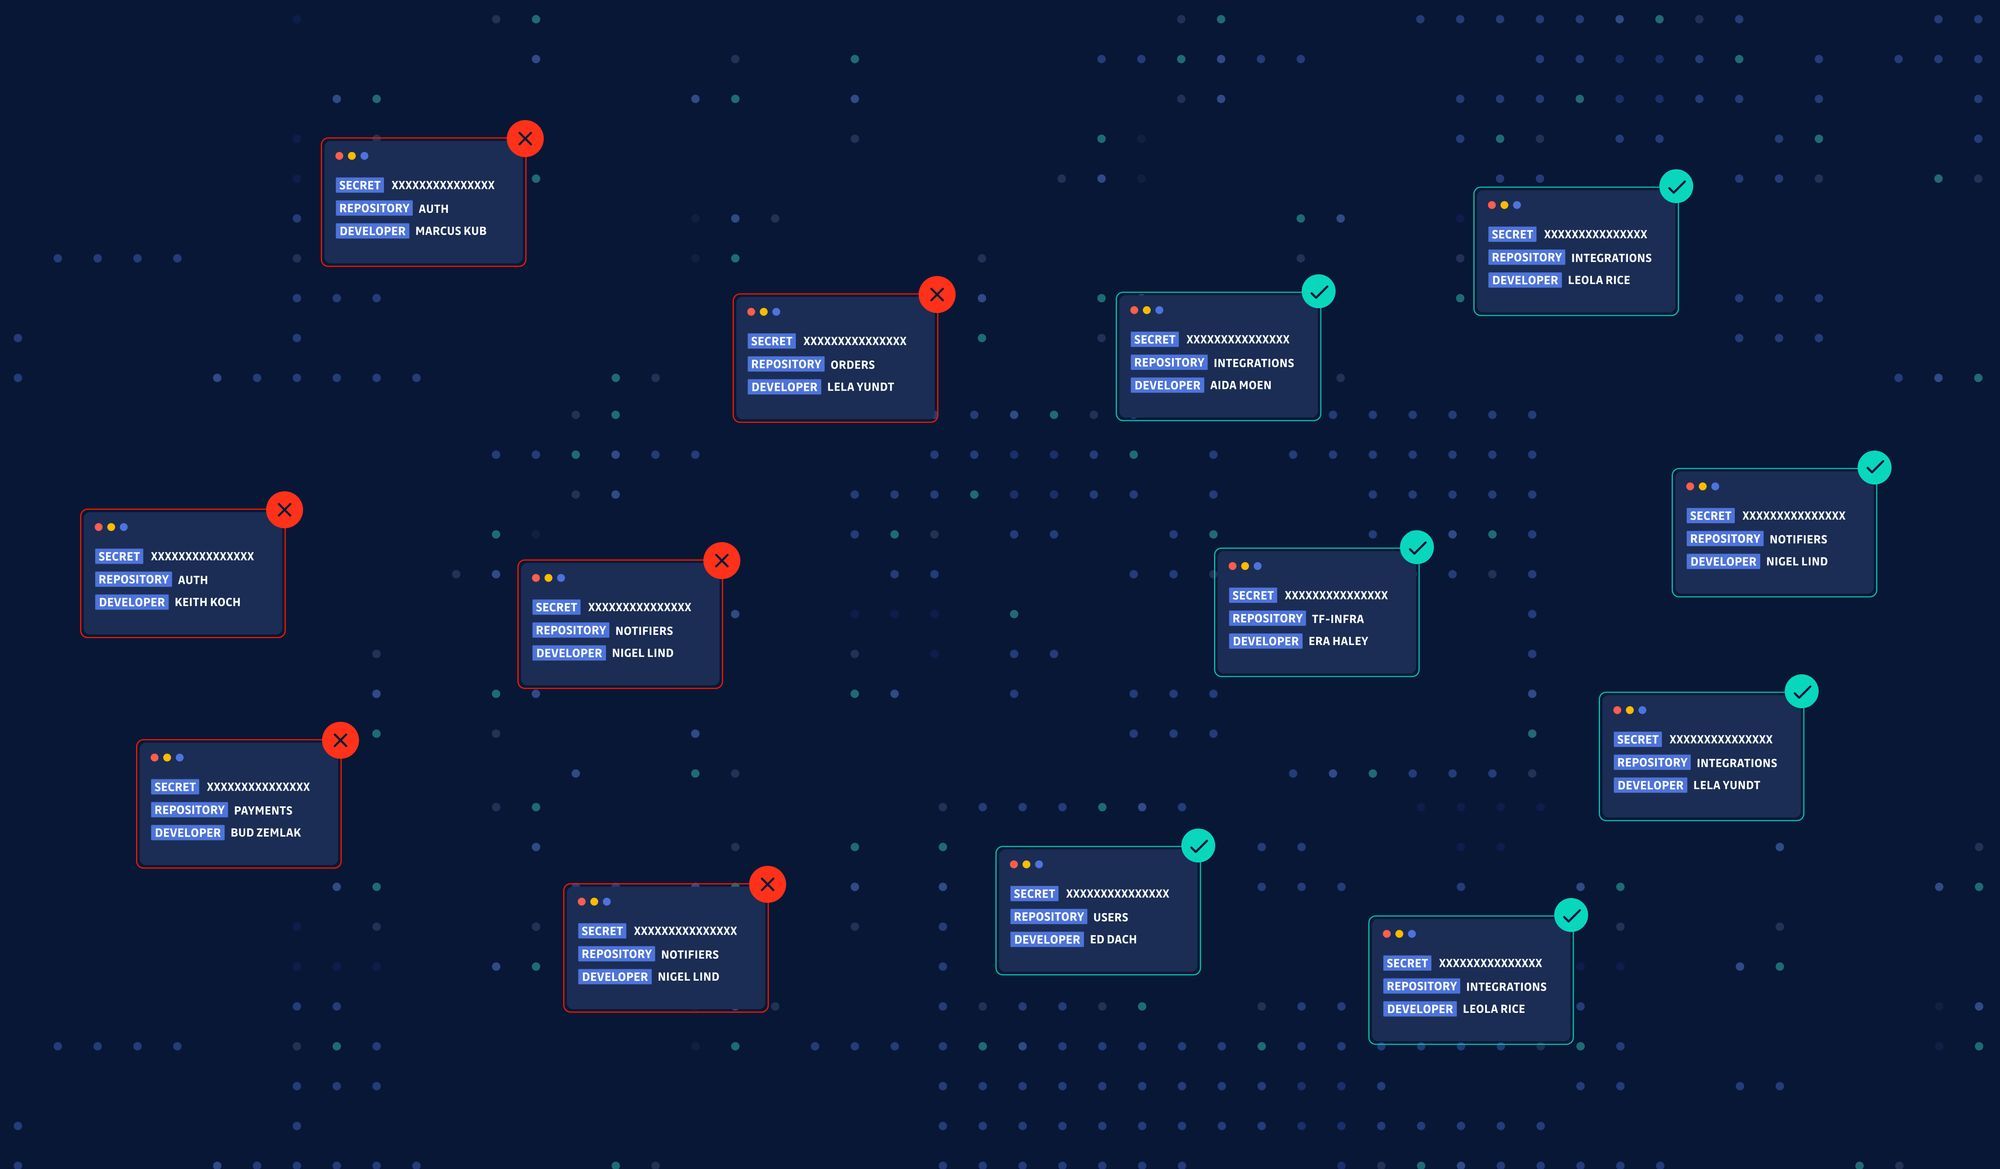
Step 1. Identification and alerting
For every historical incident in your pile, identify the developer involved to share with them incident details. Simply use the commit author email here.
Step 2. Feedback collection
Once you have listed all incidents and their matching developers, you need to automate incident details sharing en masse and ask developers to submit their feedback. This will give you additional information such as:
- Is this secret a test environment credential? Or is it a false positive?
- Does it give direct access to sensitive services or data?
- Is it used in a production environment?
- Has it already been revoked by the developer?
Step 3. Resolution
You now have everything you need to prioritize and handle your incidents.
- If you decide to trigger the entire remediation workflow, ask development and DevOps teams to coordinate and:
- Start by revoking and rotating the secret,
- Replace the secret in your code with environment variables or by invoking the correct calls to centralized secrets storage,
- Optionally, rewrite the git history to remove all traces of the incident (we recommend against doing this, git can get very messy!).
- Otherwise, simply close the incident. Make sure you add a flag (false positive, test key…) to avoid losing context if you need to return to the incident.
Step 4. Verification
You can mark the incident as' resolved' when you are informed that the steps were followed. You should also try to automate calls (HTTP, SSH, or other) to the associated host to verify if the secret is no longer valid and obtain proof of remediation.
As all teams advance and become more comfortable with their collaboration and remediation processes, we suggest your security teams embrace the trust but verify principle. In the long run, developers should be empowered to resolve incidents with little to no intervention from security teams.
Here's an example of an automated workflow you can try replicating.
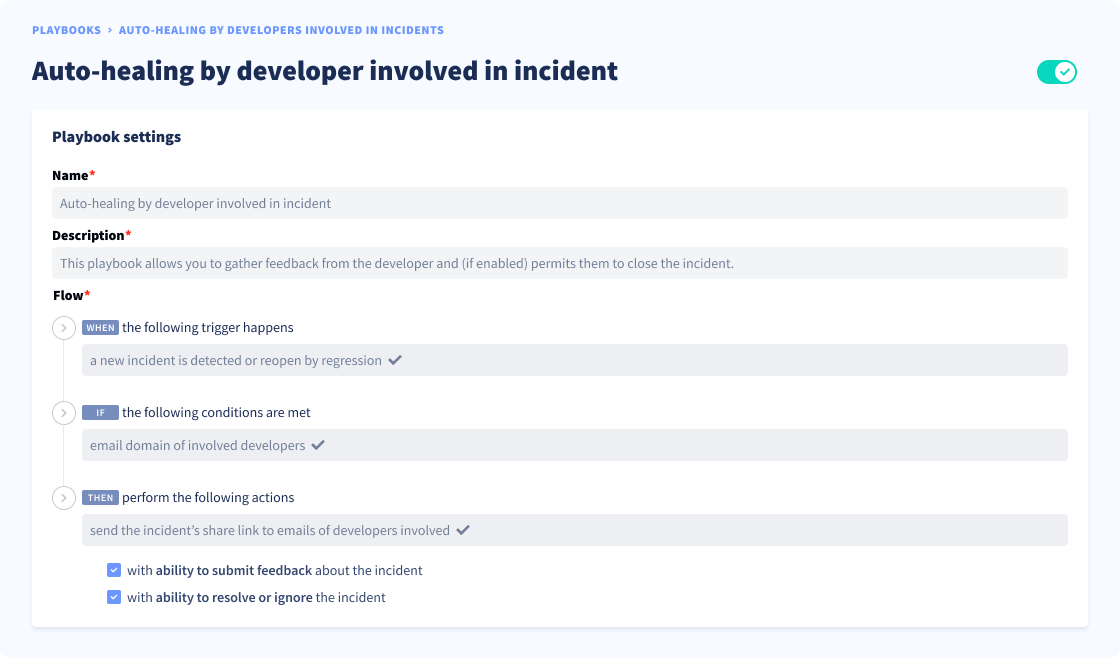
You can learn more about how GitGuardian can help you automate granting access to developers to their own incidents in this 1-min video by Dwayne McDaniel, our Security Advocate.
Don’t forget ‘orphan’ incidents
Your remediation workflows need to factor in an important detail: is the developer involved in this incident still on staff? If the answer is no, you will have to do without their help or knowledge. Here’s what to do when faced with this situation:
Step 1. Identification
Start by verifying (when possible) the developer is no longer here:
- Try pinpointing the team the developer belonged to when they were active (by querying your LDAP for example).
- Identify repo admins or users with write access (at the incident location).
Step 2. Assignment
Once all teams impacted by orphan incidents are identified, assign the bulk of the historical incidents to engineering leads, repo admins, or other relevant team members.
Alternatively, try leveraging this helpful resource if you have a “Security Champions” program. Security Champions can take on the task of remediation on behalf of the developers no longer on staff.
Leveraging Non-Human Identity Governance for Secrets Automation
A critical gap in most secrets remediation discussions is the connection between secrets management and Non-Human Identity (NHI) governance. As organizations scale their automation efforts, understanding this relationship becomes essential for effective secrets risk remediation.
Non-human identities—service accounts, API keys, certificates, and tokens—represent the majority of secrets in modern environments. These identities often have extensive permissions and long lifespans, making them attractive targets for attackers. Traditional remediation approaches treat secrets as isolated artifacts, but effective automation requires understanding the complete NHI lifecycle.
Automated remediation workflows should be a part NHI governance platforms to understand secret ownership, permissions, and dependencies. This integration enables automated assessment of blast radius before rotation, identification of over-privileged secrets requiring immediate attention, and coordination of remediation across multiple systems and teams.
When secrets are viewed through the lens of NHI governance, remediation becomes more strategic. Instead of simply rotating exposed credentials, teams can implement least-privilege principles, establish appropriate expiration policies, and ensure proper monitoring of secret usage patterns. This holistic approach transforms reactive incident response into proactive identity risk management.
Before you go
Remediating years of historical incidents of hardcoded credentials may seem unrealistic at first. But with careful preparation, reasonable resources, and the right dose of automation, we believe it can be perfectly pulled off.
This guide explored some of the complex aspects of remediating secrets-in-code incidents. Ultimately, secrets detection and remediation in AppSec programs aim to prevent more and remediate less. Focusing on resolving past incidents while doing nothing to avoid new ones will not result in lowering the total count and, in turn, reducing the effort needed for remediation in the future.
Keep your eyes on our blog, we will soon release a guide on reducing the risks of secrets exposure in the SDLC!
FAQ
How should security teams prioritize thousands of hardcoded secrets incidents?
Prioritization should begin with a discovery phase—identify repositories with the highest concentration of secrets and link them to critical applications or services. Assess the types and impact of exposed secrets, and define severity levels based on business risk, access scope, and environment (production vs. test). This structured approach ensures remediation efforts are focused where they matter most.
What role does context play in automating secrets risk remediation?
Context is essential for effective automation. Understanding what a secret does, who owns it, where it is used, and its associated permissions enables precise, low-risk remediation. Modern secrets management solutions should automatically provide this context, reducing mean time to remediation and minimizing the risk of service disruption during secret rotation.
How can organizations scale remediation efforts given the developer-to-security engineer ratio?
Scaling remediation requires involving developers directly. Automate incident assignment based on commit authorship, collect developer feedback to validate and contextualize incidents, and empower engineering teams to revoke, rotate, and refactor secrets. Security teams should oversee and verify, but automation and developer engagement are critical for handling large incident volumes.
What is the difference between proactive and reactive secrets remediation workflows?
Proactive workflows prevent secrets exposure by integrating automated scanning at development checkpoints—blocking or alerting on secrets before code merges. Reactive workflows address incidents after exposure, focusing on rapid assessment, revocation, and rotation. Mature organizations combine both, reducing incident volume while ensuring swift response to exposures that bypass prevention.
How does Non-Human Identity (NHI) governance enhance secrets risk remediation automation?
NHI governance provides visibility into secret ownership, permissions, and dependencies. Integrating secrets management with NHI platforms enables automated assessment of blast radius, prioritization of over-privileged or orphaned secrets, and coordinated remediation. This approach transforms secrets risk remediation from isolated credential rotation to holistic identity risk management.
How can honeytokens support large-scale secrets remediation initiatives?
Honeytokens act as decoys, alerting security teams to unauthorized access during lengthy remediation periods. Deploying honeytokens in critical repositories provides real-time breach detection, helping prioritize incident response and secret rotation. This strategy maintains vigilance and reduces risk while addressing historical secrets debt at scale.
What are best practices for automating secrets risk remediation in complex, multi-cloud environments?
Best practices include integrating automated secrets detection into CI/CD pipelines, leveraging contextual metadata for prioritization, coordinating with NHI governance tools, and establishing clear remediation ownership. Automation should support both proactive prevention and reactive response, ensuring secrets are rotated, refactored, and monitored across all cloud and vault environments.