
This tutorial provides an insightful introduction to GCP's Secret Manager and guides you in creating secrets and securing access to secrets within VMs and CI pipelines.
In my previous tutorial for using Azure Key Vault as a secret manager, we had a look at the Zero Trust security strategy, how to put it into practice to secure applications and data, and how secrets managers like Azure Key Vault can help to achieve the Zero Trust goal.
If you haven't read it yet, please give it a quick look before moving on because it serves as the foundation of "why using a secret manager" in the first place.
The previous tutorial also showed two examples using Azure Key Vault (accessing secrets from virtual machines and from K8s clusters) with a cheat sheet. I know not all of us use Azure, and I bet Google Cloud Platform (GCP) users are desperate to get their hands on a similar tutorial on GCP, which is precisely what we will do today: a tutorial with a cheat sheet on GCP's Secret Manager.
Without further adieu, let's get started.
1. GCP and Secret Manager
1.1 GCP Quirks and Features
If you're familiar with AWS or Azure, when you want to manage multiple environments or even multiple projects, you will probably use different accounts (AWS) or subscriptions (Azure) so that you can have a granular view and control over different environments and projects.
Unlike AWS or Azure, GCP offers a concept "project", which is a structured and organized approach to managing your cloud resources. You can think of GCP's project as an alternative to AWS accounts or Azure subscriptions, and it's the foundation of your GCP cloud journey: a centralized space to create, manage, and utilize GCP services.
And, unlike AWS/Azure, to use most GCP services, first, you must enable them in a project, and this should be done once per service per project. For most operational use cases, the simplest way to enable and disable services is to use the GCP console, although you can create scripts, for example, using the GCP CLI to do so. For this tutorial, you can enable them in the console when you find that you can't use a certain service.
1.2 GCP Secret Manager
Secret Manager is a secure and efficient storage system provided by Google Cloud for storing sensitive data like API keys, passwords, and certificates. It acts as a central repository, ensuring easy management, access, and auditing of secrets across Google Cloud.
With Secret Manager, adhering to the Principle of Least Privilege is made simple through Cloud IAM roles, allowing granular permissions for managing and accessing secrets. The product offers streamlined life cycle management with versioning and the ability to automate rotation using Cloud Functions. Powerful auditing capabilities are provided through integration with Cloud Audit Logs, enabling compliance and anomaly detection.
Secret Manager features include replication policies for choosing storage regions, first-class versioning to pin secrets to specific versions, and Cloud IAM integration for access control. Data is encrypted both in transit and at rest, and integration with VPC Service Controls enables secure access from hybrid environments. With an API-first design, Secret Manager is highly extensible and integrates well with popular technologies like HashiCorp Terraform and GitHub Actions.
1.3 GCP Secret Manager V.S. Azure Key Vault
If you read the previous tutorial on Azure Key Vault, you will see that Key Vault and GCP's Secret Manager are both cloud-based services designed to manage secrets such as keys, passwords, and tokens.
Both Azure Key Vault and GCP Secret Manager help to protect sensitive data from unauthorized access and ensure that the data is available only to authorized applications and services. They both provide a centralized key management solution, both come with robust access control mechanisms, and provide audit logging capabilities.
However, there are a few differences. Azure Key Vault is more than a secret manager; it supports a wide range of secret types, including cryptographic keys, secrets, and certificates. On the other hand, Google Secret Manager is primarily designed for storing and managing secrets, such as API keys, passwords, and tokens.
It's worth noting that this is only a comparison; if you are starting a new project from scratch, you probably shouldn't decide which public cloud provider to use merely based on the features of their secret managers' offering.
GCP Secret Manager vs AWS Secrets Manager vs Azure Key Vault
While the current article briefly compares GCP Secret Manager to Azure Key Vault, a comprehensive comparison across all major cloud providers provides essential context for organizations making platform decisions. GCP Secret Manager focuses primarily on secrets storage with automatic encryption and regional replication, offering a streamlined approach compared to AWS Secrets Manager's broader feature set including automatic rotation for RDS databases and Lambda integration.
Azure Key Vault provides the most comprehensive solution, supporting cryptographic keys, certificates, and secrets in a unified service. However, GCP Secret Manager excels in simplicity and Google Cloud integration, particularly with services like Cloud Functions for custom rotation logic and seamless IAM integration. Cost-wise, GCP's pricing model of $0.06 per active secret version per location is competitive, especially for organizations with fewer secret versions. The choice often depends on existing cloud infrastructure, with GCP Secret Manager being optimal for Google Cloud-native environments where its tight integration with Cloud IAM and other GCP services provides operational advantages over cross-cloud solutions.
2. Creating Secrets
2.1 Create via Console
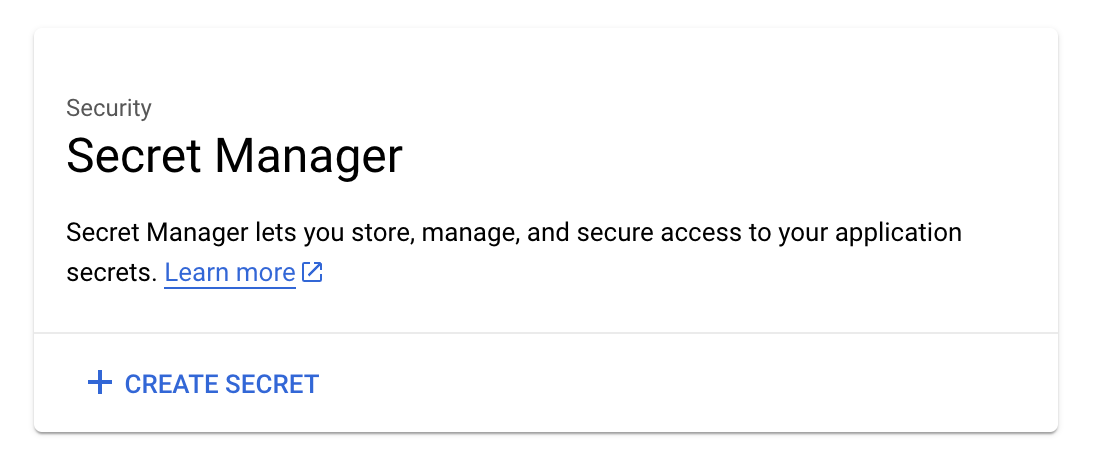
To create a secret, it's easiest to do it in the console: under Security -> Data Protection, choose "Secret Manager".
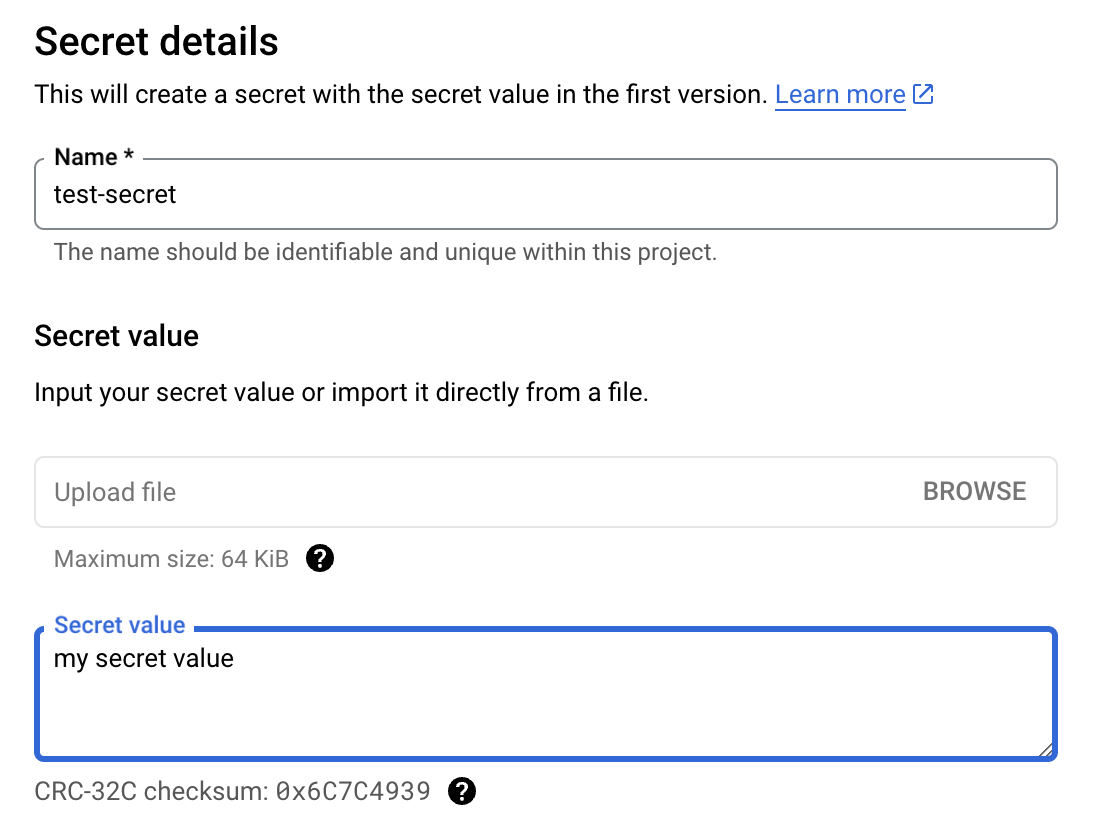
Note:If you haven't enabled the secret manager API for your project yet, do it now.You also need to make sure the roles/secretmanager.admin is enabled for the project. Go to "Roles" under "IAM & Admin", and make sure the "Secret Manager Admin" role is enabled for your project.Then, click "CREATE SECRET", put a name and value for the secret, leave other fields as default, and click "CREATE SECRET":
2.2 Create via CLI
Although creating the secret is most likely a one-time job (except rotating the value later), for hardcore CLI users, you probably prefer to do it in your command-line console, and if this is what you prefer, the easiest way is to do it in the cloud shell (alternatively, you can install the gcloud CLI locally, which is out of the scope of this tutorial).
For demonstrating purposes, today we will use the cloud shell: activate it by clicking the CLI button on the top-right corner of the web console, then execute the following command to create a secret:
$ echo -n "my secret value" | gcloud secrets create test-secret2 \
    --replication-policy="automatic" \
    --data-file=-
Created version [1] of the secret [test-secret2].
Note on thegcloud secrets createcommand:The above command creates a secret namedtest-secret2(to make it different from the previously created one via the web console), set the value from theechocommand, and set the replication policy as "automatic".In case you are wondering about the replication policy, there are two: automatic, replicated without restriction, simplest configuration and recommended for most users; and user-managed, replicated to a user-configured set of locations. To know more about secret manager locations, see the official doc here.
After creation, we can also use the CLI to list versions or describe a specific version of a secret and, for sure, access the secret value.
List versions:
$ gcloud secrets versions list test-secret2
NAME: 1
STATE: enabled
CREATED: 2023-08-11T08:59:03
DESTROYED: -
This lists all the versions of a given secret.
Describe a version:
$ gcloud secrets versions describe 1 --secret="test-secret2"
clientSpecifiedPayloadChecksum: true
createTime: '2023-08-11T08:59:03.181451Z'
etag: '"1602a1eca0488b"'
name: projects/644876091278/secrets/test-secret2/versions/1
replicationStatus:
  automatic: {}
state: ENABLED
This gives you more detail about a specific version of a secret.
Access a specific version:
$ gcloud secrets versions access 1 --secret="test-secret2"
my secret value
This outputs the value of the secret.
3. Using Secrets from a Virtual Machine
Now that we know how to create and access secrets from the web console as well as the CLI console, let's do more: getting secrets from within an app running on a virtual machine.
If you are running your apps and workload in GCP virtual machines, you can access the secret manager without using a long-lived token securely. There are a couple of GCP concepts that help to achieve this goal:
- Service account: An account, an entity, which can be bound with some roles
- Roles: Roles define what you can do and what you can not
- Assign a service account to a VM: So that the VM has the permissions for operations defined in the roles linked with the service account
- Cloud-platform access scope: By assigning this to the VM, we allow it to access most of the Cloud APIs, then grant the service account only relevant IAM roles.
If you are familiar with AWS, the whole process is a bit like IAM role + IAM policy + instance profile. If you are still confused, don't worry. Let's learn by example to get a first-hand feeling about it.
3.1 Creating a VM
Note: update all the "rational-diode-395607" parts to your project's name in all the commands in this section before running. "rational-diode-395607" is my project's name for demo purposes.
First, let's create a service account:
$ gcloud iam service-accounts create secret-manager-test
Created service account [secret-manager-test].
Next, we provide access to our project and resources by granting a role to the service account:
$ gcloud projects add-iam-policy-binding rational-diode-395607 --member="serviceAccount:secret-manager-test@rational-diode-395607.iam.gserviceaccount.com" --role=roles/secretmanager.secretAccessor
Updated IAM policy for project [rational-diode-395607].
bindings:
- members:
  - serviceAccount:service-644876091278@compute-system.iam.gserviceaccount.com
  role: roles/compute.serviceAgent
- members:
  - serviceAccount:service-644876091278@container-engine-robot.iam.gserviceaccount.com
  role: roles/container.serviceAgent
- members:
  - serviceAccount:service-644876091278@containerregistry.iam.gserviceaccount.com
  role: roles/containerregistry.ServiceAgent
- members:
  - serviceAccount:644876091278-compute@developer.gserviceaccount.com
  - serviceAccount:644876091278@cloudservices.gserviceaccount.com
  role: roles/editor
- members:
  - serviceAccount:secret-manager-test@rational-diode-395607.iam.gserviceaccount.com
  role: roles/iam.serviceAccountUser
- members:
  - user:guotiexin@gmail.com
  role: roles/owner
- members:
  - serviceAccount:service-644876091278@gcp-sa-pubsub.iam.gserviceaccount.com
  role: roles/pubsub.serviceAgent
- members:
  - serviceAccount:secret-manager-test@rational-diode-395607.iam.gserviceaccount.com
  role: roles/secretmanager.secretAccessor
etag: BwYCopWbGGc=
version: 1
From the parameters, we can infer that now the secret-manager-test service account has the permissions defined in the roles/secretmanager.secretAccessor role. And since we didn't create any role, we can also safely assume that this role is GCP-managed.
Next, we grant our own Google account a role so that we can use the service account's roles and attach the service account to other resources (we will need to attach the service account to a VM, remember?). Don't forget to change the member email to your own Google account email.
$ gcloud iam service-accounts add-iam-policy-binding secret-manager-test@rational-diode-395607.iam.gserviceaccount.com --member="user:guotiexin@gmail.com" --role=roles/iam.serviceAccountUser
Updated IAM policy for serviceAccount [secret-manager-test@rational-diode-395607.iam.gserviceaccount.com].
bindings:
- members:
  - user:guotiexin@gmail.com
  role: roles/iam.serviceAccountUser
etag: BwYCoiFDBos=
version: 1
Finally, let's create a VM using the service account:
$ gcloud compute instances create secret-manager-test-vm --zone=asia-east1-a --service-account=secret-manager-test@rational-diode-395607.iam.gserviceaccount.com --scopes "https://www.googleapis.com/auth/cloud-platform"
Created [https://www.googleapis.com/compute/v1/projects/rational-diode-395607/zones/asia-east1-a/instances/secret-manager-test-vm].
NAME: secret-manager-test-vm
ZONE: asia-east1-a
MACHINE_TYPE: n1-standard-1
PREEMPTIBLE:
INTERNAL_IP: 10.140.0.5
EXTERNAL_IP: 35.194.252.173
STATUS: RUNNING
The --scopes "https://www.googleapis.com/auth/cloud-platform parameter allows the VM access to most of the Cloud APIs and grants the service account only relevant IAM roles.
3.2 Setup a Python Dev ENV
In the GCP web console, go to the newly created VM, and there are a couple of options to connect to the VM. Choose your favorite option (the simplest way is to do it in the cloud shell), SSH into the VM, and let's set up a Python development environment by running the following commands:
sudo apt update && sudo apt install -y python3 python3-dev python3-venv
wget https://bootstrap.pypa.io/get-pip.py && sudo python3 get-pip.py
3.3 Creating an App to Access Secrets in the Secret Manager
The app will require some dependencies:
- google-cloud-secret-manager: SDK for accessing secret manager
- google-crc32c: validating checksum
We can create a file named requirements.txt with the following content:
google-cloud-secret-manager==2.16.1
google-crc32c==1.5.0
Then install these dependencies by running:
pip3 install -r requirements.txt
OK, now the dependencies are sorted out, and we can continue working on our sample app to read secrets. Create a file named main.py with the following content:
from google.cloud import secretmanager
import google_crc32c


project_id = "644876091278"
# project_id = "rational-diode-395607"
secret_id = "test-secret2"
version_id = 1

client = secretmanager.SecretManagerServiceClient()

name = f"projects/{project_id}/secrets/{secret_id}/versions/{version_id}"

response = client.access_secret_version(request={"name": name})

# Verify payload checksum.
crc32c = google_crc32c.Checksum()
crc32c.update(response.payload.data)
if response.payload.data_crc32c != int(crc32c.hexdigest(), 16):
    print("Data corruption detected.")

# Print the secret payload.
payload = response.payload.data.decode("UTF-8")
print(f"Plaintext: {payload}")
This piece of little program accesses the secret manager, reads the value, checks the payload's checksum, and prints the value of the secret to show that the value is successfully retrieved. Note that for the project_id, we can either use the project string slug name or the numeric ID.
If everything works smoothly, when you run it, you can get the following output:
$ python3 main.py
Plaintext: my secret value
3.4 Using Secrets from Kubernetes Clusters
In the cloud-native era, we likely want to deploy our applications in a containerized platform, say, Kubernetes. To follow the 12-factor app principles, we probably don't want to use the cloud provider's SDK directly in our apps, but rather, we want to be able to have a way to sync secrets from secret managers to ENV vars for the containerized app.
There are a few options to do this, and in the previous tutorial for Azure Key Vault, we showed an option to use the secrets store CSI driver to do so. Please refer to that part of the tutorial if you want to set up the same for the GCP secret manager and Kubernetes. Due to space limitations, we will not elaborate here. The specific differences are only slight on the service account and secret provider class.
Advanced IAM Patterns for Secret Manager Security
Beyond basic GCP Secret Manager access control, implementing sophisticated IAM patterns ensures secrets remain protected according to Zero Trust principles. The principle of least privilege should be enforced through custom IAM roles that separate secret creation, management, and access permissions. Create dedicated service accounts for different application tiers, with production environments using highly restricted roles that only allow access to specific secret versions.
Implement conditional IAM policies that restrict secret access based on request context, such as source IP ranges or time-based constraints. For GCP Secret Manager Kubernetes integration, use Workload Identity to bind Kubernetes service accounts to Google Cloud service accounts, eliminating the need for exported service account keys. This approach provides automatic credential rotation and reduces the attack surface.
Consider implementing approval workflows for sensitive secrets using Cloud Functions and Pub/Sub, where secret access requests trigger approval processes before granting temporary access. Monitor all secret access through Cloud Audit Logs and implement alerting for unusual access patterns, such as access from unexpected geographic locations or during off-hours, to detect potential security incidents early.
4. Using Secrets from CI Pipelines
Although secrets are used by apps extensively, there is another major part of your Software Development Life Cycle (SDLC) that requires access to secrets: your Continuous Integration workflows and pipelines. By definition, CI does something automatically, and most likely, it needs access to some other systems, thus requiring access to secrets. Next, let's do a quick demo using GitHub Actions to use secrets from GCP Secret Manager in a workflow.
4.1 Authentication
The workflow needs to be authenticated in order to access GCP resources, and there are two ways to do so:
- A private key for a service account token
- OIDC/workload identity federation
For demonstration purposes, we will use the first approach. To create a service account key, run:
gcloud iam service-accounts keys create ~/sa-private-key.json \
    --iam-account=secret-manager-test@rational-diode-395607.iam.gserviceaccount.com
This command will write the output to the specified JSON file. Save the whole content of the file, it will be used later.
In my other blog, I mentioned why using long-lived credentials stored in your CI system is not the best idea, and I showed how to use OIDC to authenticate your CI workflows without a long-lived token securely. If you are interested, please read it, and the same approach can be used to authenticate GitHub Actions with GCP. Also, refer to the official doc here.
4.2 Creating the Workflow
First, create a GitHub Secret named GOOGLE_CREDENTIALS with the contents being the whole JSON file from the previous section. If you are not familiar with GitHub Actions and repository secrets, refer to the official doc here.
Then, let's create the workflow to authenticate with GCP, read secrets, and use them:
name: GCP
on:
# Allows you to run this workflow manually from the Actions tab
workflow_dispatch:
jobs:
get-secret:
permissions:
contents: "read"
id-token: "write"
runs-on: ubuntu-latest
steps:
- id: "auth"
name: "Authenticate to Google Cloud"
uses: "google-github-actions/auth@v1"
with:
credentials_json: "${{ secrets.GOOGLE_CREDENTIALS }}"
- id: "get-secret"
uses: "google-github-actions/get-secretmanager-secrets@v1"
with:
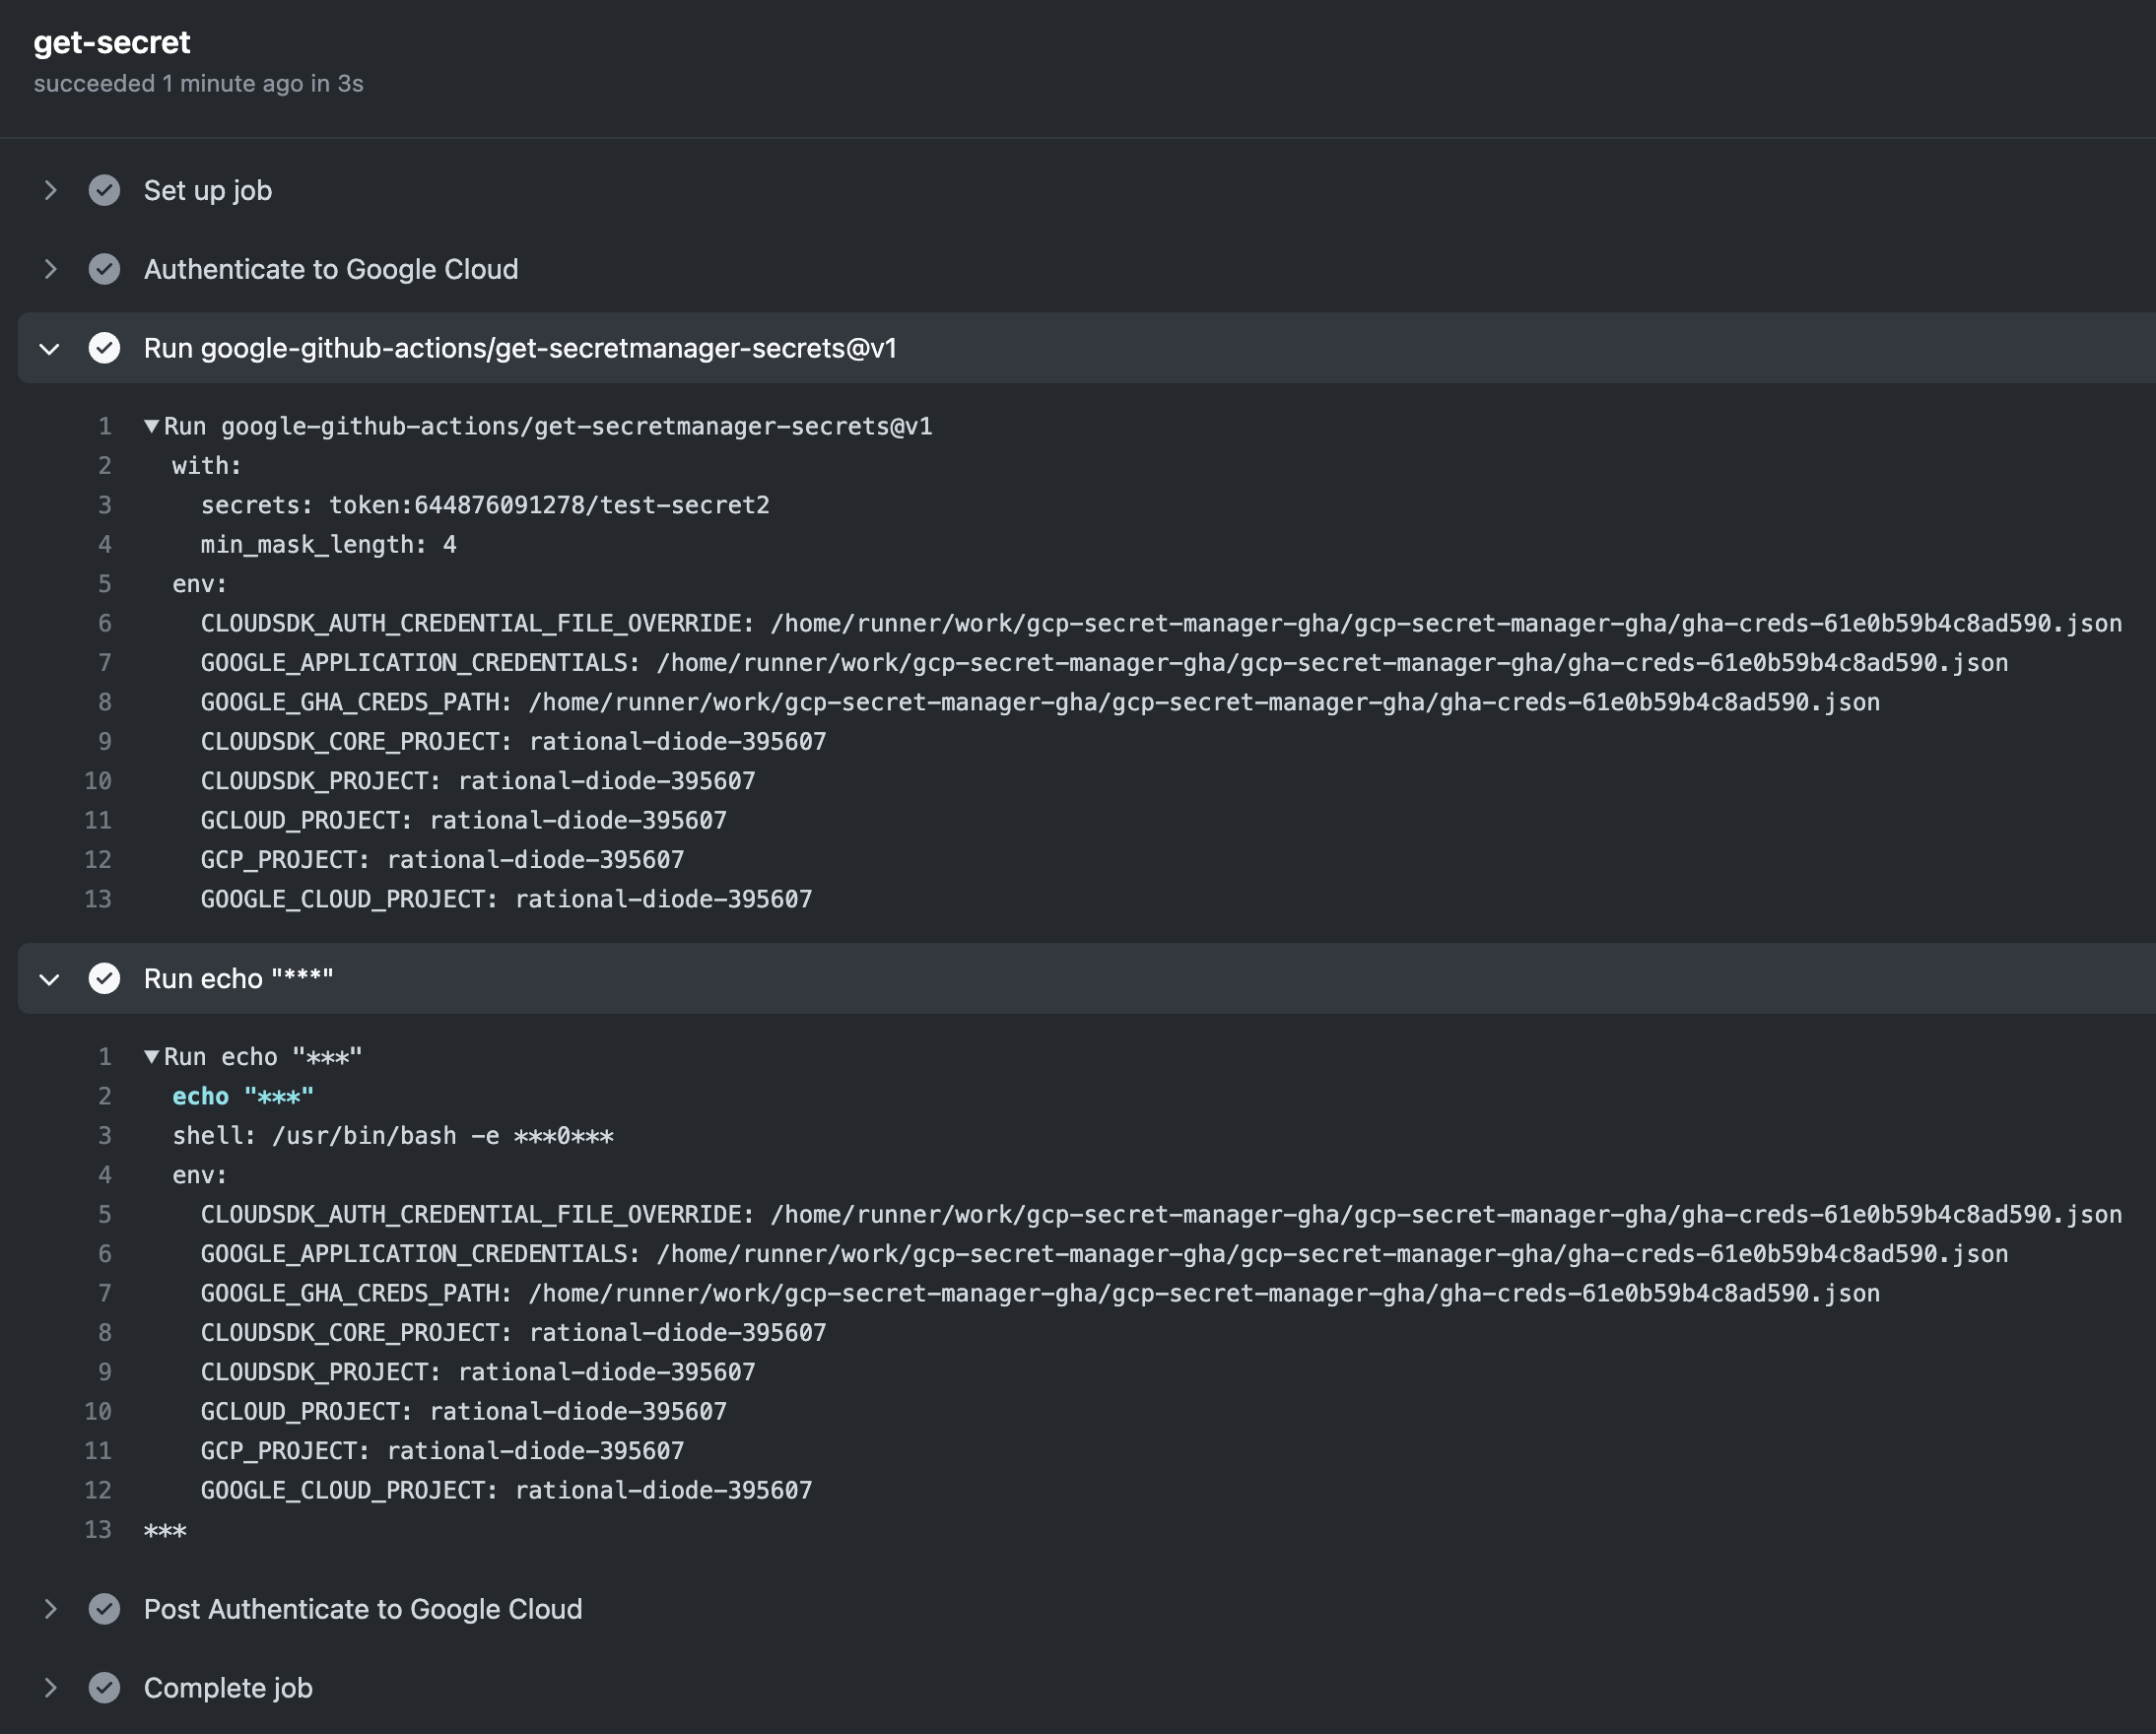
secrets: |-
token:644876091278/test-secret2
# Example of using the output
- id: "use-secret"
run: |
echo "${{ steps.get-secret.outputs.token }}"
For your convenience, I have put the example above here.
We can trigger this workflow manually, and if everything is configured correctly, you will see a successful result:
Secret Rotation Best Practices with GCP Secret Manager
Implementing robust GCP Secret Manager rotation strategies is critical for maintaining security posture and compliance requirements. GCP Secret Manager's versioning system enables zero-downtime rotation by allowing applications to pin to specific versions while new versions are created and validated. The recommended approach involves using Cloud Functions triggered by Cloud Scheduler to automate rotation workflows, ensuring secrets are updated according to organizational policies.
For database credentials, implement a dual-secret strategy where the new secret is created and validated before the old version is disabled. This prevents service interruptions during rotation cycles. GCP Secret Manager API calls should include proper error handling and retry logic to manage temporary failures during rotation processes. Monitor rotation events through Cloud Audit Logs to ensure compliance and detect anomalies.
Applications should be designed to gracefully handle secret updates by implementing refresh mechanisms that check for new versions periodically or respond to Pub/Sub notifications. For high-availability scenarios, consider implementing circuit breaker patterns that can fall back to cached secrets temporarily if Secret Manager becomes unavailable during critical operations.
5. Teardown
To tear down everything we created in this tutorial, we can delete the VM, secrets, and service account (in IAM).
Alternatively, we can also disable billing and shut down the project if the project you are using is dedicated to this tutorial only:
- In the Google Cloud console, go to the Account Management page for the Cloud Billing account.
- Go to Account Management in Cloud Billing
Disable billing for the project, then go to project settings and shut it down.
We want to disable billing first before shutting down a project because projects may continue to incur charges for some time post-shutdown. To avoid unexpected charges, it's best to disable billing for the project before shutting it down.
6. Cheat Sheet
For your convenience, I summarized the commands we used in this tutorial for future quick reference.
6.1 Secrets CRUD using CLI
- Create:
echo -n "my secret value" | gcloud secrets create secret-name --data-file=- - List versions:
gcloud secrets versions list secret-name - Describe a version:
gcloud secrets versions describe 1 --secret="secret-name" - Access a secret:
gcloud secrets versions access 1 --secret="secret-name"
6.2 Granting VM access to Secret Manager
# create service account
gcloud iam service-accounts create SERVICE_ACCOUNT_NAME

# provide access to a project and resources by granting a role to the service account
gcloud projects add-iam-policy-binding PROJECT_NAME --member="serviceAccount:SERVICE_ACCOUNT_NAME@PROJECT_NAME.iam.gserviceaccount.com" --role=roles/secretmanager.secretAccessor

# grant our own Google account a role so that we can attach the service account to VMs
gcloud iam service-accounts add-iam-policy-binding SERVICE_ACCOUNT_NAME@PROJECT_NAME.iam.gserviceaccount.com --member="user:YOUR_GOOGLE_ACCOUNT_EMAIL@gmail.com" --role=roles/iam.serviceAccountUser

# create VM
gcloud compute instances create VM_NAME --zone=ZONE_NAME --service-account=SERVICE_ACCOUNT_NAME@PROJECT_NAME.iam.gserviceaccount.com --scopes "https://www.googleapis.com/auth/cloud-platform"
6.3 Access Secret Manager from GitHub Actions
jobs:
  get-secret:
    permissions:
      contents: "read"
      id-token: "write"
    steps:
      - id: "auth"
        name: "Authenticate to Google Cloud"
        uses: "google-github-actions/auth@v1"
        with:
          credentials_json: "${{ secrets.GOOGLE_CREDENTIALS }}"
      - id: "get-secret"
        uses: "google-github-actions/get-secretmanager-secrets@v1"
        with:
          secrets: |-
            token:PROJECT_ID/SECRET_NAME
      - id: "use-secret"
        run: |
          echo "${{ steps.get-secret.outputs.token }}"
Summary
In this tutorial, we did a quick introduction to GCP and its secret management offering - Secret Manager and then demonstrated how to access secrets securely from within a VM and CI pipelines. Due to space limits, we didn't touch secrets usage from Kubernetes clusters; if you want to achieve the same goal in GCP, refer to my previous blog on Azure Key Vault tutorial; the same principles apply.
In my next tutorial, we will cover AWS's secret management offering: AWS Secrets Manager, and we will do some detailed tutorials on both using secrets in a VM and Kubernetes clusters with the external secrets operator rather than secrets store CSI driver.
If you are interested, please subscribe and stay tuned. See you in the next piece!
FAQs
How does GCP Secret Manager differ from AWS Secrets Manager and Azure Key Vault?
GCP Secret Manager focuses on secure secret storage with automatic encryption, regional replication, and deep Google Cloud integration. AWS Secrets Manager provides a broader ecosystem with features like RDS credential rotation and Lambda-based automation. Azure Key Vault unifies secrets, keys, and certificates in one platform. GCP Secret Manager is ideal for organizations centered on Google Cloud due to its simplicity and native IAM integration.
What are best practices for secret rotation in GCP Secret Manager?
Use versioning for zero-downtime rotations, automate rotation workflows via Cloud Functions triggered by Cloud Scheduler, and implement dual-secret strategies for seamless transitions. Monitor rotation activity with Cloud Audit Logs and ensure applications can reload updated secrets using polling or Pub/Sub notifications.
How can I securely grant VM or CI pipeline access to secrets in GCP Secret Manager?
Assign dedicated service accounts that include the roles/secretmanager.secretAccessor permission. Attach the service account to VMs at creation time. For CI/CD, use short-lived credentials or OIDC federation instead of static keys. Restrict access to specific secrets and versions to maintain least privilege.
How does GCP Secret Manager integrate with Kubernetes workloads?
Kubernetes workloads can use Workload Identity to map Kubernetes service accounts to Google Cloud service accounts, removing the need for static credentials. Secrets can be injected into pods via CSI drivers or External Secrets Operator, enabling secure, automatic rotation and fine-grained IAM enforcement.
What advanced IAM patterns can enhance security for GCP Secret Manager?
Use custom IAM roles to segregate duties, apply conditional IAM policies for contextual restrictions, and create approval workflows using Cloud Functions and Pub/Sub for sensitive secrets. Continuously monitor access through Cloud Audit Logs and configure anomaly detection alerts to spot unauthorized activities.
What are the cost considerations when using GCP Secret Manager?
GCP Secret Manager charges $0.06 per active secret version per location. Costs grow with additional versions and replication regions. Regularly prune obsolete secret versions to manage spending and simplify compliance management.
How can I monitor and audit access to secrets in GCP Secret Manager?
GCP automatically logs all secret access and administrative operations via Cloud Audit Logs. Forward these logs to your SIEM for monitoring and compliance. Configure alerting for suspicious access patterns, such as requests from unusual geographic locations or outside expected time windows.