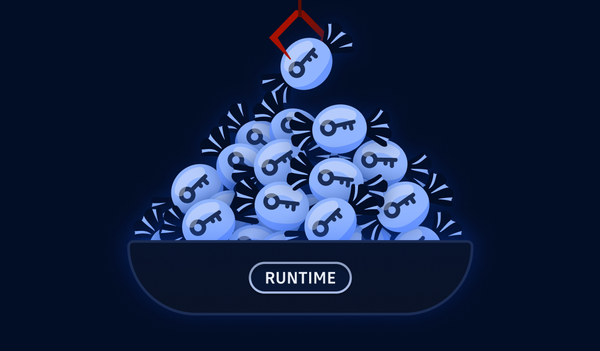
GitGuardian has partnered with CyberArk to offer a unique solution for security teams to detect secrets leaks and manage their remediation.
This innovative solution allows you to connect GitGuardian Secrets Detection with CyberArk, automatically addressing leaked secrets detected by GitGuardian in various key scenarios.
- Secrets, known or unknown, found inside your repositories
- Secrets, known or unknown, exposed publicly on GitHub.com
Known secrets are secrets that already exist in your Conjur safe and which will need to be rotated or revoked, whereas unknown secrets should be created there in the first place.
Learn more about the use cases that this joint solution solves:
 Ziad Ghalleb
Most of the heavy lifting will be performed by the open-source Go applications Brimstone and Hailstone, developed by CyberArk and GitGuardian.
The first part of the tutorial will cover their installation and deployment process, while the second part will guide you through setting up the integration and verifying that it works as expected.
Introducing Brimstone and Hailstone
Brimstone is a server application that acts as a proxy between GitGuardian and CyberArk Conjur. Its purpose is to handle GitGuardian events and take action to either rotate known secrets or create new ones in a designated CyberArk safe. Importantly, Brimstone only knows the cryptographic hashes of secrets stored in CyberArk, not the secrets themselves.
Hailstone is a CLI (command-line interface) that synchronizes CyberArk accounts with Brimstone. It computes hashes of secrets stored in CyberArk and sends those hashes to Brimstone, constantly updating Brimstone on the secrets managed by CyberArk.
The hashing algorithm used is similar to the one used by HasMySecretLeaked (HMSL). The primary reason for reusing this hashing method is to ensure a secure way of matching secrets between GitGuardian and CyberArk without ever storing or sending unencrypted secrets.
When GitGuardian detects a new leak within an organization's internal perimeter (such as code repositories, Slack messages, Jira tickets ...), it notifies Brimstone, which then determines the appropriate action to take. If the hash of the leaked secret matches a secret stored in CyberArk, Brimstone will notify Conjur administrators to trigger a remediation process. If the leaked secret is not yet known, Brimstone will add it to a designated CyberArk safe for secure storage.
In addition, Brimstone will periodically compare the hashes of all secrets managed by CyberArk against HMSL (GitHub's public leak database). This allows it to check if any of the stored secrets have ever been publicly exposed on GitHub, enabling proactive remediation.
Prerequisite
Tools
To install Brimstone and follow this tutorial, you will need the following:
- A CyberArk Conjur PAM account with access to safes
- A GitGuardian account with owner/manager privileges
- A working Docker installation
Setup
- Clone the Brimstone/Hailstone repository from the official source:
git clone https://github.com/conjurdemos/cyberark-gitguardian-hmsl-remediation-integration-service- Download the additional scripts required for the deployment process (.env file, Dockerfile and Docker Compose files, build script) in the working directory and rename the example environment files:
# Move to your working directory
cd cyberark-gitguardian-hmsl-remediation-integration-service/

# Copy all additional scripts and rename environment variable files
curl --silent --show-error --location https://gist.github.com/irgeek/e56d0509a0b77129fdda0faae9fe4b1f/archive/main.tar.gz | tar -vzx --strip-components=1
cp .env.example .env- Configure your environment variable. Edit the files according to your configuration.
Here’s what these variables refer to in .env. For this tutorial, we'll use PostgreSQL:
- ID_TENANT_URL: CyberArk Privileged Access Manager (PAM) ID Tenant URL
- PCLOUD_URL: CyberArk Privilege Cloud URL
- SAFE_NAME: Name of the CyberArk safe where new secrets are saved. Important: safe must already exist, and the PAM user needs to be able to add and modify accounts.
- PAM_USER: CyberArk username
- PAM_PASS: CyberArk password
- GG_API_TOKEN: GitGuardian API Token
- GG_WEBHOOK_TOKEN: Signature token to generate, needed when setting up the integration
- BRIMSTONE_URL: URL of the Brimstone instance
- BRIMSTONE_API_KEY: API key to authenticate to Brimstone service, set when invoking Brimstone
- POSTGRESQL_DATABASE: URL of the database used by Brimstone, sqlite:// and postgres:// are supported
- POSTGRESQL_USERNAME: PostgreSQL username
- POSTGRESQL_PASSWORD: PostgreSQL password
With that, you should now be ready to install the applications.
Part 1 - Building the Docker Images
This Dockerfile is used to build the two binaries brimstone and hailstone, and then create an image including the binaries.
FROM golang:alpine as build

RUN apk add --no-cache \
    ca-certificates \
    bash

ENV BINDIR=/usr/local/bin

WORKDIR /build

COPY VERSION go.mod go.sum ./
COPY cmd ./cmd
COPY pkg ./pkg

RUN go mod download

COPY build.sh ./

RUN ./build.sh brimstone "${BINDIR}"
RUN ./build.sh hailstone "${BINDIR}"

FROM alpine:latest

RUN apk add --no-cache \
    ca-certificates \
    curl \
    bash

COPY --from=build /usr/local/bin /usr/local/bin

WORKDIR /root
Dockerfile
Here's a compose.yaml file to load the environment variables, build the binaries, and launch a Brimstone server with a PostgreSQL database attached.
name: brimstone-demo
services:
  brimstone:
    build: .
    env_file:
      - .env
    environment:
      - DB_URL=postgres:///${POSTGRESQL_DATABASE}?host=${POSTGRESQL_HOST:-/tmp}&user=${POSTGRESQL_USERNAME}&password=${POSTGRESQL_PASSWORD}&sslmode=${POSTGRES_SSLMODE:-require}&timezone=${POSTGRES_TIMEZONE:-utc}
    command: /usr/local/bin/brimstone
    restart: always
    volumes:
      - type: volume
        source: tmp_data
        target: /tmp
    ports:
      - 9191:9191
    depends_on:
      postgres:
        condition: service_healthy
  postgres:
    image: docker.io/bitnami/postgresql:16.2.0-debian-12-r10
    healthcheck:
      test: ["CMD", "pg_isready", "-U", "postgres"]
      interval: 10s
      timeout: 5s
      retries: 5
    env_file:
      - .env
    restart: always
    volumes:
      - type: volume
        source: tmp_data
        target: /tmp
      - type: volume
        source: db_data
        target: /var/lib/postgresql/data
      - type: tmpfs
        target: /dev/shm
        tmpfs:
          size: 268435456
volumes:
  tmp_data:
  db_data:
The containers are configured with environment variables, volume mounts, and restart policies.
Part 2 - Running the servers
You should be able to run the containers by executing in the working directory:
docker compose up -dOnce the applications are built, it's essential to ensure they run seamlessly.
- Brimstone must remain operational to receive webhooks and handle incoming requests.
- Hailstone should be run periodically to manage secrets, calculate hashes, and synchronize data with Brimstone. However, since Docker Compose doesn’t support cron jobs, you should configure a scheduler service to run it periodically.
To check if the applications are running correctly, you can use the following:
docker compose ps
docker compose logs brimstone
As Brimstone is designed to be a long-running task, we suggest deploying it in a managed container environment in the cloud once you're comfortable with the installation process.
Part 3 - Set the integration
Once your Brimstone and Hailstone servers are up and running, it’s time to configure the integration in GitGuardian.
On your GitGuardian dashboard, go to Integrations and scroll to the Secrets manager category in the Destinations section.
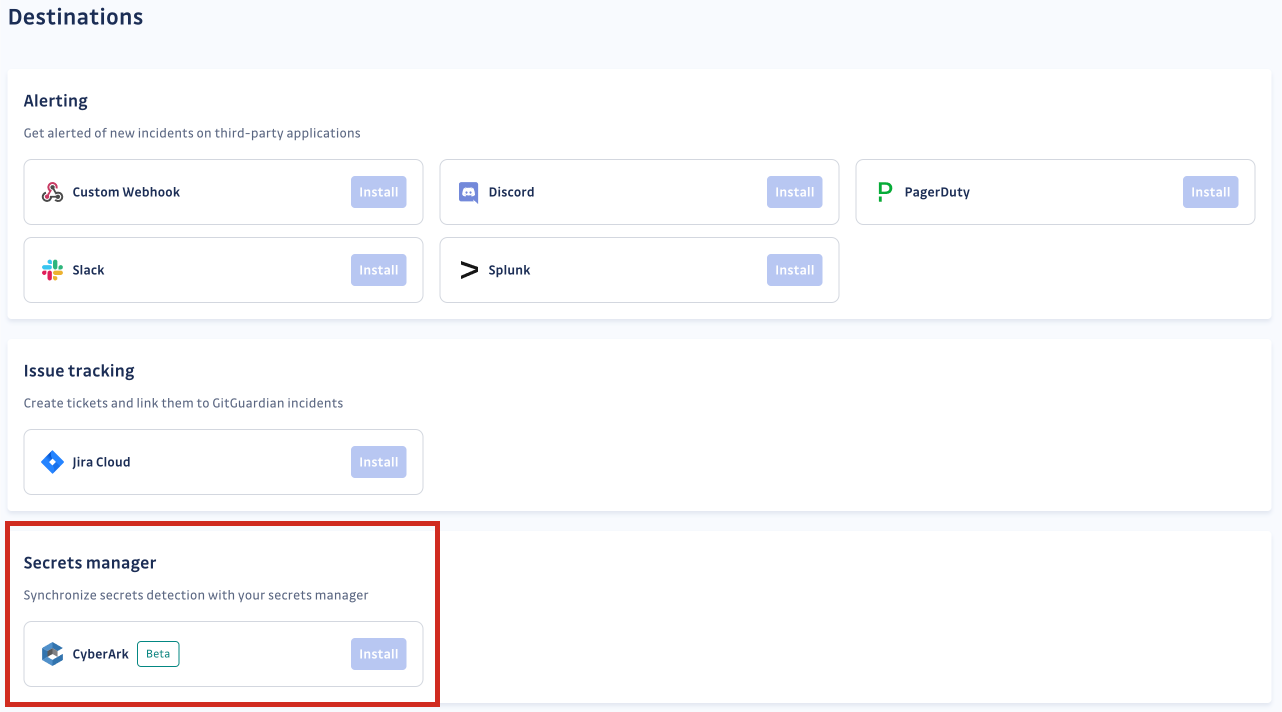
Click Install next to CyberArk. Then, configure the integration.
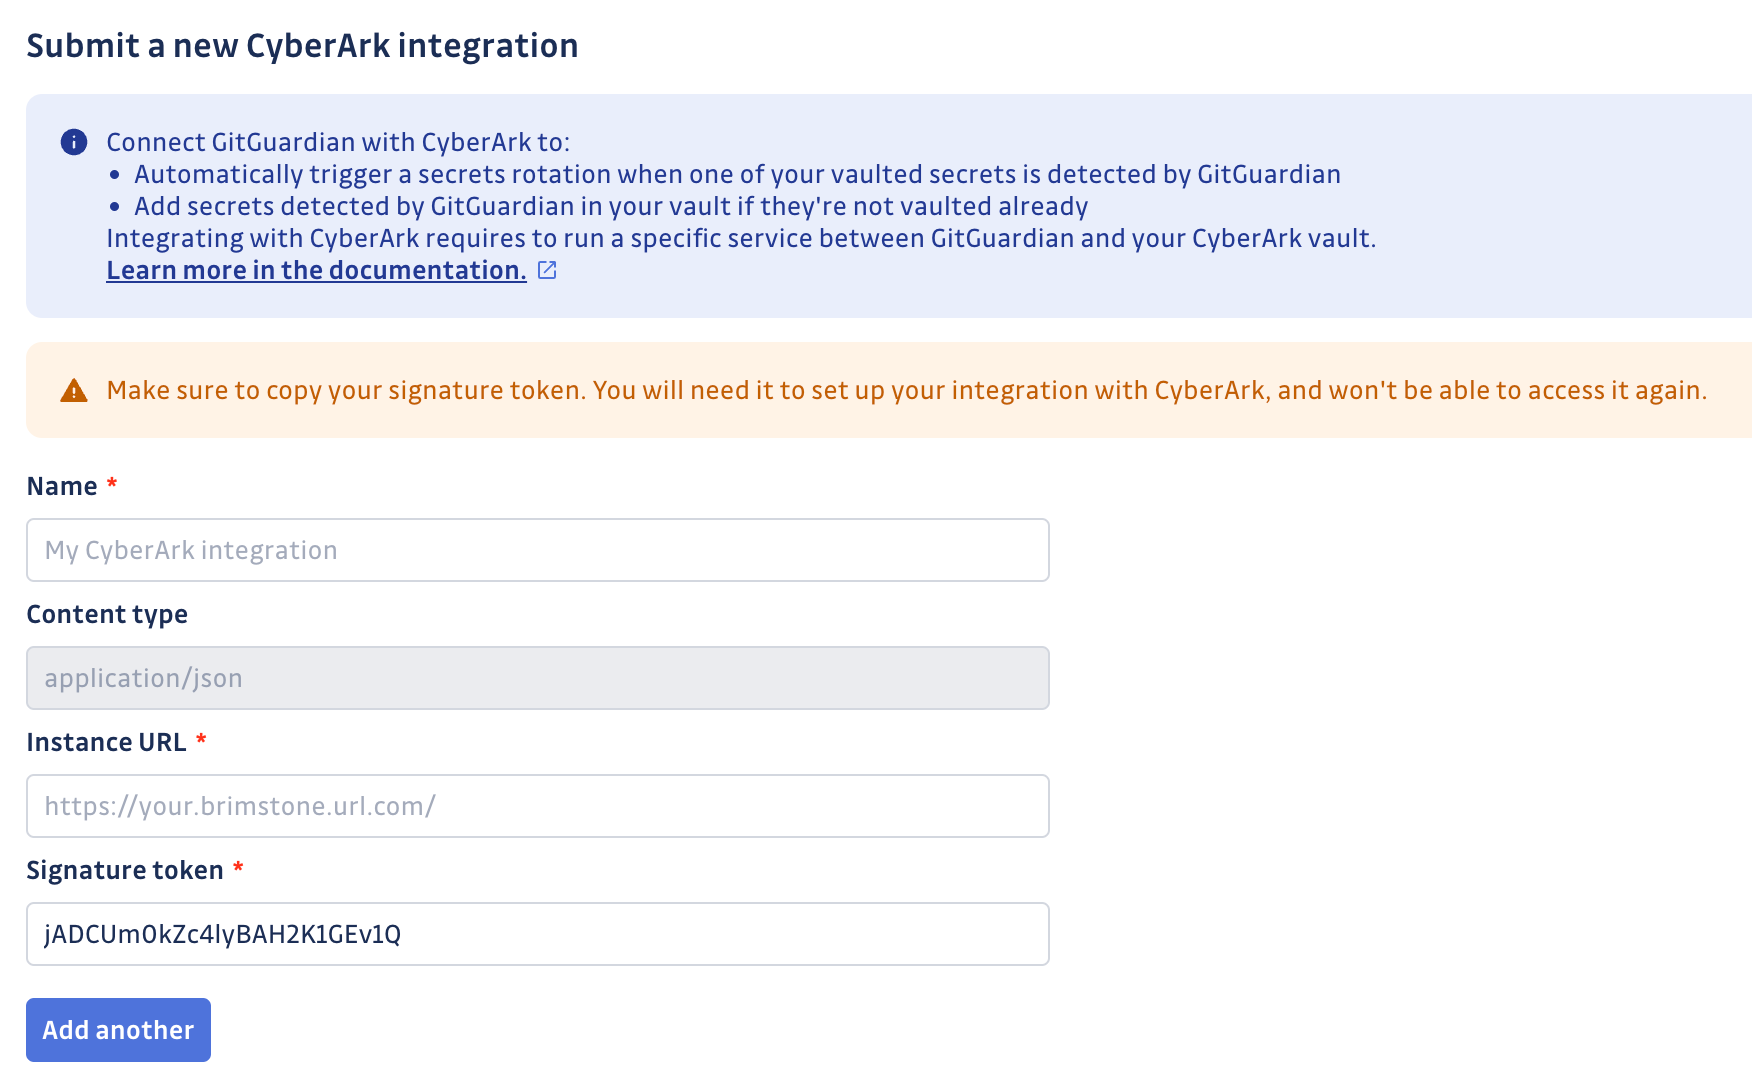
Choose a name for your integration, add the URL where Brimstone is deployed, and input the same signature token as in your environment variables. Then submit your integration.
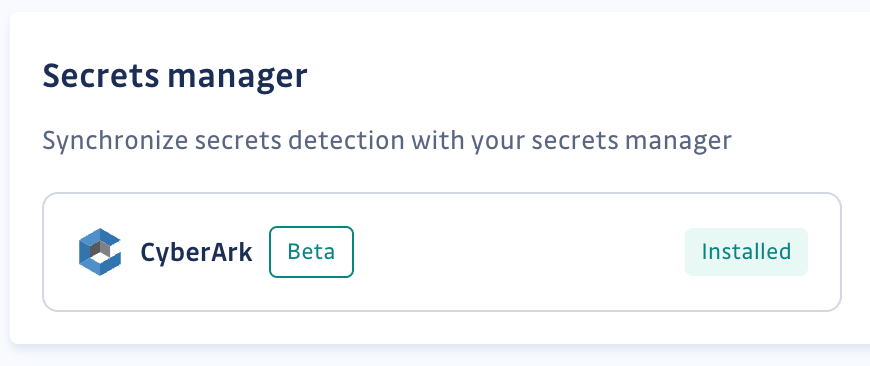
You’re all set!
Part 4 - Let’s test it
Let's test if the integration is working as expected. We'll use the example of a secret that has been leaked within the company's internal network.
We intentionally leak a dummy secret on a repository that GitGuardian is monitoring.
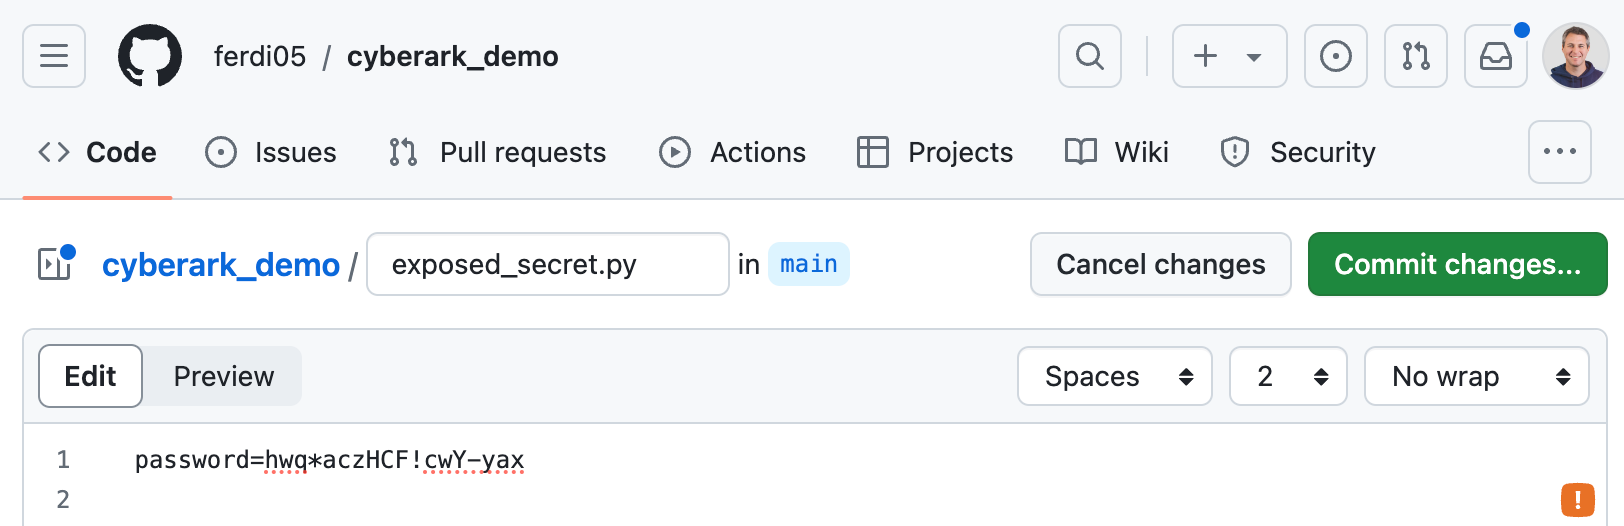
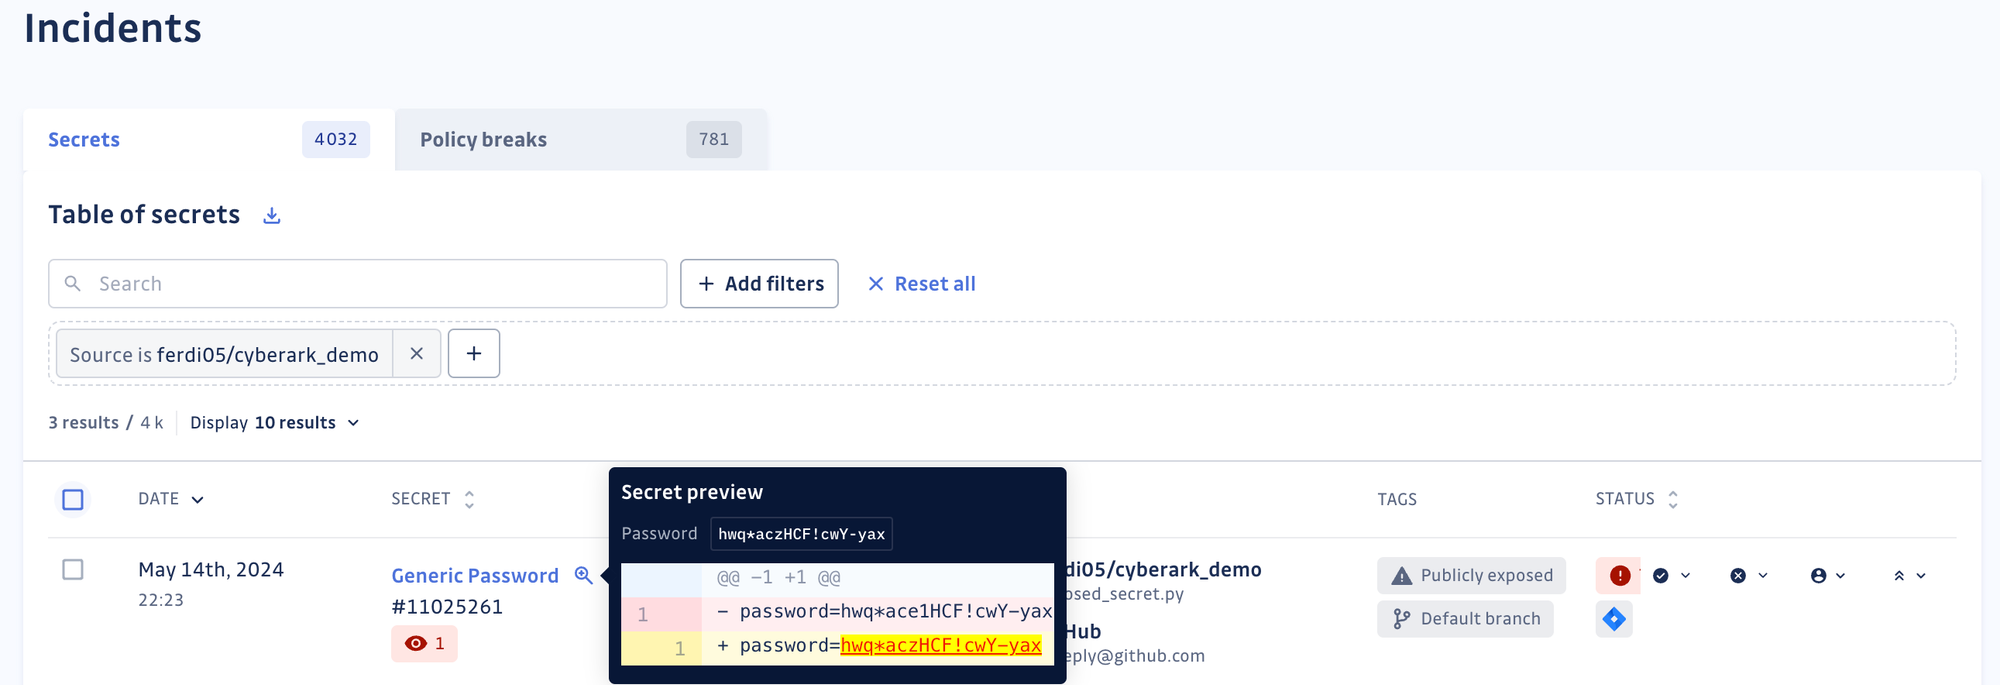
Once we commit the secret, GitGuardian should immediately raise an incident.
There is nothing new yet; this behavior is exactly what you would expect from GitGuardian.
After the incident has been raised, check your Pending safe in CyberArk, and you should see a new account with a link to the GitGuardian incident dashboard.
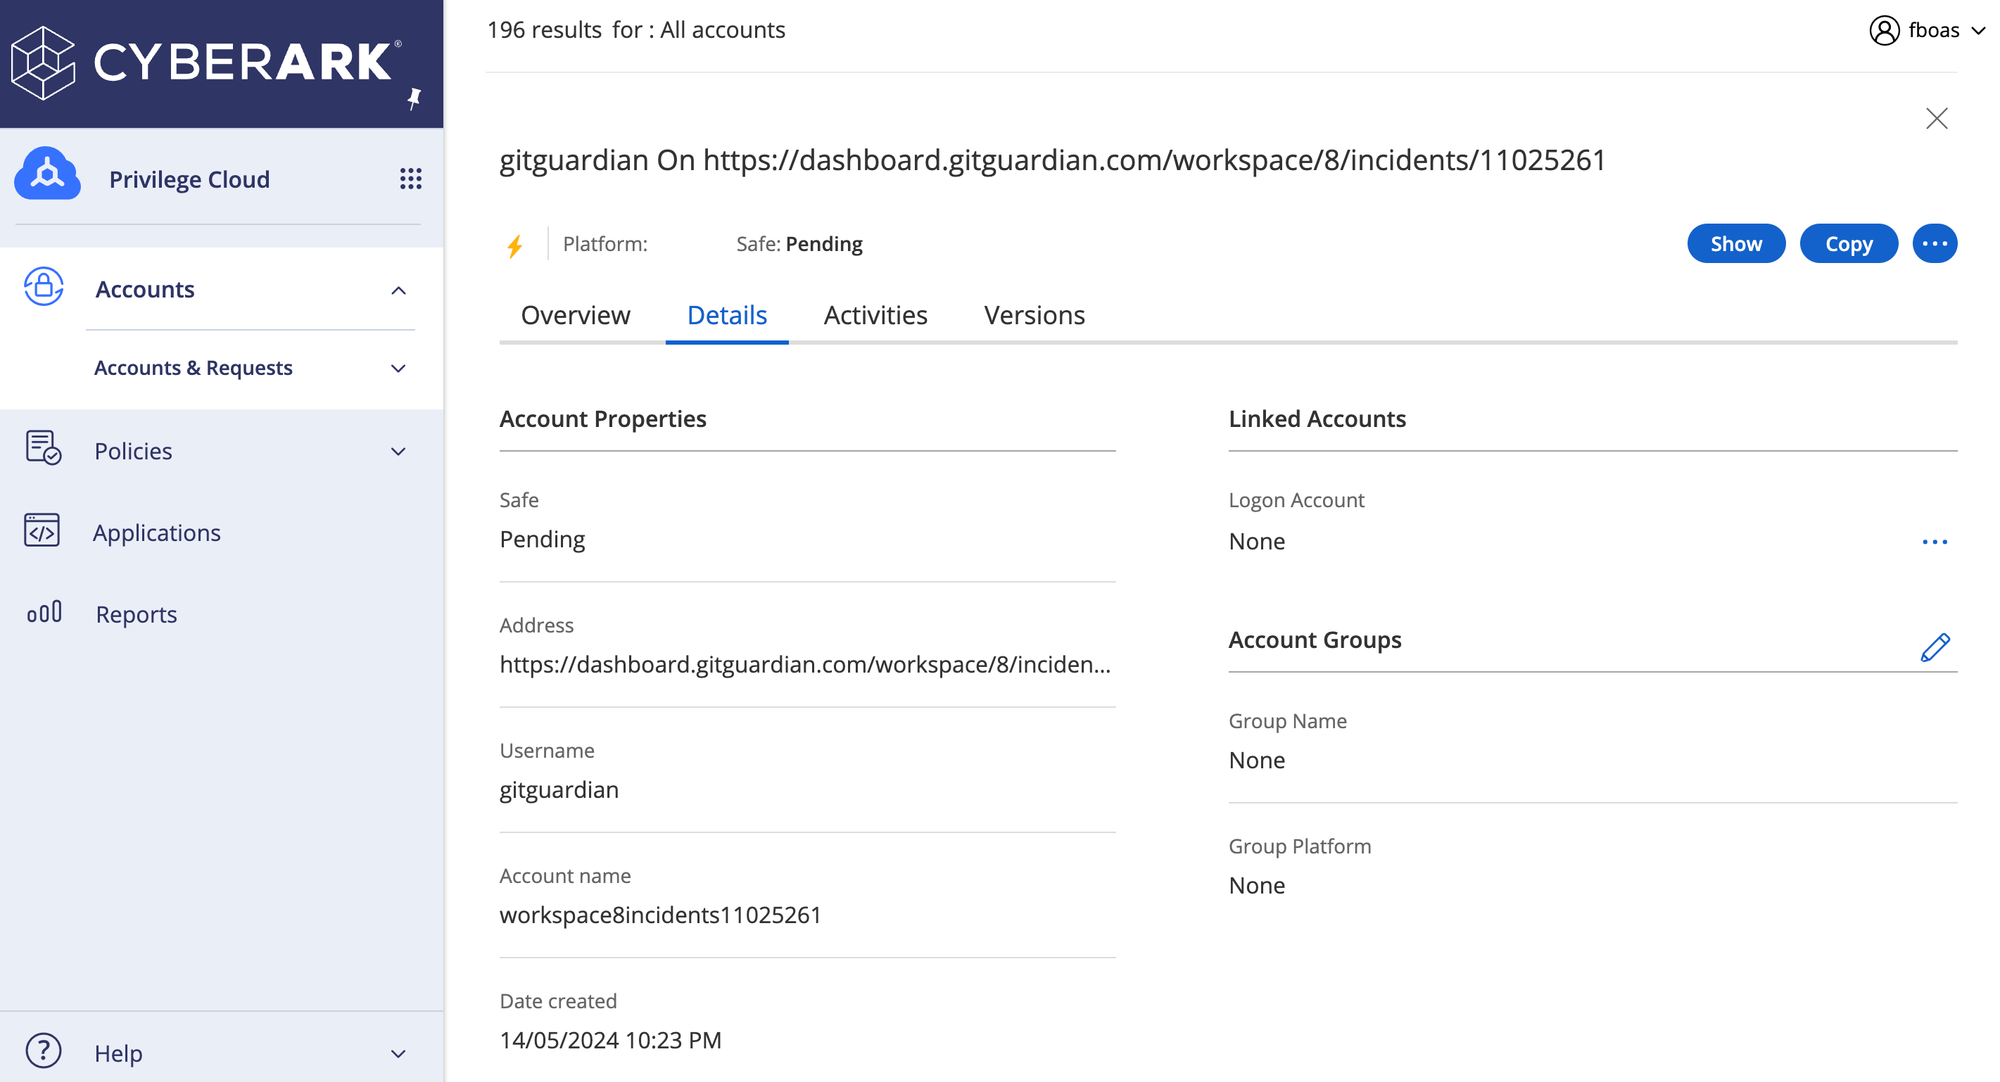
This indicates that Brimstone has correctly been notified that GitGuardian has caught a new, unknown secret and has taken action to create a new account in your CyberArk Pending safe. To fix the issue, you will need to revoke the secret and then rotate it by giving it a new value stored in your safe.

The next step
After configuring the integration, you should perform initial scans on your internal and external perimeters. You may receive notifications for some of the secrets stored in Conjur that have been exposed. Remember, the Secrets Sprawl is getting worse, but we're fighting it every day. It is now essential to consider revoking or rotating those exposed secrets from Conjur.
You can check our documentation for any additional technical information on the CyberArk integration.