
Today we are going to run through step by step how to create your own honeytokens using entirely open-source tools. With this method, you can create 1 - 5,000 tokens that you can manage using entirely your own infrastructure. To complete this tutorial you will need an AWS account and create a terraform backend, but don’t worry, even if you have no experience with these tools this tutorial will walk through each step.
What are honeytokens or canary tokens? Both are different names for essentially the same thing. You can find a much more detailed description in this blog post, but as a refresher, honeytokens are secrets (like AWS API keys, or other credentials) that are left in your infrastructure to tempt attackers to try and exploit them. Once an attacker uses a honeytoken, it sends an alert and this lets you know you have an intruder in your systems.
Enough about that, let's get started. To make this tutorial accessible to everyone, I am going to explain each step including creating an AWS user with the correct permissions and setting up a slack webhook for notifications. Advanced users may wish to skim over these steps if they are experienced in using these tools.
You may also find it useful to follow along using the video below
Step 1: Create an AWS user account with the correct permissions
When creating honeytokens I always recommend creating a fresh new AWS user to handle these. This way you can restrict scope easily and keep it separate from your everyday workings. If you have never used AWS here are some steps to create them.
If you are familiar with these steps you can skip down to the permissions JSON file.
1. 1 log in to your AWS account or create a new one
If you are brand new to AWS you can create an account here, you can use other cloud providers for this but will require a lot of modifications so today we will stick with AWS.
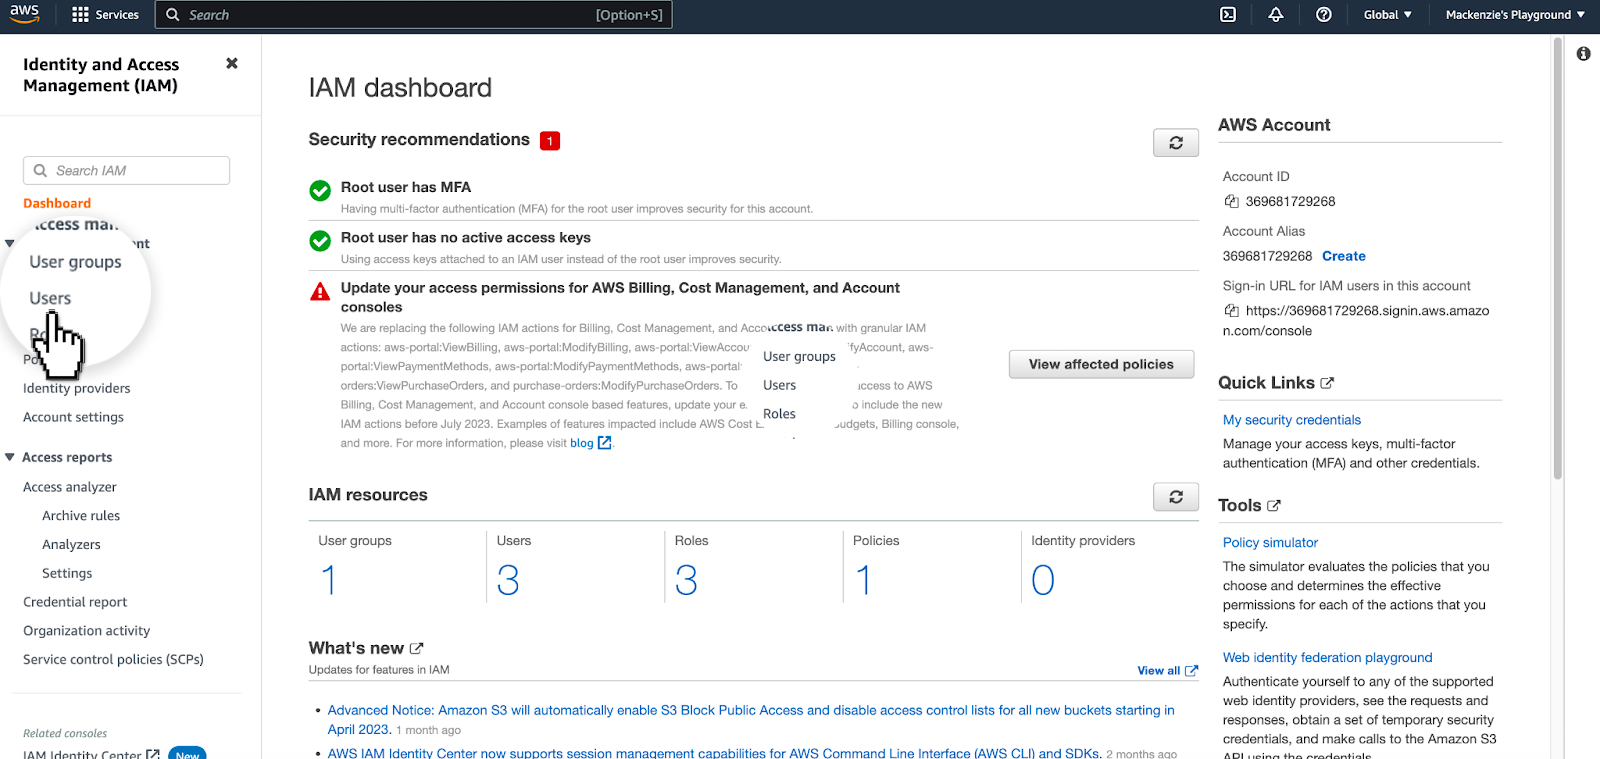
1.2 Create a new user
Visit your IAM Dashboard and visit the IAM dashboard and click on the user's tab and follow the prompts.
1.3 Set permissions
Next, we need to set the permissions of the user, it is always a best practice to specify the minimal possible permissions.
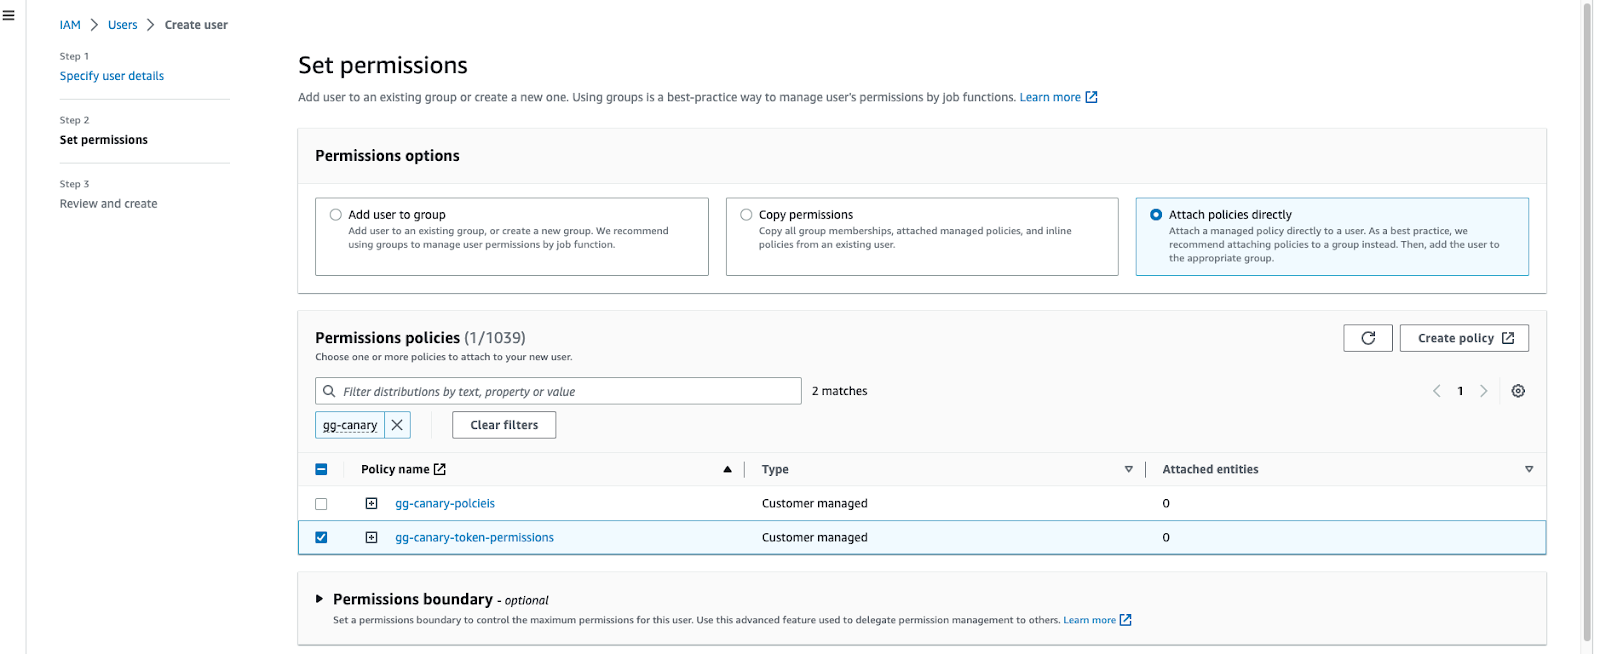
Permissions can be added to a group, this may be a good idea if you plan on creating multiple honeytoken users, or you can assign permissions directly to a user. For this tutorial, we will select "Assign policies directly" and click "Create policy".
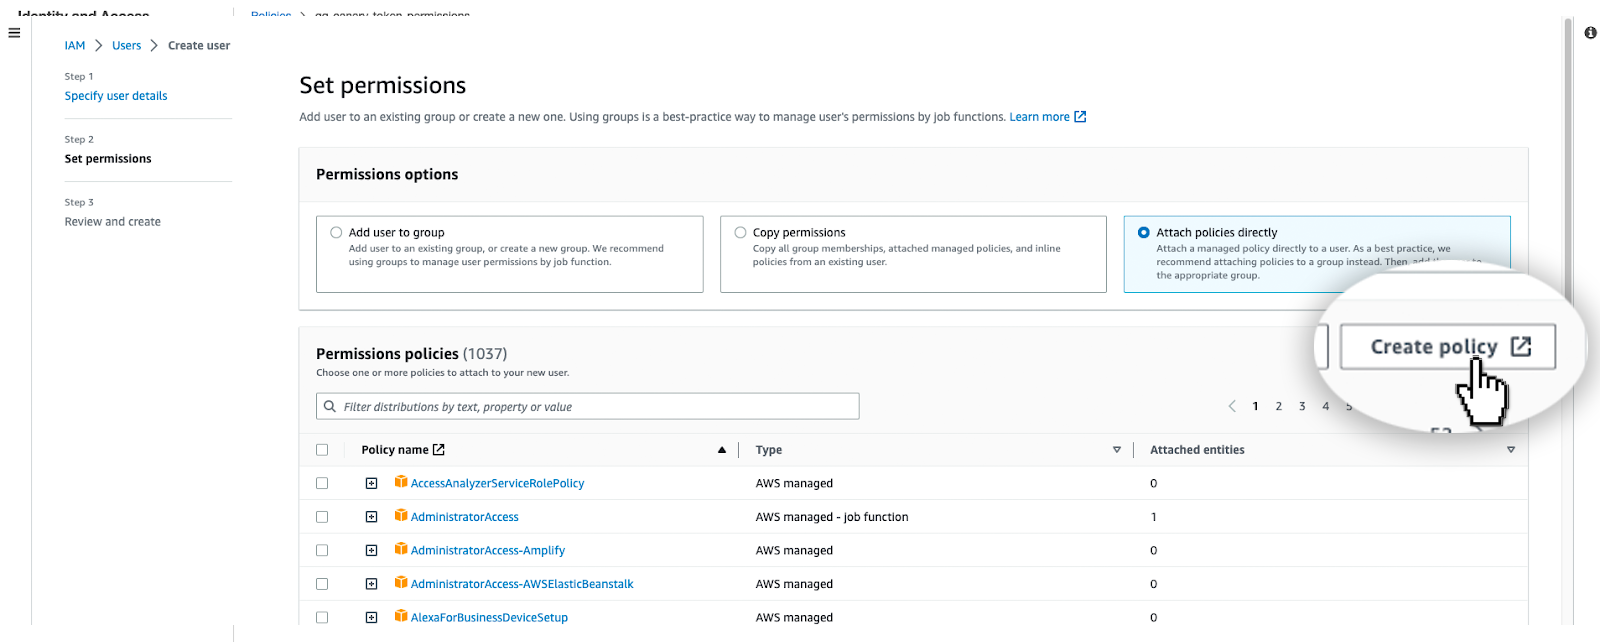
Select the JSON editor and copy in the policy code below.
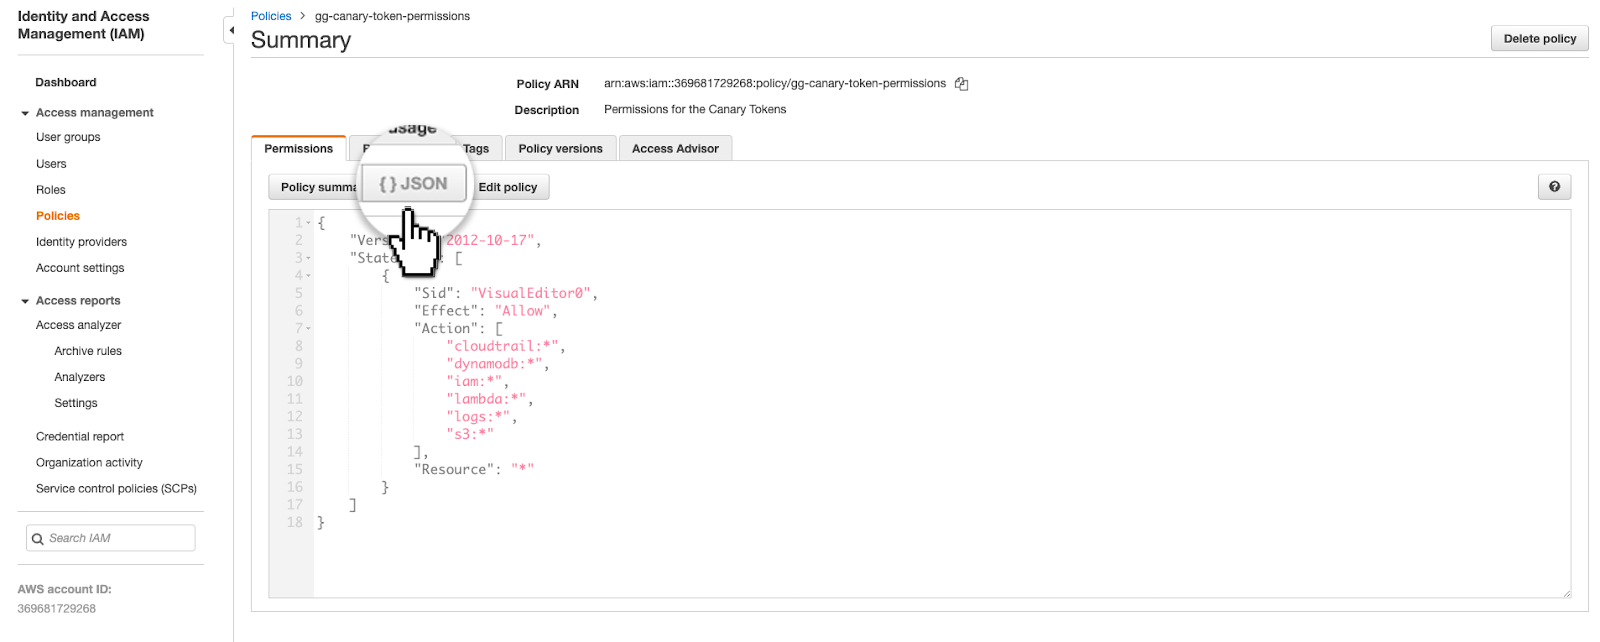
{
  "Version": "2012-10-17",
  "Statement": [
    {
      "Sid": "VisualEditor0",
      "Effect": "Allow",
      "Action": [
        "cloudtrail:*",
        "dynamodb:*",
        "iam:*",
        "lambda:*",
        "logs:*",
        "s3:*"
      ],
      "Resource": "*"
    }
  ]
}
Give your new policy a name before finally attaching it to your newly created user.
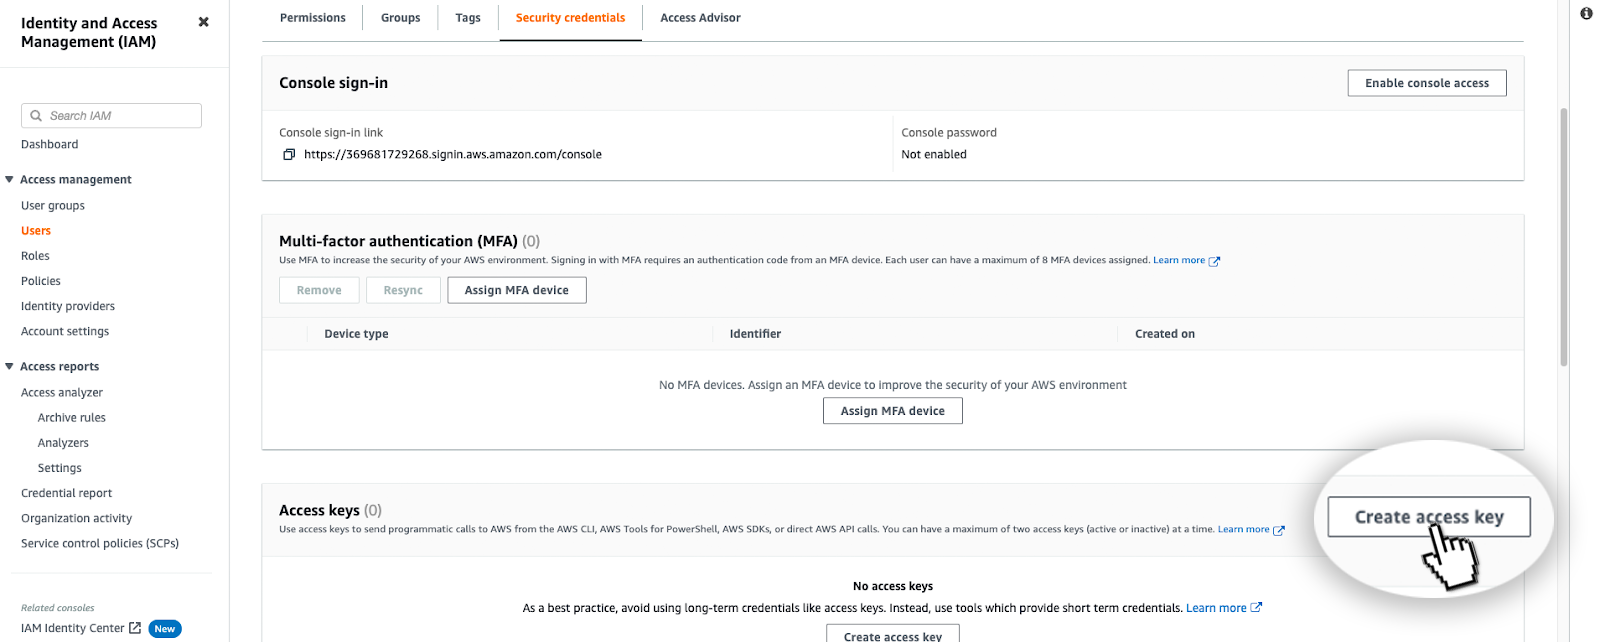
1.4 Generate an access key
Now we have created a user, we need to create an access token for them. Select the user from the console, and under the "Security credentials" tab click "Create access key", at the next option select "CLI interface".
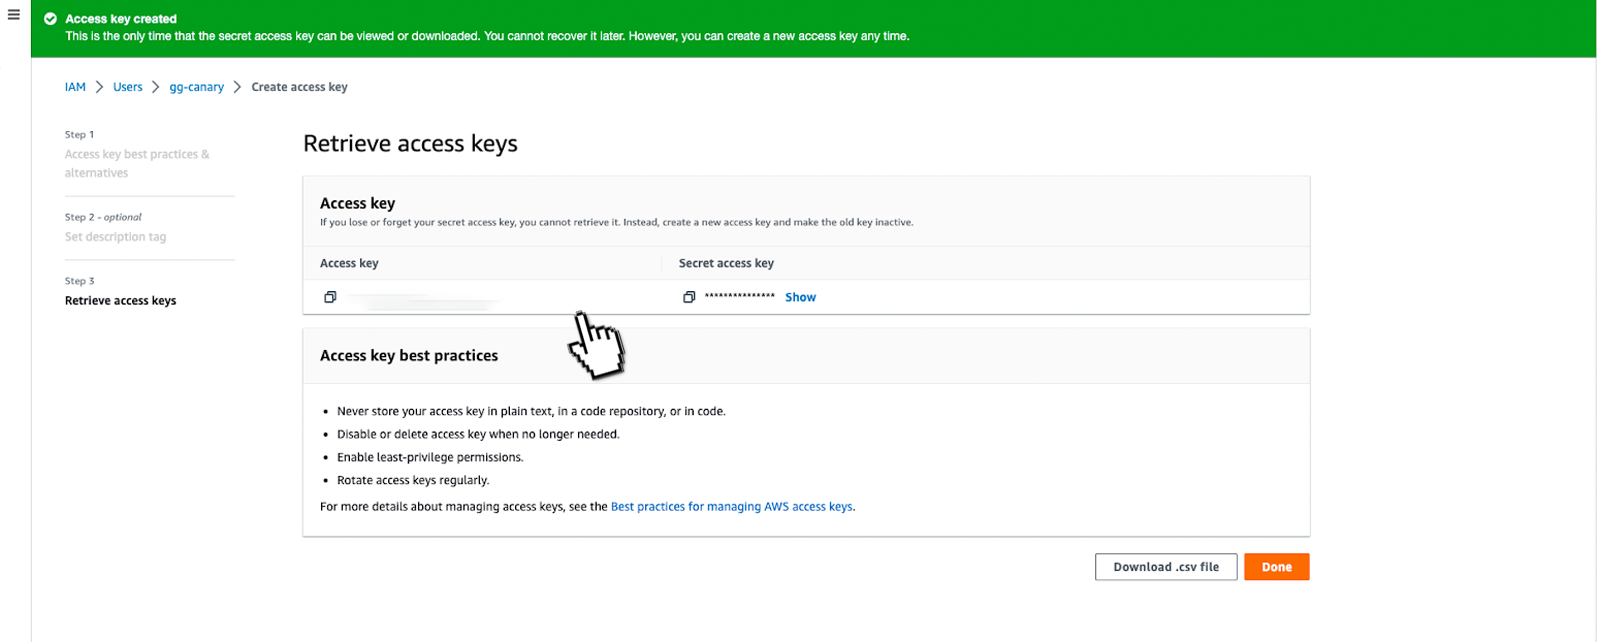
Now we have our REAL access keys. Next, we need to add them to our local environment. Be careful as these keys are sensitive so you do not want to lose track of them.
1.5 Adding access keys to the local environment
Make sure you have the AWS CLI client installed - https://docs.aws.amazon.com/cli/latest/userguide/getting-started-install.html
Using your CLI run the comman
aws configure --profile [NAME]
The command line will then prompt you to insert your access tokens and region. The region is the closest AWS data center to you, you can leave this blank if you are not sure. Leave the default output format blank. See the example below.
AWS Access Key ID [None]: ********************
AWS Secret Access Key [None]: ********************
Default region name [None]: us-east-1
Default output format [None]:
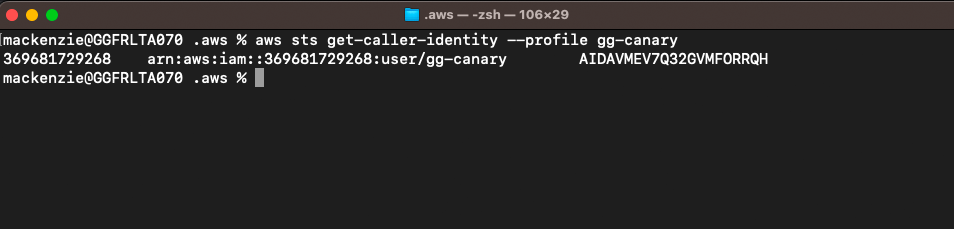
If you want to check it is all working you can use the following command
aws sts get-caller-identity --profile HONEYTOKENPROFILE
You should get the same response as below
Step 2 - Set up your Slack token
You can get alerts from your honeytokens in a number of places, the GitHub project comes with examples for Slack, SendGrid (email), SES and more. But we are going to be using Slack notifications because, in my opinion, they are the easiest to set up. For this, you will need a slack workspace with a webhook URL. If you know how to do this or want to use a different notification method you can skip this step.
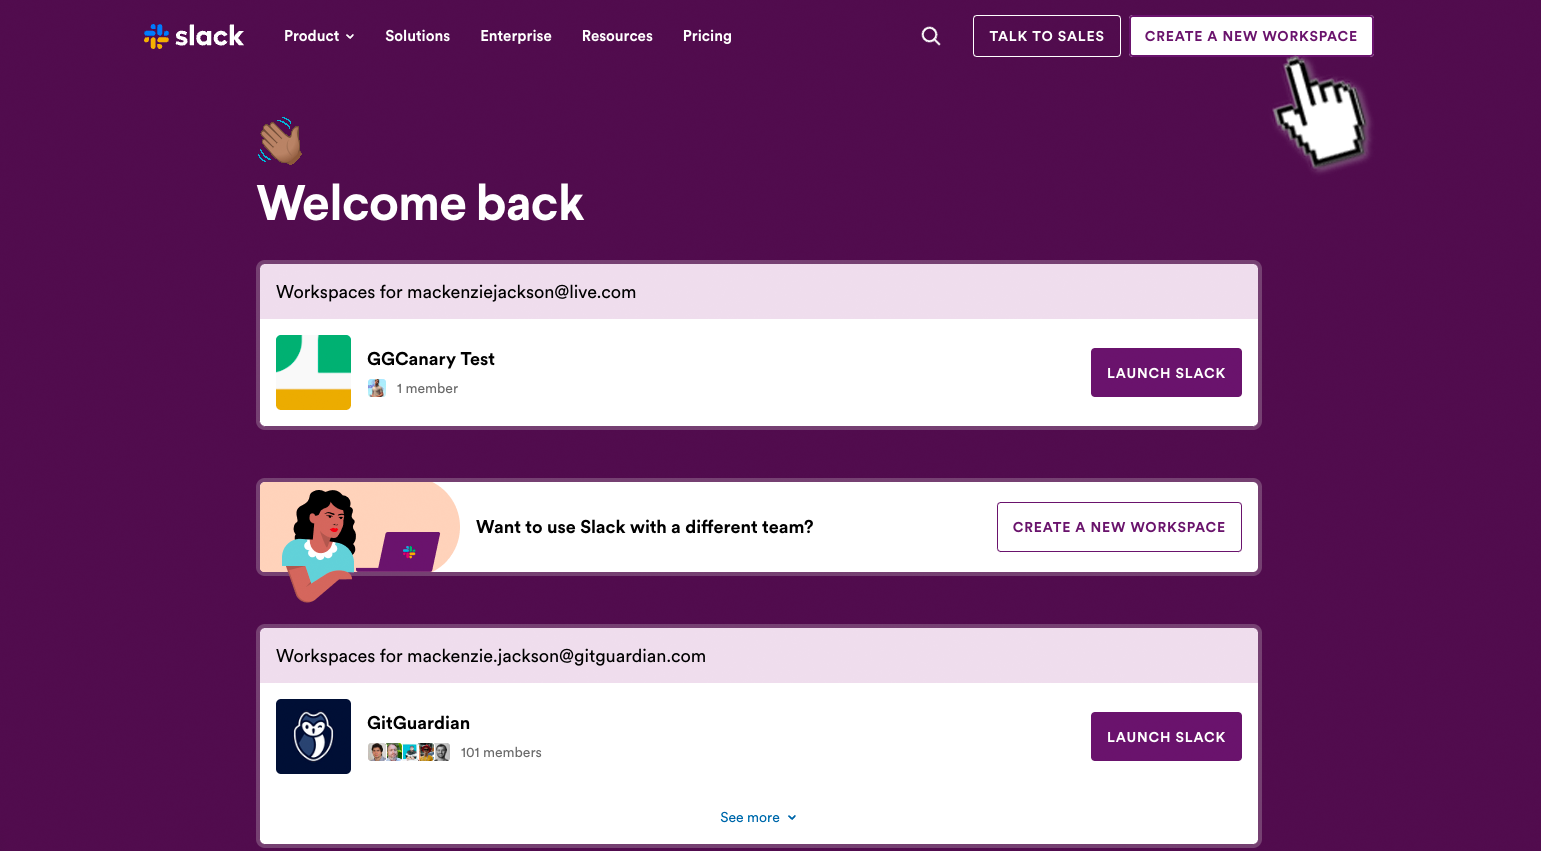
Head over to https://slack.com, create an account if you don’t have one, choose the workspace you want to use or create a brand new workspace by clicking on “Create a new workspace” in the top right corner/
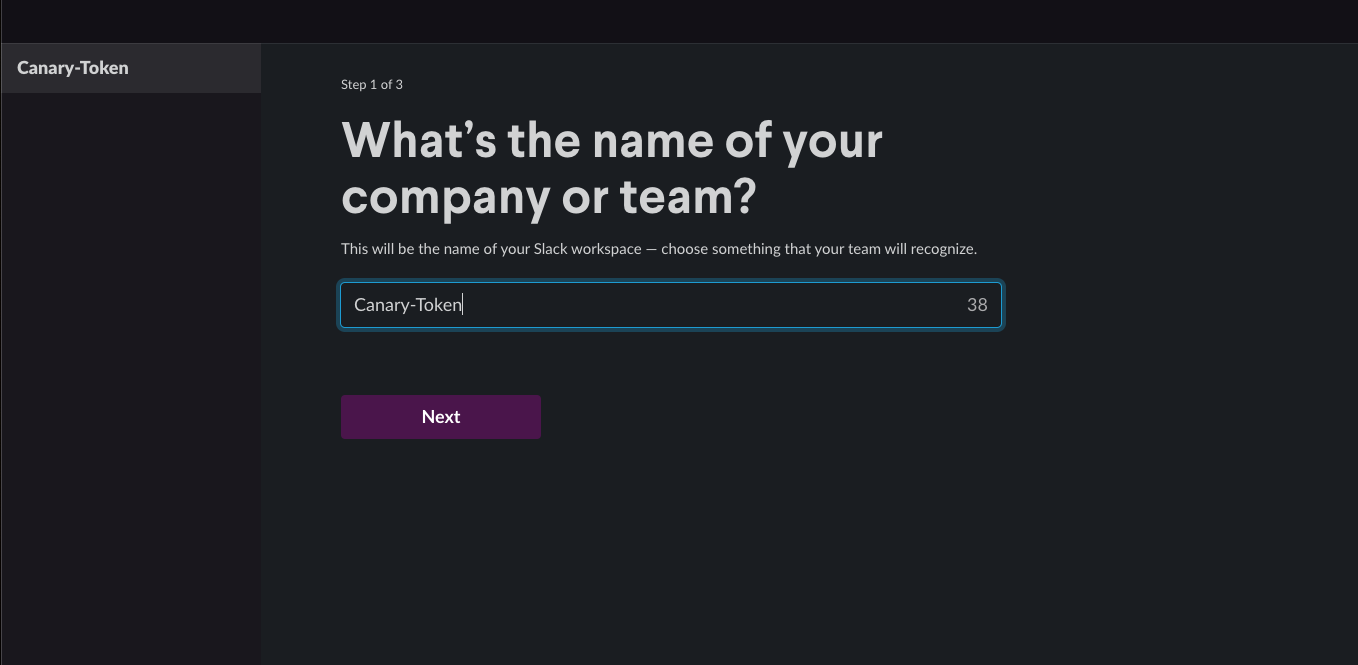
2.1 Create a workspace
Create a new workspace, for simplicity I called my Canary-Tokens.
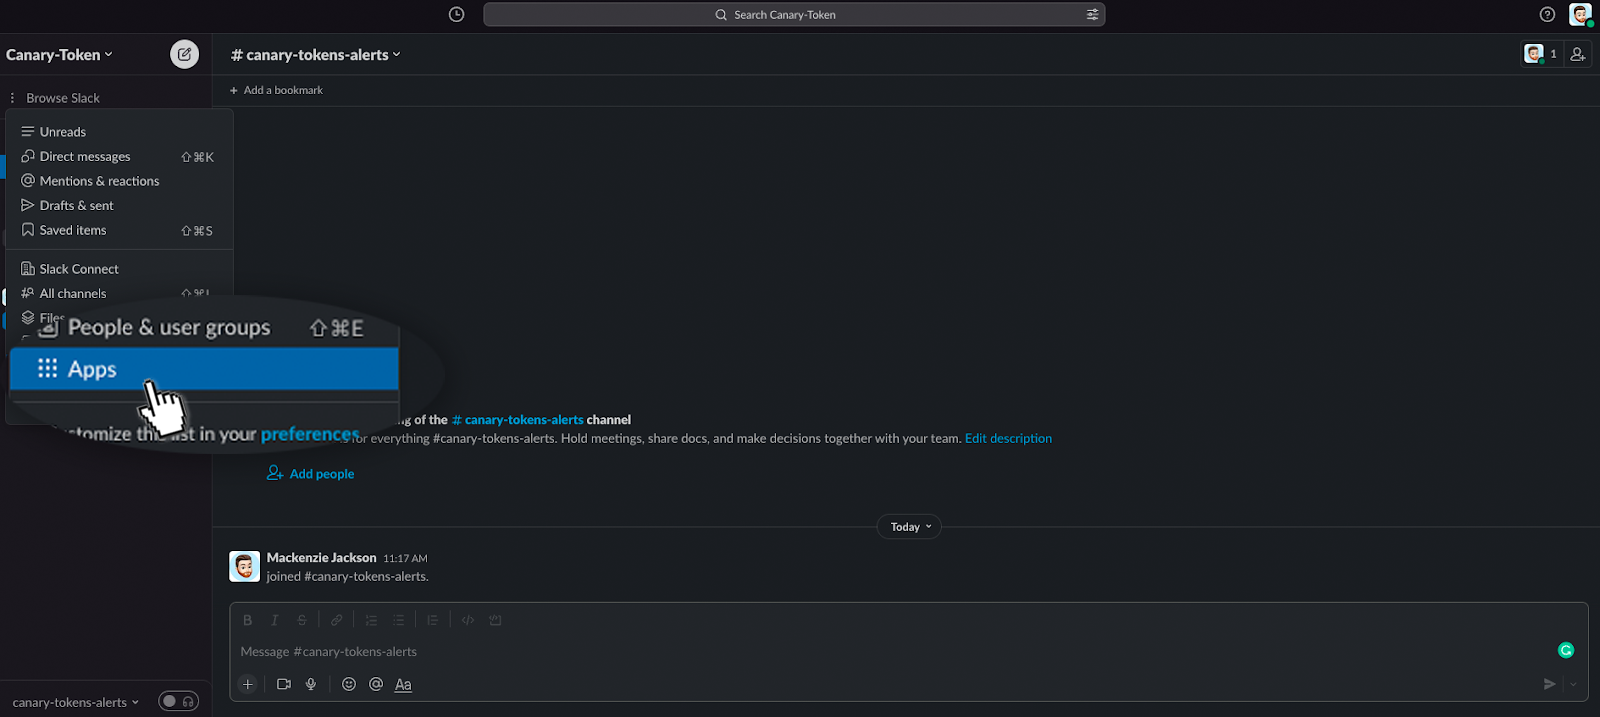
Next, create a new channel that you want the alerts to go to. Again for simplicity, I called my Canary-Token-Alerts

Once the workspace has been set up, you need to add a new app to your workspace. Next to “Browse Slack” there are three dots, click this and select “Apps” on the menu
2.2 Generate a webhook token
Search for the application, "incoming webhook", and click "add"
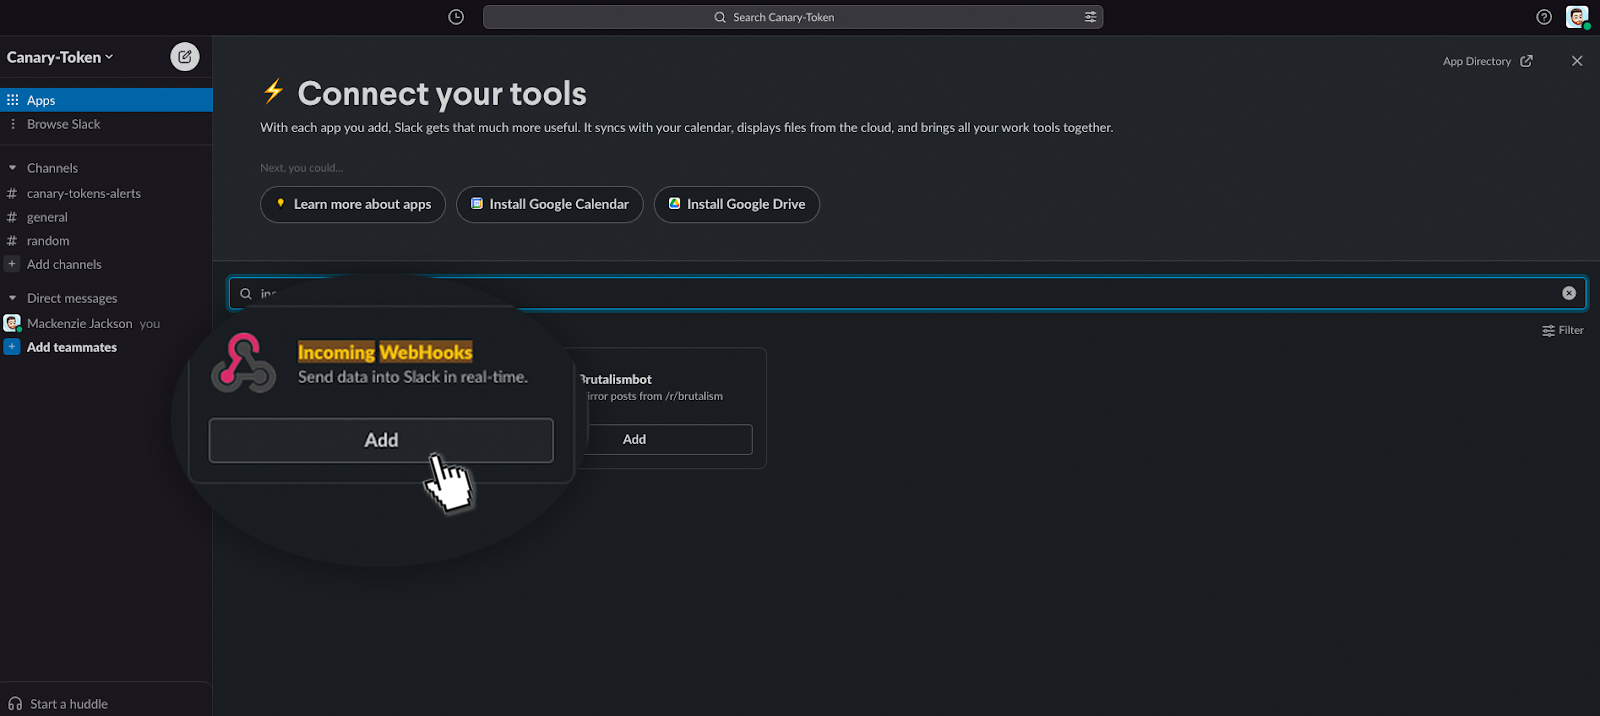
During the setup of this app, select the channel you want it to post alerts to. In our case, it is the channel we just created "Canary-Token-Alerts"
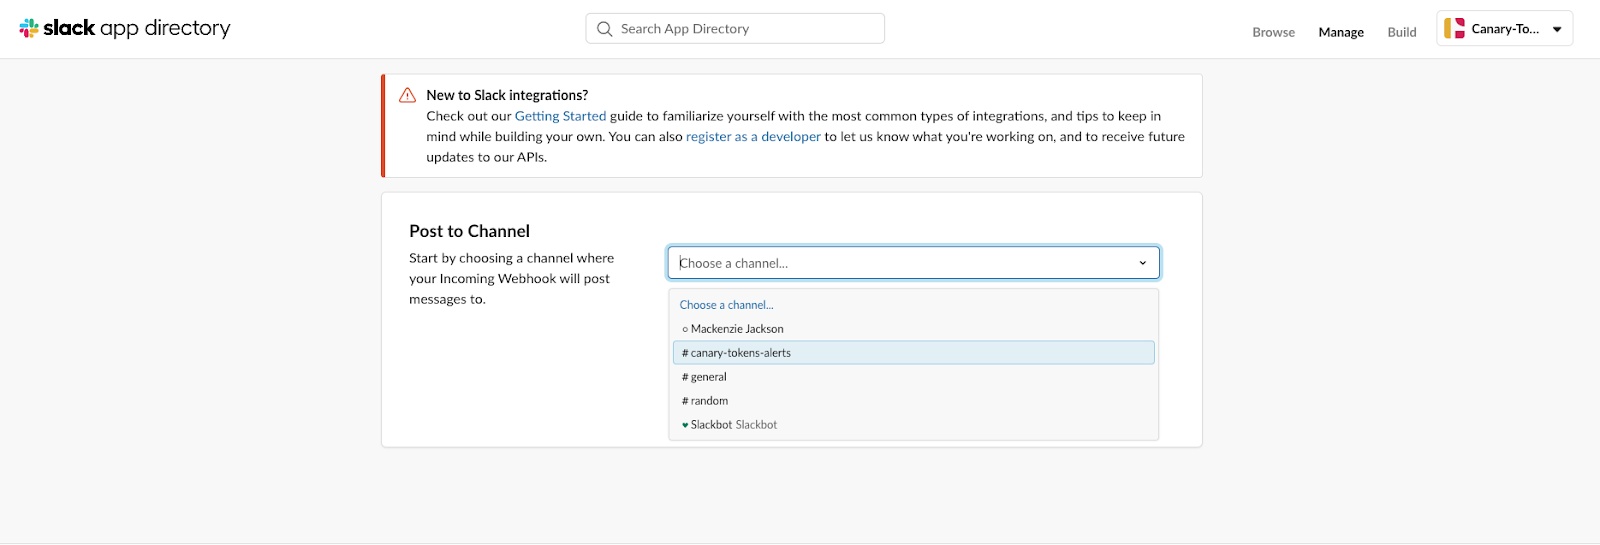
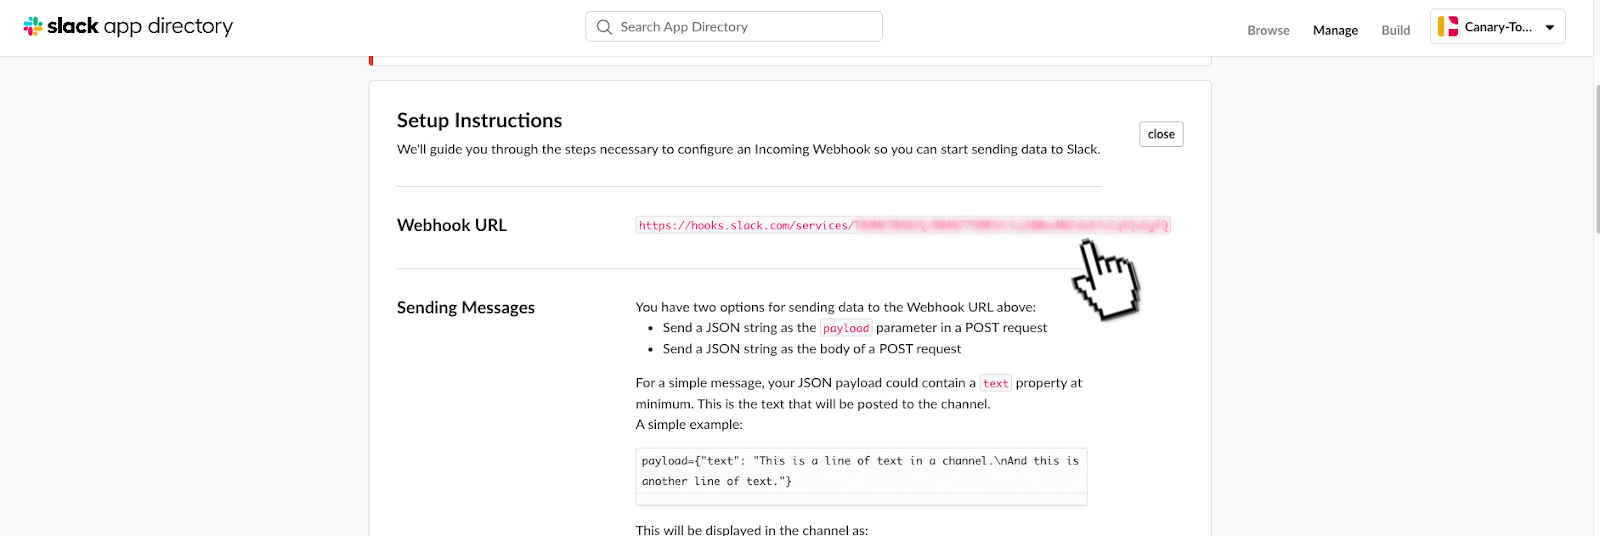
Finally, you will be able to retrieve your Slack WebHook, and store this somewhere safe as we will need it later.
Step 3 - Set up your honeytoken
Now that we have set up our AWS user and created our Slack webhook, we are ready to build our honeytoken.
We are using the GGCanary GitHub project. This is a complete open-source solution so you can create all your own tokens using a terraform backend, it can be scaled from 1 to 5,000 tokens different so suitable for personal use all the way to large enterprises.
3.1 Install Terraform locally
If you don’t already make sure you have terraform installed on your computer. Instructions https://developer.hashicorp.com/terraform/tutorials/aws-get-started/install-cli
3.2 Clone the GGCanary project to your local machine
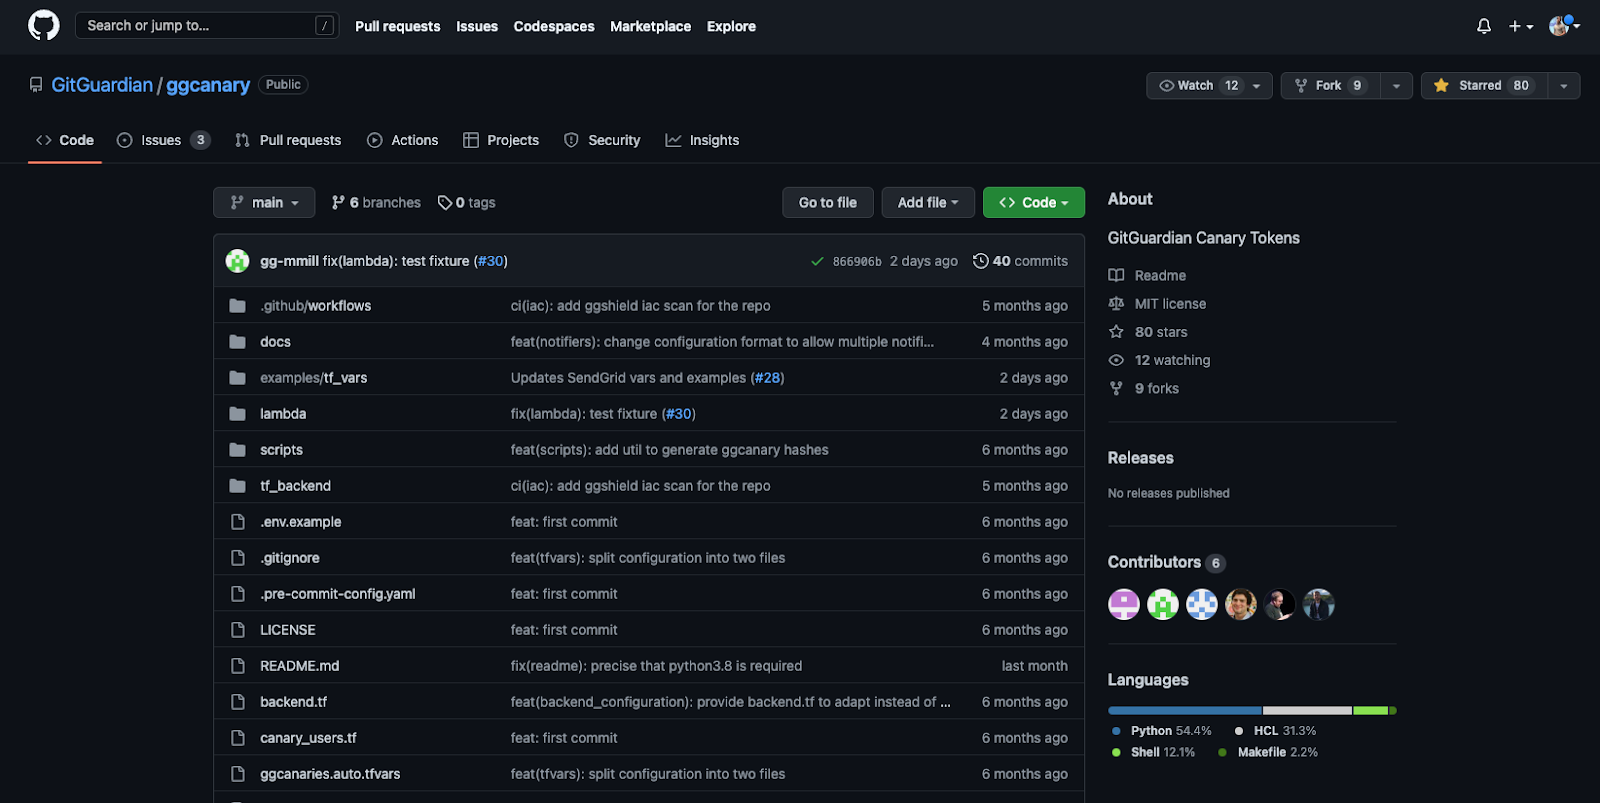
For our tokens, we are using the open-source project GGCanary https://github.com/GitGuardian/ggcanary
Clone a copy of the project into your local directory
3.3 Edit the backend.tf file
Open the project in your chosen text editor, and find the file backend.tf
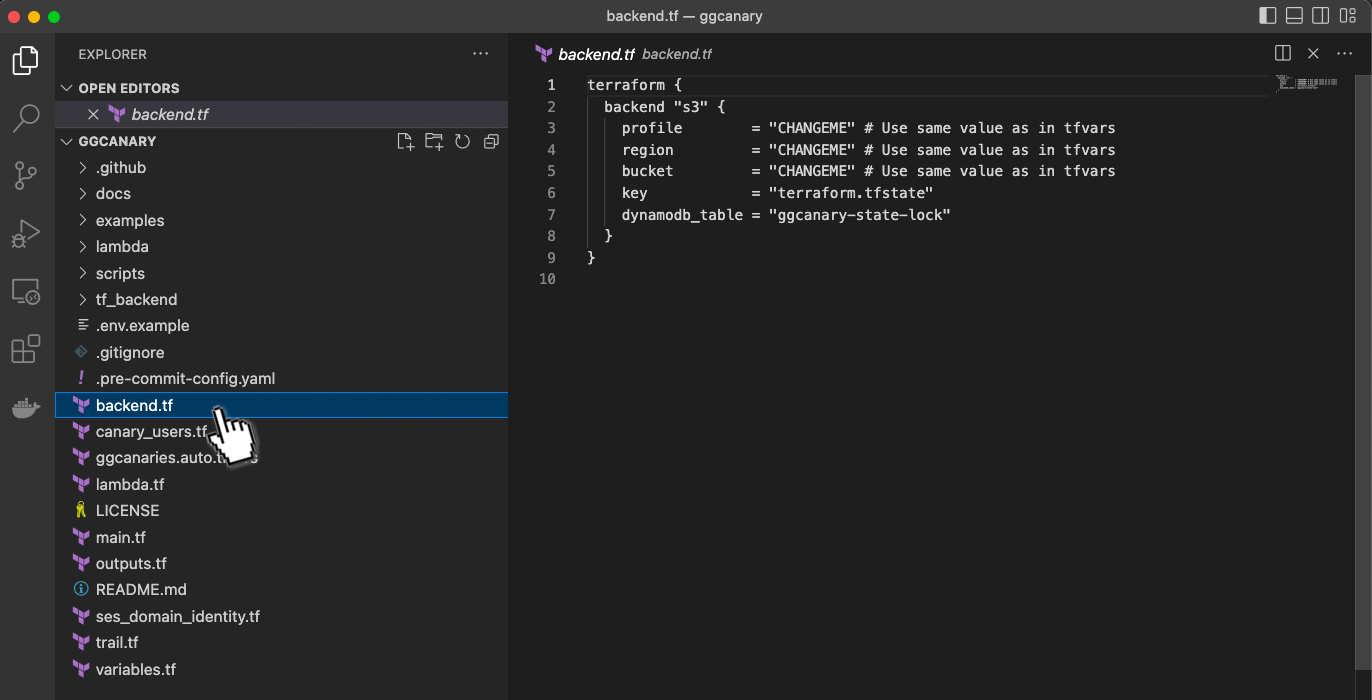
This is the file that establishes the connection between our terraform backend and our AWS account.
terraform {
  backend "s3" {
    profile        = "CHANGEME" # Use same value as in tfvars
    region         = "CHANGEME" # Use same value as in tfvars
    bucket         = "CHANGEME" # Use same value as in tfvars
    key            = "terraform.tfstate"
    dynamodb_table = "ggcanary-state-lock"
  }
}
The three fields we need to change are
- Profile - This is the AWS profile we are using (I created mine as ggcanary in the first step)
- Region - The AWS region we want to set up our cloud
- Bucket - The name of the S3 bucket we are going to create (make sure this is unique, good idea to add a date and a name to avoid any conflicts)
Below is my finished file
terraform {
backend "s3" {
profile        = "ggcanary"
region         = "us-east-2"
bucket         = "ggcanary-bucket-2023-02-01"
key            = "terraform.tfstate"
dynamodb_table = "ggcanary-state-lock"
}
}
3.4 Create a terraform.tfvars file
We now need to create a terraform.tfvars file which will connect with our Slack webhook to send us alerts.
In the main project directory, create a file named terraform.tvars and copy the code below into that file.
If you want to connect your tokens to email or other systems you can find examples of this file for connections to different services in the folder examples/tf_vars
# use same value as in backend.tf
aws_profile = "YOUR_AWS_PROFILE"

terraform_backend_s3_bucket = "CHANGEME"

aws_region  = "us-west-2"


global_prefix = "CHANGEME"  # prefix used for all ggcanary resources

Slack_notifiers = [{
  webhook = "REDACTED"  # eg: https://hooks.slack.com/services/CHANGE/ME
}]
Obviously, we need to change some data here
- aws_profile = This is the name of the profile we created in step 1.5
- terraform _backend_s3_bucket = This is the name of the s3 bucket we created in step 3.3
- aws_region = The region we selected in step 3.3
- global_prefix = This is the name used to define ALL our canary tokens
this will be used to create an S3 bucket so must be unique. A good idea to add a date and some unique name to it - webhook = this is the webhook URL we created back in step 2.2
Here is my finished code
aws_profile = "ggcanary"

terraform_backend_s3_bucket = "ggcanary-bucket-2023-02-01"

aws_region  = "us-east-2"

global_prefix = "test-honeypot-2023-02-01"

Slack_notifiers = [{
webhook = "https://hooks.slack.com/services/***************************"
}]
3.5 Create honeytoken profiles
Next, we need to actually create each of our tokens, we can create 1 or 5,000 or any number in between. I am going to create two.
Open the file ggcanaries.auto.tfvars
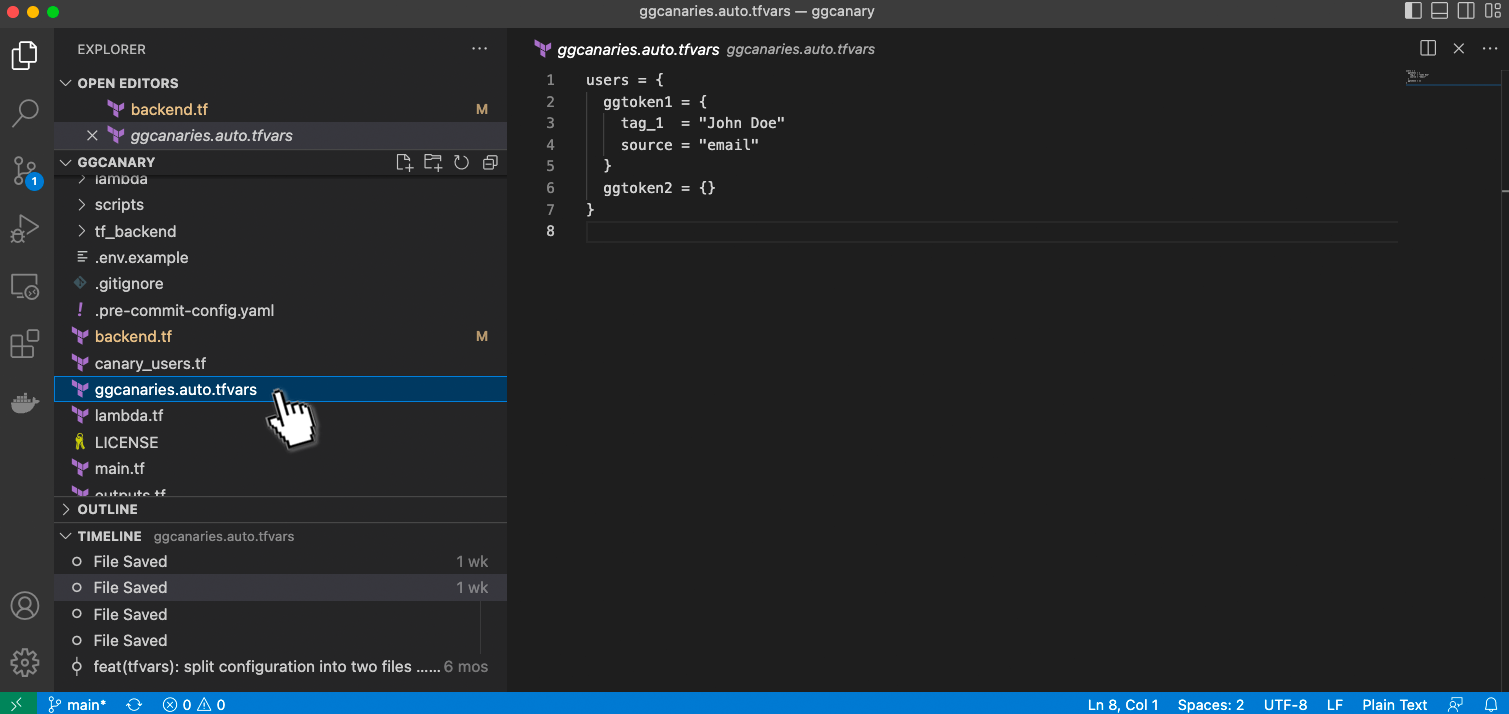
Again we need to change some variables
First the token name, the default is ggtoken1, you can name this whatever you want, it may help to give it a name that references where you will put this token. For example github-token-1. This will help you identify what token was triggered if you have multiple.
Next Tags, these are tags you can add to the token which may help you in understanding more details. You can add multiple tags for example:
tag_1=”GitHub”
tag_2=”Secret-Project”
tag_3=”env-file”
Finally, the source is where you did leave the token, in my example this is GitHub so I will name this VCS-GitHub. Here is my finished file
users = {
  github-token-1 = {
    tag_1  = "github"
    tag_2  = "secret-project"
    tag_3  = "env-file"
    source = "vcs-github"
  }
  s3-bucket-token-1 = {
    tag_1  = "s3-bucket"
    tag_2  = "secret-project"
    tag_3  = "passwords.txt"
    source = "bucket-s3-amazon"
    }
}
3.6 Check Dependencies
We are almost there! Now we just need to check we have all the dependencies available to run and prevent any annoying errors.
Run ./scripts/check_setup.sh in your terminal
If you need to install anything do that now.
3.7 Initialize and apply the Terraform backend
Next, we need to initialize our terraform
Navigate to the the tf_backend folder in your CLI tool
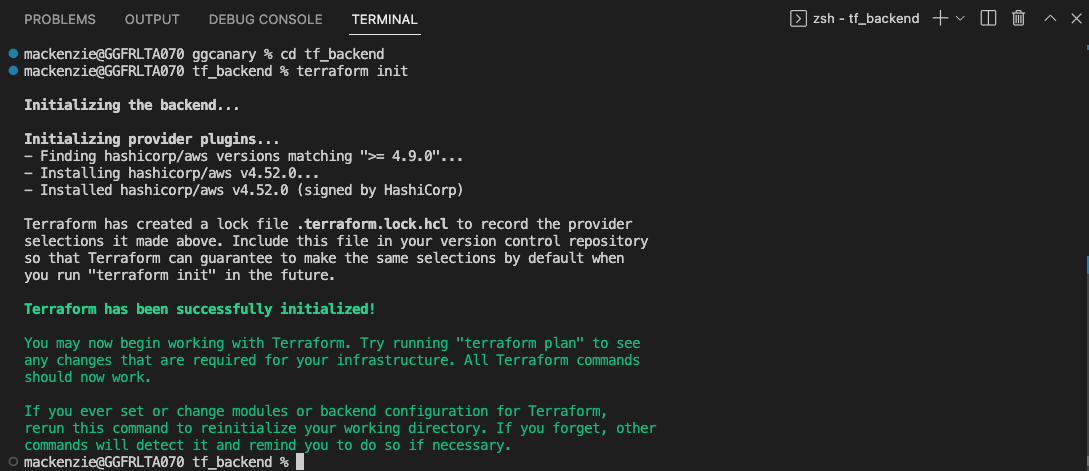
$ cd tf_backend
Run the command
$ terraform init
If that runs successfully you should get a message like the one below.
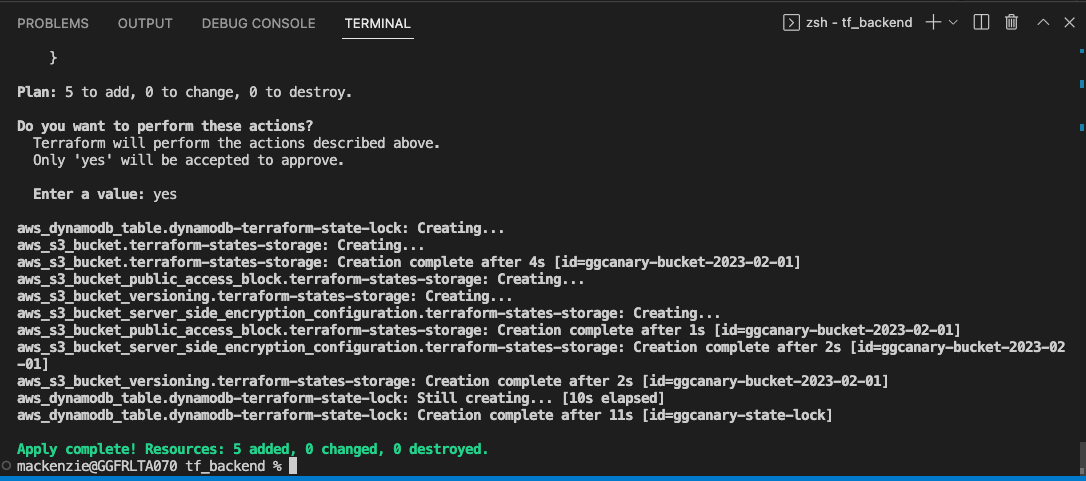
Next we need to run the command
terraform apply -var-file="../terraform.tfvars"
This applies the terraform state that we described in our terraform.tfvars file. Center yes when prompted to perform the next action, you should get the following message below.
3.8 Initialize and apply the GGCanary project
Navigate back to the main project directory
CLI command $ cd ..
Next, we want to run the same command to initialize the terraform backend again in this directory.
$ terraform init
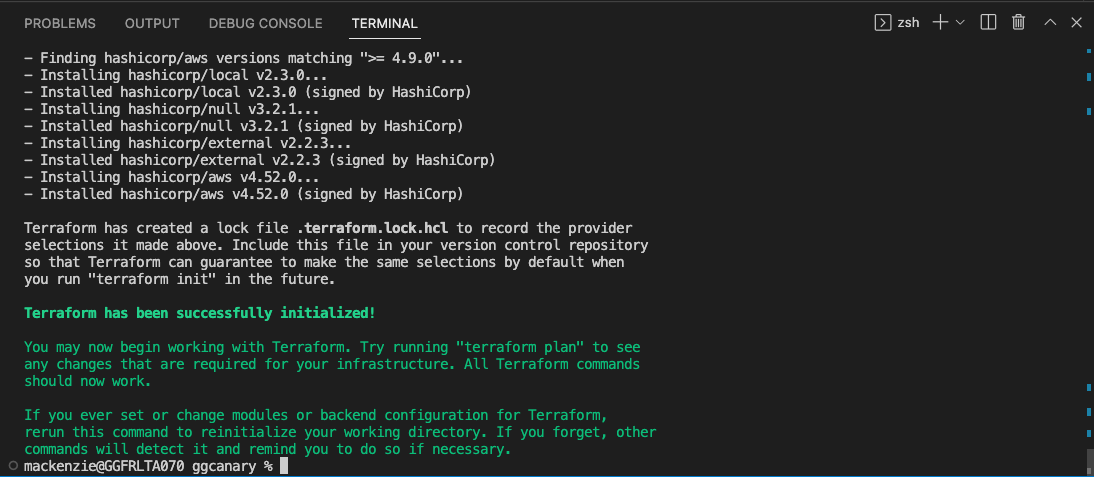
Just as we did in the backend we want to apply to terraform state in the main folder. Run the command
$ terraform apply
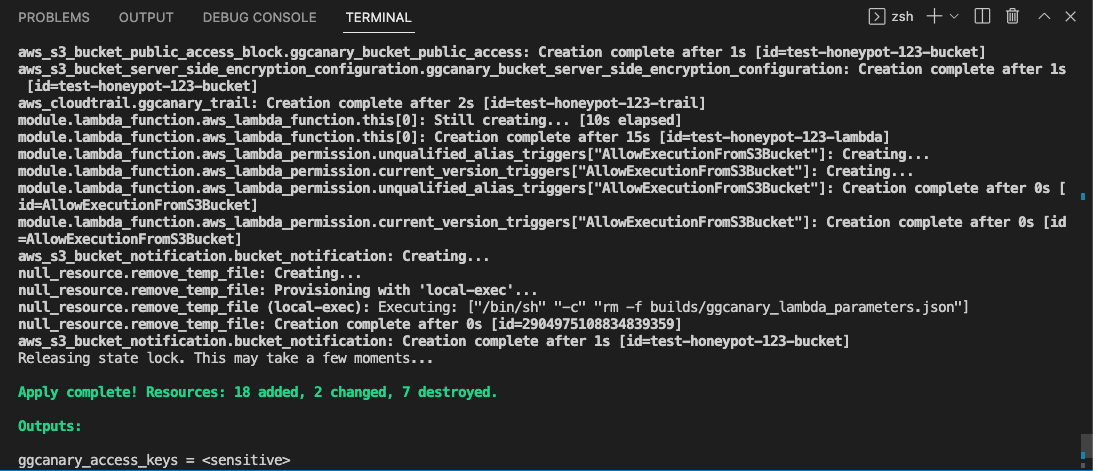
Again type yes when prompted and if that works you should see the message above.
3.9 Generate honeytokens
Final step!!! We just now need to access our honeytokens that have been created. Use the command
$ ./scripts/list_keys.sh
And you will get an output like the below:

Congrats you have just created your first honeytokens.
4. Test our honeytokens
Now we can test our keys!!
You can use these keys to make a call like you would with any other AWS credentials. We can also run the helpful command below to test one of our tokens.
$ ./scripts/ggcanary_call.sh <GGCANARY_NAME>

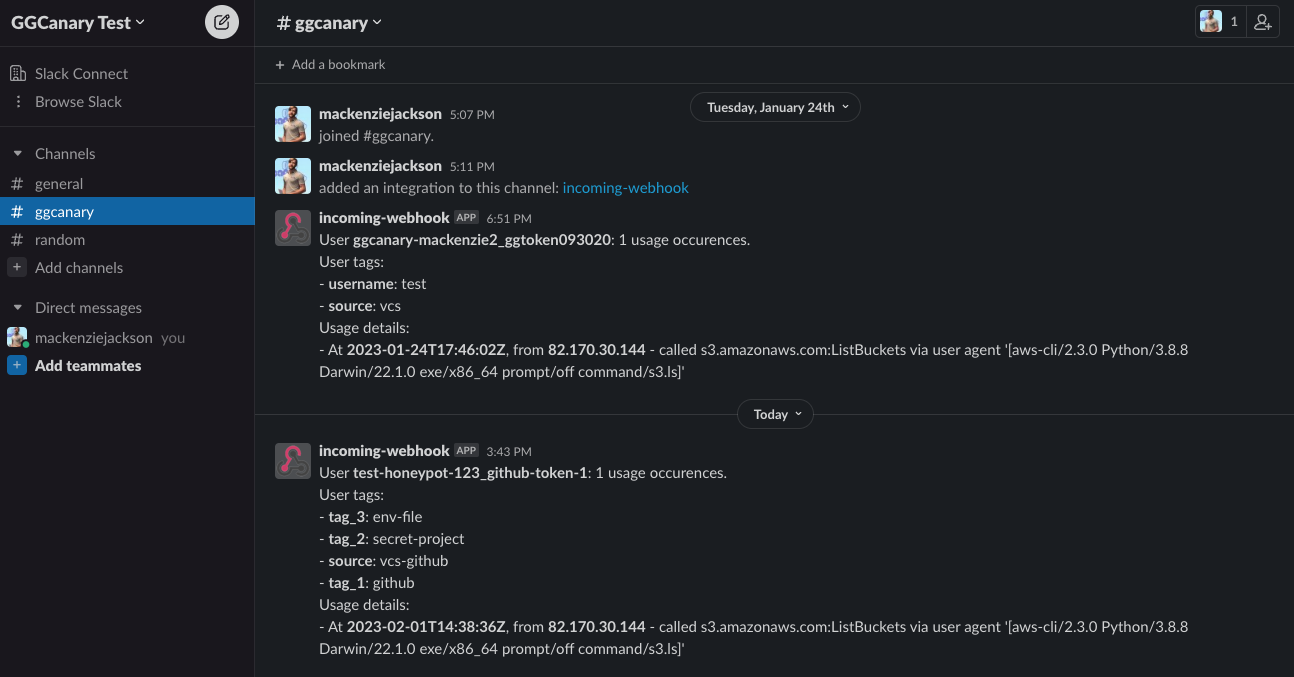
In just a few minutes, you should get a notification in your slack channel saying that someone has tripped over your honeytoken! The message in your slack channel should look like the one below.
You're all set up!!
Need more help? email me mackenzie.jackson@gitguardian.com and I will be happy to help debug them pesky error messages with you.
The GitGuardian Honeytoken module is now available!
Read the release announcement for more information, and watch the demo to see what GitGuardian Honeytoken is all about.