
In my previous articles, we discussed what Policy-as-Code is, why we need it, and how to use the Open Policy Agent (OPA) tool. If you haven't read the introduction yet, please take some time to read it first:
 Guest Expert
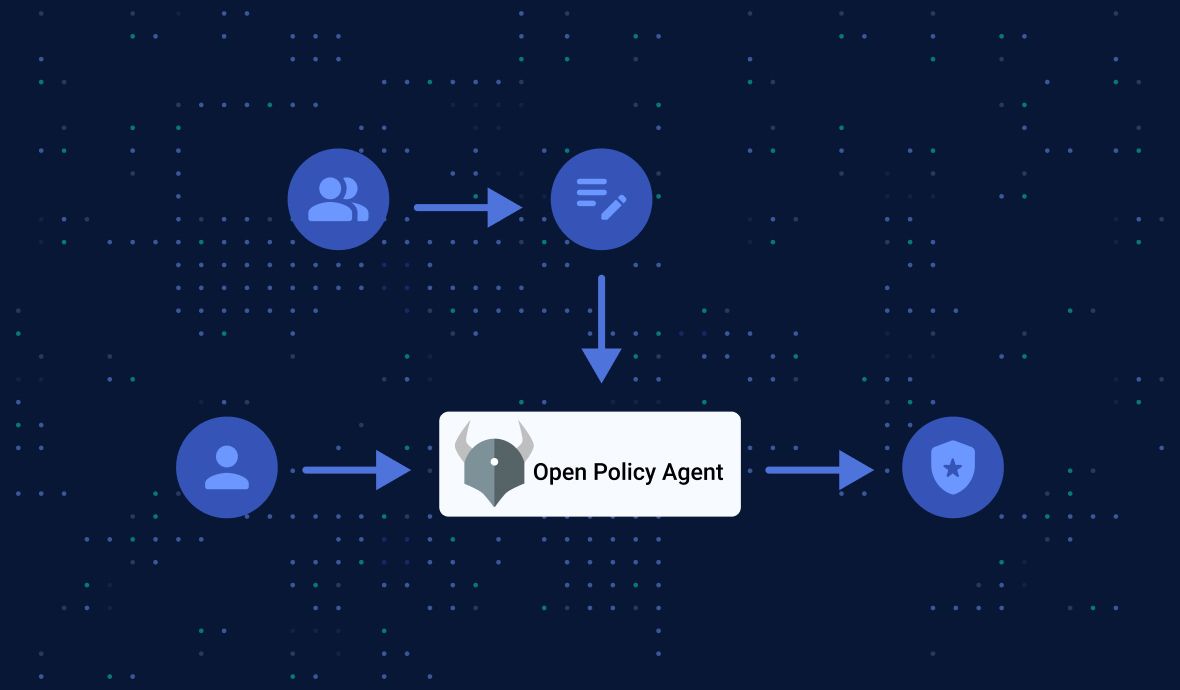
Following the OPA introduction, I started the first part of an OPA/Kubernetes integration tutorial, showing how to use OPA to enforce policies inside a Kubernetes cluster. Here's the link to the first part of the tutorial:
Guest Expert
TL;DR: we used OPA as the admission controller with the kube-mgmt sidecar enforcing ConfigMap-based policies.
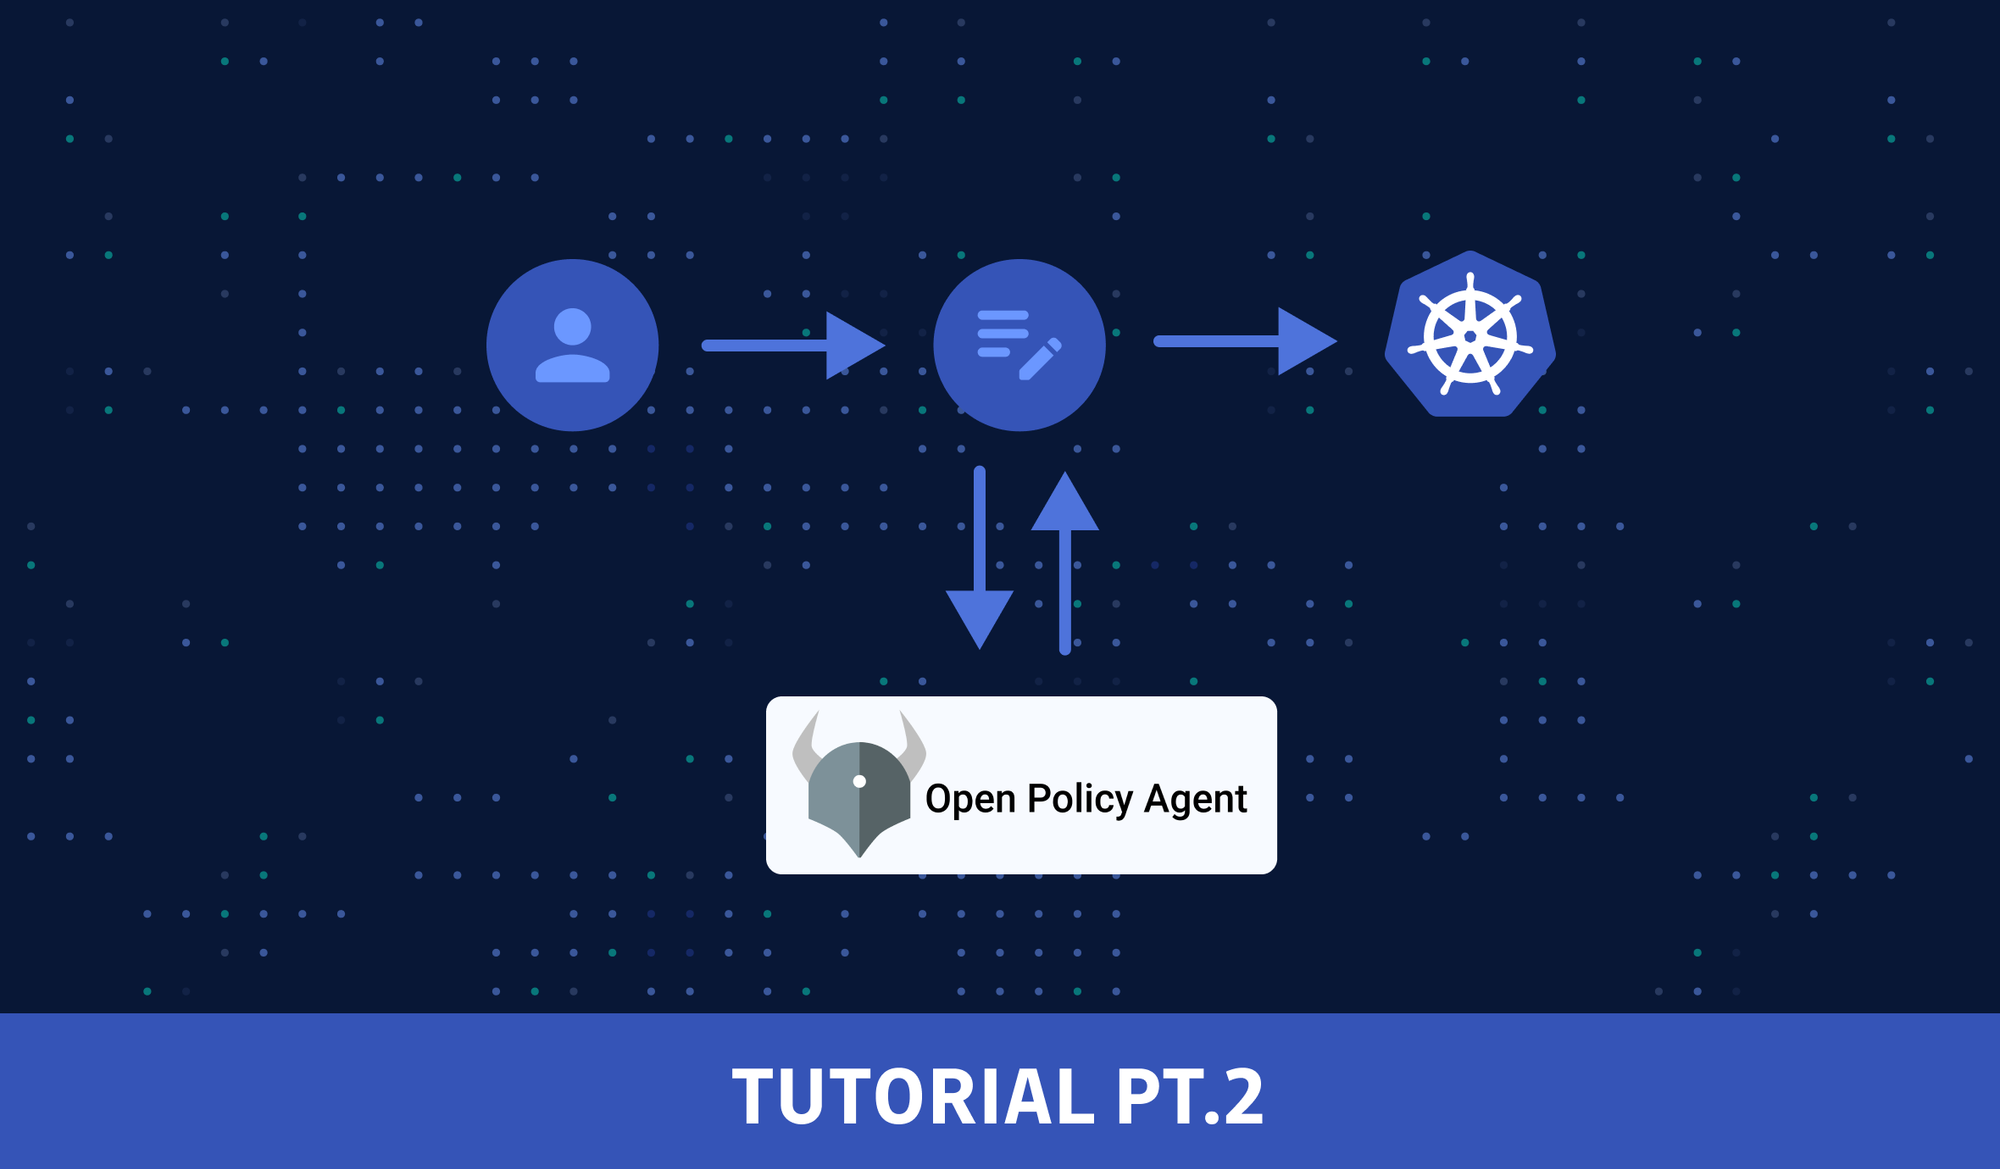
Today, we will look at another way of using OPA in a Kubernetes cluster: Gatekeeper - policy controller for Kubernetes.
Gatekeeper Introduction
The OPA Gatekeeper is a project under the OPA umbrella. Although I did not mention Gatekeeper in the previous tutorial, the technique I described there (using OPA with its sidecar kube-mgmt) is also referred to as Gatekeeper v1.0.
Today, we will get familiar with Gatekeeper v3 (hereafter: just "Gatekeeper", omitting the "v3" part), which builds a Kubernetes admission controller around the policy engine to integrate OPA and the Kubernetes API service.
CRD-Based Policies
Gatekeeper's most significant value is the ability to configure OPA policies dynamically using Gatekeeper's Custom Resource Definitions (CRDs). Custom resources are extensions of the Kubernetes API that allows for the customization of a Kubernetes installation.
CRD-based policies allow for a deeper integration of OPA within the Kubernetes ecosystem: it enables the creation of policy templates for Rego policies, the creation of policies as CRDs, and the storage of audit results on policy CRDs.
How is Gatekeeper different from OPA?
Compared to using OPA with its sidecar kube-mgmt (aka Gatekeeper v1.0), Gatekeeper introduces the following functionality:
- An extensible, parameterized policy library
- Native Kubernetes CRDs for instantiating the policy library (aka "constraints")
- Native Kubernetes CRDs for extending the policy library (aka "constraint templates")
- Native Kubernetes CRDs for mutation support
- Audit functionality
- External data support
This may sound a bit too abstract, so let's get down to the nitty-gritty of how Gatekeeper works.
Install Gatekeeper
First, let's start minikube:
minikube startFor this tutorial, we will deploy a released version of Gatekeeper in our minikube cluster with a prebuilt image:
kubectl apply -f https://raw.githubusercontent.com/open-policy-agent/gatekeeper/master/deploy/gatekeeper.yamlNote: it's also possible to deploy it with Helm:
helm repo add gatekeeper https://open-policy-agent.github.io/gatekeeper/charts
helm install gatekeeper/gatekeeper --name-template=gatekeeper --namespace gatekeeper-system --create-namespace
After the deployment, a new namespace gatekeeper-system will be created, and the following resources will be created:
tiexin@mbp ~ $ kubectl get deployments
NAME                            READY   UP-TO-DATE   AVAILABLE   AGE
gatekeeper-audit                1/1     1            1           2m20s
gatekeeper-controller-manager   3/3     3            3           2m20s

tiexin@mbp ~ $ kubectl get services
NAME                         TYPE        CLUSTER-IP      EXTERNAL-IP   PORT(S)   AGE
gatekeeper-webhook-service   ClusterIP   10.103.86.204   <none>        443/TCP   2m22s

tiexin@mbp ~ $ kubectl get crd
NAME                                                 CREATED AT
assign.mutations. Gatekeeper.sh                       2023-01-01T08:59:54Z
assignmetadata.mutations.gatekeeper.sh               2023-01-01T08:59:54Z
configs.config.gatekeeper.sh                         2023-01-01T08:59:55Z
constraintpodstatuses.status.gatekeeper.sh           2023-01-01T08:59:55Z
constrainttemplatepodstatuses.status.gatekeeper.sh   2023-01-01T08:59:55Z
constrainttemplates.templates.gatekeeper.sh          2023-01-01T08:59:55Z
expansiontemplate.expansion. Gatekeeper.sh            2023-01-01T08:59:55Z
modifyset.mutations. Gatekeeper.sh                    2023-01-01T08:59:55Z
mutatorpodstatuses.status. Gatekeeper.sh              2023-01-01T08:59:55Z
providers.externaldata. Gatekeeper.sh                 2023-01-01T08:59:55Z
Gatekeeper Concepts: Constraints and Constraint Templates
Before moving on to the actual tutorial, let's have a look at two essential concepts of Gatekeeper with concrete examples: constraints and constraint templates.
In short, constraints use constraint templates to inform Gatekeeper what policies to be enforced and how.
I know this sounds a bit confusing, so let's have a look at an example:
The ConstraintTemplate example below contains Rego code which checks if a resource object has a label named "team":
File constraint_template.yaml:
apiVersion: templates.gatekeeper.sh/v1
kind: ConstraintTemplate
metadata:
  name: teamlabel
spec:
  crd:
    spec:
      names:
        kind: TeamLabel
  targets:
    - target: admission.k8s.gatekeeper.sh
      rego: |
        package teamlabel

        labels := input.review.object.metadata.labels

        has_team {
          labels.team
        }

        violation[{"msg": msg}] {
          not has_team
          msg := "You should have the team label"
        }
The ConstraintTemplate object above doesn't trigger policy enforcement on its own. However, it creates a new custom resource in our cluster of the type TeamLabel. If we want to enforce our TeamLabel policy, we create a constraint by using that new resource type:
File constraint.yaml:
apiVersion: constraints.gatekeeper.sh/v1beta1
kind: TeamLabel
metadata:
  name: teampods
spec:
  match:
    kinds:
    - apiGroups: [""]
      kinds: ["Pod"]
    excludedNamespaces:
    - kube-system
  parameters: {}
This constraint uses the TeamLabel constraint template above to let Gatekeeper enforce our TeamLabel policy for all pods not in the kube-system namespace.
The Gatekeeper service also continually and constantly monitors and audits existing cluster objects to detect policy violations.
How to Use Gatekeeper in Kubernetes
Create files constraint_template.yaml and constraint.yaml with the content in the previous section, and apply them:
kubectl apply -f constraint_template.yaml
kubectl apply -f constraint.yaml
Now let's deploy a simple pod into the default namespace as a test:
kubectl apply -n default -f https://k8s.io/examples/pods/simple-pod.yamlWe will get the following error:
Error from server (Forbidden): error when creating "https://k8s.io/examples/pods/simple-pod.yaml": admission webhook "validation.gatekeeper.sh" denied the request: [teampods] You should have the team labelLet's get in compliance and add a "team" label to the simple pod:
File simple-pod.yaml:
apiVersion: v1
kind: Pod
metadata:
  name: nginx
  labels:
    team: test
spec:
  containers:
  - name: nginx
    image: nginx:1.14.2
    ports:
    - containerPort: 80
Create this file with the above content and apply it:
kubectl apply -n default -f simple-pod.yamlWe should encounter no error, and the pod will be created successfully:
tiexin@mbp ~ $ kubectl get pods -n default
NAME    READY   STATUS    RESTARTS   AGE
nginx   1/1     Running   0          34s
How to Scale OPA?
So far, we have demonstrated a simple use case of OPA/Kubernetes integration with Gatekeeper.
However, the policies can be much more complicated in real-world scenarios, and you will have multiple policies. How does OPA work at a much larger scale?
Let's talk about three crucial topics on this subject matter:
- repository structure
- testing policies
- other tools
Repository Structure
A well-structured directory helps to make your code more manageable:
.
└── team-label-policy
    ├── README.md
    ├── constraint.yaml
    ├── constraint_template.yaml
    ├── simple-pod.yaml
    ├── src.rego
    └── src_test.rego
In the example above, we put everything that belongs to the team label policy under the folder "team-label-policy", which contains the core files:
src.rego: the OPA Rego codesrc_test.rego: the corresponding test cases for our policy Regoconstraint_template.yaml: ConstraintTemplate for our policy. Note that this file also contains the code fromsrc.regoinline, but the OPA tool cannot parse the manifest YAML, so we need to copy the Rego code to a separate file for testing. If you use this layout for your policies, you must remember to synchronize code changes between the two files.constraint.yaml: the manifest for a test of the constraint templatesimple-pod.yaml: a minimalist pod definition to demonstrate the constraint in practiceREADME.md
How to Test a Rego Policy
For essential use cases and complicated policies, we should also write tests for those policies.
When writing test coverage for your Gatekeeper policy, you want to consider the following points carefully:
- What Kubernetes API resource fields do my policy query? Are any of them optional? Can they appear more than once in a spec?
- How many positive test cases do I need to write to ensure my policy will do what I expect?
- How many negative test cases do I need to write to ensure my policy will not produce results I do not want?
Policy tests are also written in Rego.
By convention, they live in the same directory as the source file. In our case, we can copy the policy from the constraint_template.yaml file into src.rego and write tests in the file src_test.rego.
Note the matching package name at the top of each file:
File src.rego:
package teamlabel

# copied from file constraint_template.yaml

labels := input.review.object.metadata.labels

has_team {
  labels.team
}

violation[{"msg": msg}] {
  not has_team
  msg := "You should have the team label"
}
File src_test.rego:
package teamlabel
import future.keywords

test_pod_allowed if {
  results := violation with input as {"review": {"object": {"metadata": {"labels": { "team": "test" }}}}}
  count(results) == 0
}

test_pod_denied if {
  results := violation with input as {"review": {"object": {"metadata": {"labels": {}}}}}
  count(results) > 0
}
Test method names should always begin with the prefix test_.
We can use the OPA command-line tool to evaluate our tests:
tiexin@mbp ~ $ opa test --explain fails src.rego src_test.rego
src_test.rego:
data.teamlabel.test_pod_allowed: PASS (7.852791ms)
data.teamlabel.test_pod_denied: PASS (301.75µs)
--------------------------------------------------------------------------------
PASS: 2/2
If you haven't installed the OPA CLI tool, follow the instructions here.
Helpful Tools
There are some exciting tools (for example, this one) available that can help integrate OPA with your systems and provide ways of writing policies and deploying them across your infrastructure, as well as tools for unit testing, monitoring policy usage, and more. But, even without them, OPA can be managed at a larger scale.
Going from Here
In this 2-part OPA tutorial mini-series, we did two demos on integrating OPA with Kubernetes. If you are interested in OPA and OPA/Kubernetes integration, here is some more reading material for you:
If you like the OPA introduction and the tutorials, please like, comment, and subscribe. See you in the next one!
This article is a guest post. Views and opinions expressed in this publication are solely those of the author and do not reflect the official policy, position, or views of GitGuardian, The content is provided for informational purposes, GitGuardian assumes no responsibility for any errors, omissions, or outcomes resulting from the use of this information. Should you have any enquiry with regard to the content, please contact the author directly.